Showing posts with label sausage. Show all posts

Sunday, August 20, 2023

Zucchini Pasta

This zucchini pasta recipe is loosely based on one found in Kathleen Flinn's The Kitchen Counter Cooking School. We got the book as a gift about a decade ago, and reading it back then had a major influence on my cooking. For one thing, it got me to switch to the "pinch" knife grip used by professional chefs. The book details Flinn's experience teaching cooking classes to a group of novice cooks. While I don't agree with everything in it, it's a good read for anyone who wants to get more creative in the kitchen. Rereading the book during the pandemic reminded me of an intriguing pasta dish that Flinn used to teach her students basic knife skills.

The basic concept is simple: cook zucchini for a long time, until it breaks down and becomes part of the sauce for the pasta. In principle, it's not far from my own crab pasta. Flinn's recipe uses a huge amount of zucchini relative to the pasta, which I've rebalanced. I also add some garlic, onions, and sausage to make it a complete, self-contained meal. The sausage I used for this dish are from Costco and are a staple in our house. They are fully cooked and easily frozen and reheated in a convection oven to add some meat to a meal with little effort. You can, of course, use any sausage you like, or none at all. Some fresh basil from the garden completes the dish, but can be left out if unavailable.

Sunday, August 21, 2022

Upgrade: Portuguese Chicken (葡國雞)

Portuguese chicken (translating literally to pou gwok gai in Cantonese, pu guo ji in Mandarin, and galinha à portuguesa in Portuguese) is a dish that fascinates me endlessly. It's a fusion of east and west that could only have been born in its own specific context. Back when I wrote about it in 2012, I noted that little was written about it (at least in English) on the internet. There's quite a bit more now, but it's still not a widely known dish. It also doesn't show up in any of my Chinese cookbooks. I still don't know if my version is authentic, but I can tell you it tastes good and improves upon my previous one in many ways. One of those can be seen in the photo, where the deeply colored sauce appeals a lot more than the bright yellow of my previous attempt.

Despite the name, Portuguese chicken does not originate in Portugal, but rather the bustling southern Chinese city of Macau, which was an outpost of the Portuguese empire for over 450 years. The food of Macau blends Cantonese cuisine with influences brought from around the world by Portuguese traders. As such, Portuguese chicken features some ingredients not commonly seen in other Chinese dishes. Most recipes feature five main components: chicken, potatoes, onion, coconut milk, and turmeric but diverge from there. Other possible additions include sausage, olives, and bell peppers. Some are simmered on the stovetop, while others are baked as a casserole. In some versions, the casserole includes rice on the bottom or desiccated coconut sprinkled on top. I decided to keep it simple and stay on the stove in a wok. This also makes it easy to thicken and adjust the sauce at the end.

After I wrote my original post, I found out I was not the only member of my family to be a fan of Portuguese chicken. As it turns out, my grandma went to school in Macau for a time and enjoyed it regularly. She informed me back then that my version was incorrect because the chicken and potatoes should be cut into smaller pieces. Cutting smaller does make more sense to eat with chopsticks and also helps everything cook more quickly. Another change I made was to crank up the seasoning and build a more complex flavor in the sauce. I also chose to marinate the chicken this time. Sources vary greatly on what should go in the marinade, but I went with a classic Chinese style. I included just a little dark soy sauce for color - don't overdo it. Some recipes use more spices in the marinade, while I put the into the sauce instead. I did not have any Portuguese chouriço (in fact, I have no idea where one can buy such a thing) but did have some Spanish chorizo on hand that worked well here. Some Cantonese lap cheong would also probably do just fine. The versions I recall from Shanghai did not include any sausage, and that works as well.

Sunday, December 13, 2020

Savory Kolaches

Going to the farmer's market every Saturday was one of our favorite things to do in Bloomington. While we certainly enjoyed the produce on offer, we really went for the breakfast options. Whether that was crepes and croques at Le Petit Café, Brown County Coffee, or Aahaa Chai, there was always something tasty to be found. Our all-time favorite, though, was Sweet Claire Bakery, which always had a line around the corner. It is here we were introduced to kolaches: sweet buns with lots of different filling options. More than two years after we left town, we have greatly missed them... until now. Ariel got in touch with the proprietor and got the dough recipe, and I went to work dreaming up some fillings. We were blown away with how good the results were, and I'm excited to share them.

Kolaches originated in Central Europe, like so many other delicious things, made their way to the United States with the immigrants who loved them. Czech communities have made them especially popular in Texas. From what I can tell, the original Czech version has strictly sweet fillings, but creative American cooks have moved them in a savory direction. We came up with two fillings, loosely inspired by what we remembered from the kolaches we had in Bloomington. Both types were delicious.

The first is a braised chicken I've been calling "adobo chicken," not to be confused with the grilled version I posted last summer. This was fairly similar to my pulled pork recipe, but uses chicken thighs and tomatoes. It's a little spicy on its own, but this balances out inside the bun with. The filling is rounded out with half a hard-boiled egg. The chicken turned out very well and would also be great in a taco. Because it is a saucy filling, there were some structural problems on the bottoms, so it's important to make sure they are thick enough to hold up. It wasn't too bad, but it's something to watch out for. The second emulates a classic breakfast sandwich with sausage, egg, and cheese. The main question here was how to do the eggs. I decided to make French-style rolled omelettes and put half an omelette in each kolache. This worked out very well because they hold up well while not drying out. These kolaches turned out great. The only adjustment we would make is adding a little more cheese. 

The dough recipe is reproduced from what we received from Sweet Claire. The original recipe was given in baker's percentages, with this set to make 12 kolaches. As such, the amounts are all in grams - a little unusual for this blog. A good scale is a great addition to any kitchen. We made 6 of each type of kolache. The chicken recipe makes enough for all 12 buns, so I saved half of it for later. All in all, the results were simply fantastic, and we're already looking forward to making them again and trying some different fillings. 

Friday, September 25, 2020

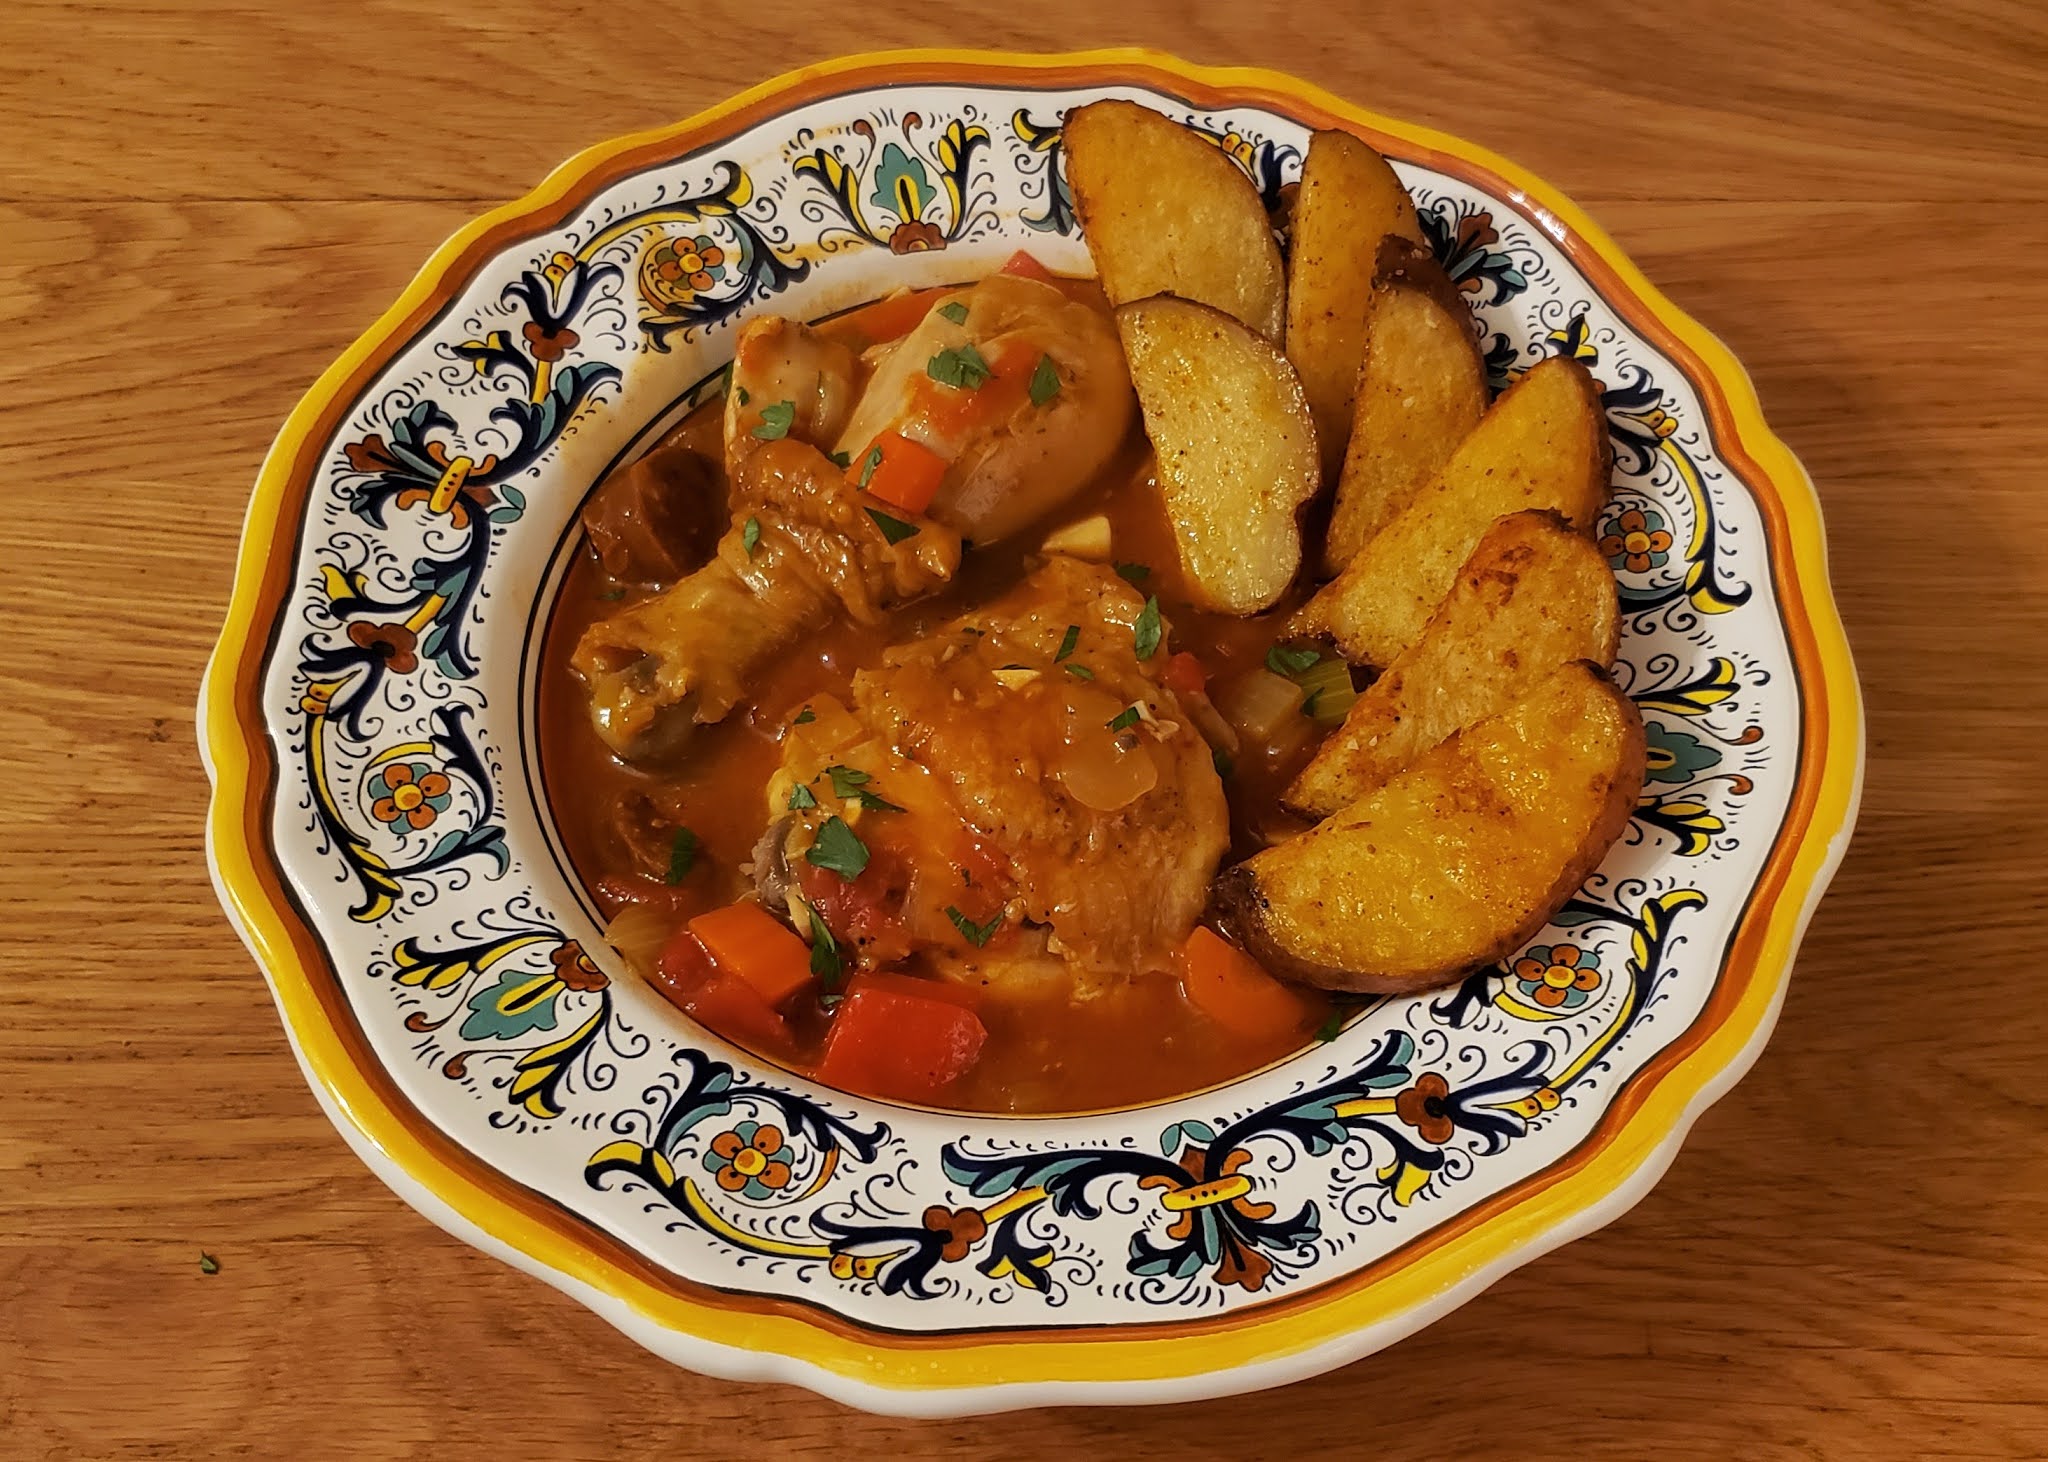
Spanish Chicken Stew

Braised chicken has become one of my favorite things to cook and eat in recent years. It's pretty hard to mess up, and produces great results for a low cost and mostly inactive cooking time. Recent examples have included a Chinese and a French version, as well as one that sprang from entirely my own brain. I planned out this chicken stew to emulate a Spanish flavor profile, using paprika, chorizo, and sherry vinegar. I don't know if this is something that would actually be made in Spain, but it turned out well. The paprika and chorizo give it a hint of heat and the vinegar lends a subtle, tangy acidity. 


The chicken is the central ingredient here, and I used three leg quarters, which I split apart into legs and thighs for more even cooking. A sharp knife should go easily through the tendon. Leg quarters are one of my top three cuts for braising, along with pork shoulder and beef chuck. They are very economical. Locally, we can get a 10 pound bag for just a few dollars. These particular quarters were quite roughly butchered (probably a reason for the low price), each with a piece of the backbone still attached. I put in the time to take the backbones off, which I froze to be made into stock later. In these crazy times, I found this simple task quite mentally therapeutic. Taking off the backbones also improves the presentation of the thighs.

The chorizo used here is the Spanish variety, which is a firm, cured sausage flavored with paprika. It can be eaten as-is, or as an accent ingredient as I've done here. This differs from Mexican-style chorizo, which is a fresh sausage that is great in tacos or quesadillas, but not appropriate here. I also continue to experiment with potato starch as a thickener, which has been working quite well. It's definitely become a staple in my kitchen for both thickening and breading. I went with roasted potatoes to accompany the stew, but you could definitely use mashed potatoes, rice, or noodles.

Sunday, March 17, 2019

Sausage and Napa Cabbage Fried Rice

It is safe to say fried rice is central to the mission of No Free Lunch. Not only was it a staple of my family's diet from when I was young, it can also be endlessly customized. Fried rice was my first recipe here (can you tell it's the same wok?), and I've done three more of them over the years. Most recently (in 2014), I wrote about how Pei Mei's Chinese Cook Book  led to me thinking more about fried rice and what really makes it good. To me, fried rice is about using humble ingredients to get something greater than the sum of its parts. Over time, I've settled into a go-to base fried rice recipe - the one I'm sharing today. 


This recipe makes use of some classic Chinese staples: napa, sausage, egg, and green onion. The amounts given here are flexible and can be adjusted to taste. The method of slowly cooking the sausage to render the fat is similar to how bacon is cooked. If Chinese sausage is unavailable (or if it is preferred), bacon could be used. Various other ingredients can also be added, such as shrimp or black mushrooms. 

Also, happy St. Patrick's Day. While we didn't have any corned beef and cabbage, I hope you enjoy this dish that also involves preserved meat and cabbage. I did have a Guinness with it!

Ingredients
  • 1 1/2 lb. Napa Cabbage (about 1/2 head)
  • 4 Chinese sausages (lap cheong)
  • 4 eggs
  • Dash of sesame oil
  • 4 cups cooked rice
  • 3 green onions
  • Vegetable oil
  • Kosher salt and white pepper to taste

Instructions

Slice the napa crosswise, into strips about 1/2 inch wide. Place the napa in a large bowl (I use this bowl for serving the fried rice later) and salt generously. Toss to coat. Let the napa stand for about 20 minutes. 


Take this time to prepare the remaining ingredients. Slice the sausages into thin disks. Crack the eggs into a bowl, beat with a fork, and add a dash of sesame oil and a pinch each of salt and white pepper. Chop the green onions. When ready, take a handful of napa, wrap in a dish towel, and squeeze out as much water as possible. Continue working in batches until all the napa has been squeezed out. Finely chop the napa and set aside.


Heat up a wok on medium heat. Add some oil and cook the eggs, constantly scraping the bottom. Cook until mostly solidified, but still soft. Set the eggs aside. Scrape out the wok. Still on medium heat, cook the sliced sausage. Toss frequently. The goal is to render out the fat in the sausages while not burning them. Tilt the wok to reserve the rendered fat in the wok and set the sausage aside. 


Turn the heat up to high and stir fry the napa. Depending on how fatty the sausages were, you may have to either remove some fat or add vegetable oil. Cook a few minutes, until lightly browned, and set aside. 


Add more oil to the wok, then add the rice and chopped green onion. Break up the rice as you add it to the pan. Stir fry for a few minutes, letting the rice stand briefly before tossing. Add the cooked napa, sausage, and eggs. Break up the eggs while adding them in. Cook a few more minutes, continuing to periodically toss the rice. 


Serve with condiments of your choice. As always, I recommend Worcestershire sauce, but Lao Gan Ma sauce is good if you like it spicy.

Saturday, April 15, 2017

Kosher for Passover Scotch Eggs

Passover always presents a culinary challenge. Eliminating flour is one thing, but cutting the traditionally avoided kitniyot (beans, corn, rice, and other grains) is quite another. My reliance on bean-related ingredients (fermented and otherwise) usually means I do little cooking during the week of Passover. My only contribution this year was chicken kebabs and brussels sprouts. Ariel suggested I make a kosher for Passover version of Scotch eggs. Scotch eggs were one of my earliest posts, and remain a family favorite, so this sounded like a fun experiment.


I will always maintain Scotch eggs are deceptively easy to make. The only trouble is the moderate hassle of deep frying. The basic recipe involved the time-honored breading technique of flour, egg wash, then breadcrumbs that I've used in several other recipes. The flour and breadcrumbs are replaced by two Passover-friendly ingredients: matzo cake meal and matzo meal. The cake meal is made of ground matzo, and is roughly the consistency of flour, while the matzo meal generally resembles breadcrumbs. This is my first time using these ingredients, so they are still somewhat "exotic" to me, the results were great. I used a basic bulk breakfast sausage here, but as I noted on the original recipe, any will do. 


Ingredients
  • 4 hard boiled eggs
  • 3/4 lb. sausage
  • 1 raw egg
  • Matzo cake meal
  • Matzo meal
  • Vegetable oil for frying

Instructions

Preheat oil in a deep fryer, wok, or saucepan to about 375 degrees F. Use enough oil to mostly submerge the eggs. 

Divide the sausage into four equal balls. Flatten and wrap around each egg. Carefully work the sausage until eggs are completely encased. Roll the balls around in palms to make sure covering is even and sealed. 

Spread a little cake meal on a plate and dredge the sausage-covered eggs all over. Beat the raw egg in a bowl. Spread out the matzo meal on a plate. Dip each Scotch egg in the beaten egg, roll around to coat, then dredge in the matzo meal until thoroughly coated.

Carefully drop the eggs into the hot oil and cook until golden brown, about 5 minutes. I cooked them in pairs in my small deep fryer. Cut in half for serving. I use a serrated bread knife to cut, as this allows cutting through the crunchy exterior cleanly. I served with a mix of mayonnaise and Sriracha sauce.

Sunday, February 28, 2016

Turnip Cakes (蘿蔔糕)

Turnip cakes are as classic a dim sum dish as they come. That being said, they've never been a go-to for my family. In my mind, that's all the more reason to give making them a try. I had been thinking about it for a while, but when I saw a huge pile of Chinese radishes at Better World Market (West Lafayette's newest Chinese store), I decided to go for it. Since this is a dish I'm mostly unfamiliar with, I closely (for me, at least) followed Henry Chan's recipe from Classic Deem Sum. Grandpa recently gave me this book, which was also responsible for the baozi of my childhood.


Overall, the turnip cakes turned out great. The Chinese radish has a unique flavor, and the sausage, shrimp, and mushrooms dot the cakes nicely. The cakes are quite dense, and I might experiment by lowering the amount of flour in the future. I will definitely be ordering them next time I go to dim sum.

This recipe features many interesting ingredients, a few of which are new to No Free Lunch. Dried black mushrooms and dried shrimp were both featured in my marathon Shanghai shaomai recipe. The big star here is, of course, the Chinese radish, also known as a daikon. It is a root vegetable that sort of resembles a huge, white carrot. Note that despite the name, this dish does not contain turnips. This recipe also uses rice flour, not to be confused with sweet/sticky/glutinous rice flour, which I used for tangyuan. 


The last new ingredient is one I've been wanting to discuss for a while: Chinese sausage. I have a huge weakness for these greasy little guys. Specifically, I'm using Cantonese lap cheong, which are dried, hard, lightly sweetened. You'll find them in the refrigerator section of most Chinese stores. I chop them up and cook them a bit like bacon - on low to medium heat so the chunks of fat render out. This is great for fried rice, as you can use the grease to cook the rest of the ingredients. I also like them with scrambled eggs.

Ingredients
  • 4-6 dried black mushrooms, depending on size
  • 1/3 cup dried shrimp
  • Warm water
  • 1 lb. Chinese radish/daikon (about 1 whole radish)
  • 1 cup chicken stock
  • 1 Chinese sausage, minced
  • 2 Tbs minced scallion (use only the white bottom part)
  • 1 Tbs Amontillado sherry/Shaoxing wine
  • 1 tsp salt
  • 1 tsp sugar
  • Pinch of white pepper
  • 2 Tbs vegetable oil (substituting for lard)
  • 2 cups rice flour
  • Vegetable oil to grease pan and fry the cakes

Instructions

Start soaking the mushrooms in warm water to reconstitute. The mushrooms need to soak about 30 minutes. Soak the shrimp in 1/4 cup warm water to reconstitute for at least 10 minutes. Reserve the shrimp water when done. While the dried ingredients soak, peel the radish and remove the ends. Grate the radish. I chopped it up into small pieces and used the grater attachment on the food processor.

Grated radish cooking

Combine the shredded radish with the chicken stock and the shrimp water in saucepan or wok. Cook, covered, on medium-high for about 15 minutes. Stir occasionally.

Minced mix-in ingredients

While the radish cooks, remove and discard the stems from the mushrooms and mince the caps. Mince the shrimp. If you haven't already, mince the sausage and scallions. Add the mushrooms, shrimp, sausage, scallions, wine, salt, sugar, pepper, and oil to the pan. Cover and cook 10 more minutes. 

The finished batter, before flour is added

Remove the mixture to a large bowl and let cool to room temperature. Once cooled, add the rice flour to the mixture and mix in thoroughly. Oil a square cake pan and pour the batter into an even layer. Use a wet spatula to smooth the top. Smoother is better, to get more even browning later on.

Ready to steam

For the next step, you will need to rig up a way to steam the cake. The way I did this was to put a wire steamer rack (available in various sizes at Chinese stores) in the wok and set the pan on top. A high-domed lid will likely be needed to fit everything inside. Bring water to boil in a wok with the rack in place, filling water to about an inch below where the pan will sit.

My steaming setup

Carefully place the pan on the rack and cover. Steam the cake for 50-60 minutes. Keep extra hot water on hand to refill the wok. This is easy to do with an electric tea kettle. Check the water level every 10 minutes and refill as needed. Check if the cake is done by inserting a toothpick. If the toothpick comes out clean, the cake is done.


The finished cake

Remove the pan from the heat and let the cake cool to room temperature. Place a cutting board on top of the pan and carefully flip over, letting the cake drop out of the pan. Cut into pieces as desired. I did 12 rectangular pieces (3 x 4 pieces), which are roughly the size you see in restaurants. You can also make smaller pieces if you want to go for a finger food style.

Cut and ready to fry

Select the pieces you want to eat now, and refrigerate the rest in a sealed bag. In a nonstick pan, heat a little oil on medium-high. Sear the cakes on both sides until golden brown. This is quite fast, maybe a minute on each side and serve immediately.

Monday, July 14, 2014

Easy Chicken Cassoulet

It's that time of year again, folks, and of course, I mean it's Bastille Day. Is there any better way to celebrate than by storming our hunger? Non. This dish is essentially a simplified and easy-to-make version of cassoulet, with inexpensive and relatively easily found ingredients. Along with some variants, it has become one of the most common and favorite meals in our house, where it is simply known as "beans." 


The basic formula lends itself to variation, substitutions, and experimentation for many bean-based dishes; the recipe here is really just a suggestion. Swapping the mustard for some garam masala and coconut milk puts an Asian spin on the dish, for example. Different meats (duck, of course, among others) or different types of beans can work well, too. If changing the bean type, you should be careful to stick with beans that hold their shape well after a long cooking time. Any type of kidney bean, as well as chickpeas fit the bill nicely.

Ingredients
  • 4 chicken thighs, skin removed
  • 1 large onion, diced
  • 5 carrots, peeled and diced
  • 3 stalks celery, diced
  • 4 cloves garlic, minced
  • 1 smoked sausage or kielbasa, sliced
  • 1/2 tbs butter
  • Olive oil
  • 2 cans white kidney beans, drained and rinsed
  • 1 can butter beans, drained and rinsed
  • 2 cups chicken stock
  • 3 tbs Dijon mustard
  • 1/2 large lemon
  • 1 sprig fresh parsley, removed from stem
  • 1 bay leaf
  • Herbes de Provence
  • Salt and pepper to taste
  • Flour or Wondra for thickening

Instructions

Preheat oven to 400 degrees. In a Dutch oven or large pot, heat a bit of olive oil on medium-high heat. Rub both sides of the chicken pieces with salt and pepper. Brown the chicken on both sides, then remove from the pot and set aside. Add butter and more olive oil as needed. Add the onion, carrots, celery, garlic, and sausage. Cook the mixture until the vegetables become soft. Salt and pepper to your preference.


Next, add the chicken back in, along with the beans and chicken stock. Squeeze the juice from the lemon into the pot, then stir in mustard, parsley, Herbes de Provence (a few good shakes), and bay leaf. Finally, add the thickening agent. If using Wondra, a few generous shakes is sufficient; if using flour, mix with water first. Stir thoroughly. I have also had some success with, in addition to the lemon juice, putting a piece of lemon rind in the pot before baking. I used the rind from a quarter of the lemon here. 

Ready to reduce

Put the pot in the oven and bake for about 1 hour. It is recommended to stir a few times and taste during baking. If the dish is not thickened to your liking after 1 hour of baking, you can remove the chicken and then reduce the liquid on the stovetop on high heat. I generally do this for at least 5 minutes. At the end, you should always be sure to taste and add salt or pepper if needed.

Thursday, April 19, 2012

Baked Penne Mornay

Pasta and cheese. What's not to love? The idea behind this type of dish is a sort of classed-up mac and cheese. I was originally inspired to try a recipe like this when I saw something similar on an episode of Diners, Drive-Ins, and Dives. My version isn't quite as extravagant, and I've added Italian sausage. The recipe for the cheese sauce is derived from one found in The Joy of Cooking, but with more cheese.


Ingredients

Pasta
  • 2 1/2 cups dry penne pasta
  • 3 links Italian sausage
  • 2 tbs half and half
  • Extra Parmiggiano-Reggiano
Sauce
  • 2 tbs butter
  • 2 tbs flour
  • 1 1/4 cup skim milk
  • 1/4 cup grated Emmentaler
  • 1/4 cup grated Parmiggiano-Reggiano
  • Salt and pepper to taste

Instructions


Preheat oven to 400 degrees. Get some salted water boiling and cook the pasta for about 10 minutes. Drain, rinse, and set aside. Heat pan on medium-high. De-case the sausage. Break it up and add to the pan. Cook until well browned and set aside.


Clean out the pan. We'll now make the sauce. Melt butter on medium heat. Add flour and mix together. Cook until the roux darkens slightly. Add milk and whisk together. Simmer the sauce while grating the cheese. Add grated cheese and stir together until melted and integrated. Add salt and pepper to taste.


Combine the pasta, sauce, sausage, and half and half in a casserole dish. Mix thoroughly to coat the pasta. Cover the top with more grated Parmiggiano. Bake for 20 minutes. The top should be a little crunchy, while the interior will be creamy and cheesy.

Thursday, March 8, 2012

Mexican-Style Meatballs

This recipe was inspired by meatballs Iron Chef Bobby Flay made on the Food Network a couple weeks ago. The sauce is my own invention. The meatballs use Mexican-style chorizo sausage. This is a distinct product from the chorizo of Spain and Portugal. Unlike the Iberian versions, Mexican chorizo is not cured and must be cooked before eating.


Ingredients

Meatballs
  • 1/2 pound ground beef
  • 1/2 pound ground pork
  • 2 links Mexican-style chorizo
  • 1 egg
  • 1 tsp ground cumin
  • 1 tsp smoked paprika
  • 1/2 tsp garlic powder
  • 1 cup breadcrumbs
  • 1/2 cup chicken stock
  • Olive oil
Sauce
  • 1 1/2 red bell peppers
  • 2 red finger chiles
  • 2 cloves garlic
  • 1/2 small onion, diced
  • 1/3 cup tomato paste
  • Water
  • Olive oil
  • Salt and pepper
  • Crumbled queso fresco

Instructions

Meatballs


Decase the chorizo and mix the three meats together. Mix in egg, cumin, paprika and garlic powder. Slowly work the breadcrumbs into the meat mixture. Form into meatballs about 1 1/2 inch in diameter. Heat olive oil in a pan on medium-high heat. Brown the meatballs on all sides, then add chicken stock, cover, and cook until the meatballs are cooked through and the stock is partially absorbed.

Sauce


Place the peppers in a baking pan and broil until blackened on all sides. Let cool for a few minutes. Peel off the blackened skin and remove stems and seeds. Place roasted peppers, garlic, and onion in a blender and puree. Add the pepper puree, tomato paste, a little olive oil, and some water to a pan. Cook on high until the strong raw onion and garlic taste goes away and is replaced by slight sweetness. Add salt and pepper to taste.

To compose the dish, top each meatball with sauce and crumbled queso fresco.

Sunday, February 19, 2012

Roasting Sausages and the "One Pan Meal"

Today, No Free Lunch reached 1500 pageviews. Thank you to all my dedicated readers. Make sure to tell all your friends about No Free Lunch and all the great things you've learned how to cook. I've been having a great time with this blog so far. If you have any suggestions or challenges (I do love a challenge) for me, please post them in the comments!


Today, I don't have a new full recipe, just some ideas. Previously, I seared and poached sausages. Another great method is to roast them. Roasting is perfect if you really want to keep the moisture inside the sausage. This leads us to a lot of great, easy "one pan meal" ideas. I like this approach to dinner because you can get everything in the oven and then do something else while it cooks. If the different items take different amounts of time to cook, either put them in partway through, or take them out.

In addition to sausages, chicken legs and potato wedges (now updated with a new photo) work very well as part of your one pan meal. While the pan is in the oven, you also have plenty of time to prepare a salad or other side, as well.

Saturday, January 21, 2012

Bangers and Mash

Pub Week, Day 7! Pub week rolls to a close with perhaps the most quintessential pub grub of them all: Bangers and Mash. Most of the time, I tell people that most complicated-seeming dishes are actually pretty easy to make. This one, however, is the opposite. Bangers and Mash seems very simple, but it actually takes a fair amount of dedication to produce, since it has 3 separate elements that need to come together at once.


Ingredients

Mashed Potatoes
  • 2 gold potatoes
  • 1 1/2 tablespoons half and half
  • 1 tablespoon butter
  • Salt and pepper to taste
Sausage and Gravy
  • 2 links pork sausage
  • 1/2 onion
  • 1 1/2 tablespoons butter
  • 1 tablespoon flour
  • 1/2 cup beef stock
  • Worcestershire sauce
  • Salt and pepper to taste

Instructions

Mashed Potatoes

Boil water in a pot. Peel the potatoes and cut into halves. Boil the potatoes until soft (pokeable with a fork), 20-30 minutes. Once soft, drain the potatoes and mash with a potato masher. Add butter and half and half, and mix thoroughly. Season to taste.


Sausage and Gravy

Heat sauté pan to medium-high and brown sausages on both sides. Fill the pan up with water, about 1/3 up the sides of the sausages. Cover the pan and poach for 20 minutes. While the sausages cook, dice the onion.


Drain the water and set the sausages aside. Melt the butter in the pan and sauté onion pieces until soft, about 5 minutes. Add flour and stir together to integrate. Pour in the beef stock and a splash of Worcestershire. Mix together and reduce for a few minutes to thicken the sauce, and season to taste.


Once all three components are ready, place a mound of potatoes on the plate, top with sausages, and pour the gravy over the plate. Serve with a strong English pale ale for a full alehouse meal. I went with Samuel Smith's Old Brewery Pale Ale.

Tuesday, January 17, 2012

Scotch Eggs

Pub Week, Day 3! I've been a fan of scotch eggs for a long time, but I had never made them before. I first ate them at the Minnesota Scottish Fair, state fair style - on a stick. As luck would have it, my wonderful girlfriend gave me an electric deep fryer, so today was a perfect opportunity. As it turns out, scotch eggs are actually pretty easy to make, with very common ingredients. This recipe makes two scotch eggs.


Ingredients
  • 3 large eggs (2 for boiling, 1 for egg wash)
  • 1 link raw pork sausage, or equivalent bulk sausage
  • Flour
  • Bread crumbs
  • Salt and pepper
  • Oil for frying

Instructions

Start by hard boiling the eggs. Fill a pot with cold water, submerge eggs, and bring to a boil. Once the water starts boiling, remove from heat and let stand for 10 minutes. Remove the eggs and set aside to cool. This can be done well in advance.

A note on sausage: I always buy link sausage, for two reasons. First, as a person living alone, it is very easy to freeze the individual links for later. Second, you can always de-case the links. I used Italian sausage here, but use whatever kind you have.


If using links, de-case the sausage. Conveniently, a regular sized link will be perfect for two scotch eggs. Divide the sausage in half and form into thin patties. Flour both sides of the patty and lay a peeled egg on it. Wrap the sausage up and around like a blanket, working it with your fingers until it thins and covers the whole egg. Make sure it's secure and there is no egg showing. This is actually a lot easier than I was expecting - the sausage stays on very nicely.


Preheat oil in a pot or deep fryer. You want the oil to be hot enough to get the breading nice and crunchy, but not too hot so that it will burn. Crack the remaining egg into a bowl and beat with a fork. Pour breadcrumbs into a shallow bowl or plate, and season with salt and pepper. Roll each sausage-egg in the egg wash, then in the breadcrumbs, and carefully drop into the oil. You can fry two eggs at a time. Cook in the oil for about 4 minutes, then let them rest on a paper towel for a few minutes. Carefully cut the eggs in half with a serrated knife.

You can enjoy your scotch eggs hot or cold. They are great on their own or with a dipping sauce. I whipped up a quick spicy mayo using regular mayonnaise, smoked paprika, a little garlic powder, and a few squirts each of Sriracha and Worcestershire. You can also use a straight hot sauce or anything you like.