This is probably one of my most complicated recipes, and also one that requires a lot of back story, so strap in and enjoy one the grandest experiments in the glorious history of No Free Lunch. As this is the first time I have made these, the instructions section is less clean than usual and will go into detail about what went well and what did not.
Back in 2009, when I was studying in China, I came across a type of dumpling I had never seen before: an open-topped sack of dark glutinous rice with some bits of meat in it. Because of their shape, we called them "volcano dumplings." I eventually found out they are called shaomai (siumai in Cantonese), which confused me greatly. I had eaten siumai my entire life, and they had always been a ball of pork and shrimp wrapped up in a thin, yellowish skin. As it turns out, shaomai, which translates as "cook and serve," is a whole family of dumplings, and what you get when ordering them varies all over China. What seems to unite these myriad forms is the open top, with visible filling inside. These particular dumplings are the Shanghai variety.
 |
| This stall sold 8 shaomai or 8 xiaolongbao for about $0.60 |
As a uniquely Shanghainese dish, I have not encountered them since. I was pleasantly surprised to find a recipe for my long lost volcano dumplings in volume 2 of Pei Mei's cookbook. She refers the reader back to volume 1 for the pork recipe. I have simplified her "Stewed Pork Rolls," significantly, as the pork is being produced specifically to be minced and stuffed in a dumpling, rather than standing as its own dish. The pork recipe here preserves the amounts of the original recipe. If you want to make only enough for the dumplings, you can halve everything, but if you make the full amount, you can eat some and sustain yourself for this long recipe. It is great with any extra sticky rice you might have.


There are a few new exotic ingredients in this dish that are worth mentioning. I have already discussed black vinegar in a previous post, so I won't spend time on that here. Dried shrimp are a Chinese grocery staple, and the distinctive smell is a hallmark of a good Chinatown shop. I was able to find these vacuum-packed in the refrigerator section. Dried mushrooms show up in a lot of Chinese recipes, so they are good to have on hand. They should be soaked in warm water ahead of time. Despite being more of a brown color, they are sometimes called "black mushrooms." Both of these dried ingredients have very intense, concentrated flavors. The last ingredient of note is glutinous rice, also called sticky rice or sweet rice. This is completely different from regular rice, and takes a lot longer to prepare. All these ingredients should be readily available in Asian stores.
Stewed Pork
- 1 lb. pork tenderloin
- 2 cloves garlic, minced
- 5 Tbs soy sauce
- 1 Tbs Shaoxing or dry amontillado
- 3 Tbs sugar
- 3 cups water
- 3 Tbs black vinegar
- 1 1/2 tsp sesame oil
- Vegetable oil for frying
Filling
- 1 cup stewed pork (about half of recipe above)
- 2 Tbs dried shrimp
- 3-4 dried mushrooms
- 3 cups cooked glutinous rice (roughly 1 3/4 cup uncooked)
- 2 Tbs soy sauce (can add more to darken the filling)
- 1/4 tsp black pepper
- 1 Tbs vegetable oil
Dough
- 3 cups flour
- 1 cup boiling water
- 1/4 cup cold water
Instructions
Well ahead of time, start preparing the glutinous rice, according to package instructions. Mine said to start soaking the rice overnight, so plan ahead. If you have never made glutinous rice before, as was the case for me, make sure to have a colander or similar device to steam the rice in. Put the rice in the refrigerator when done.
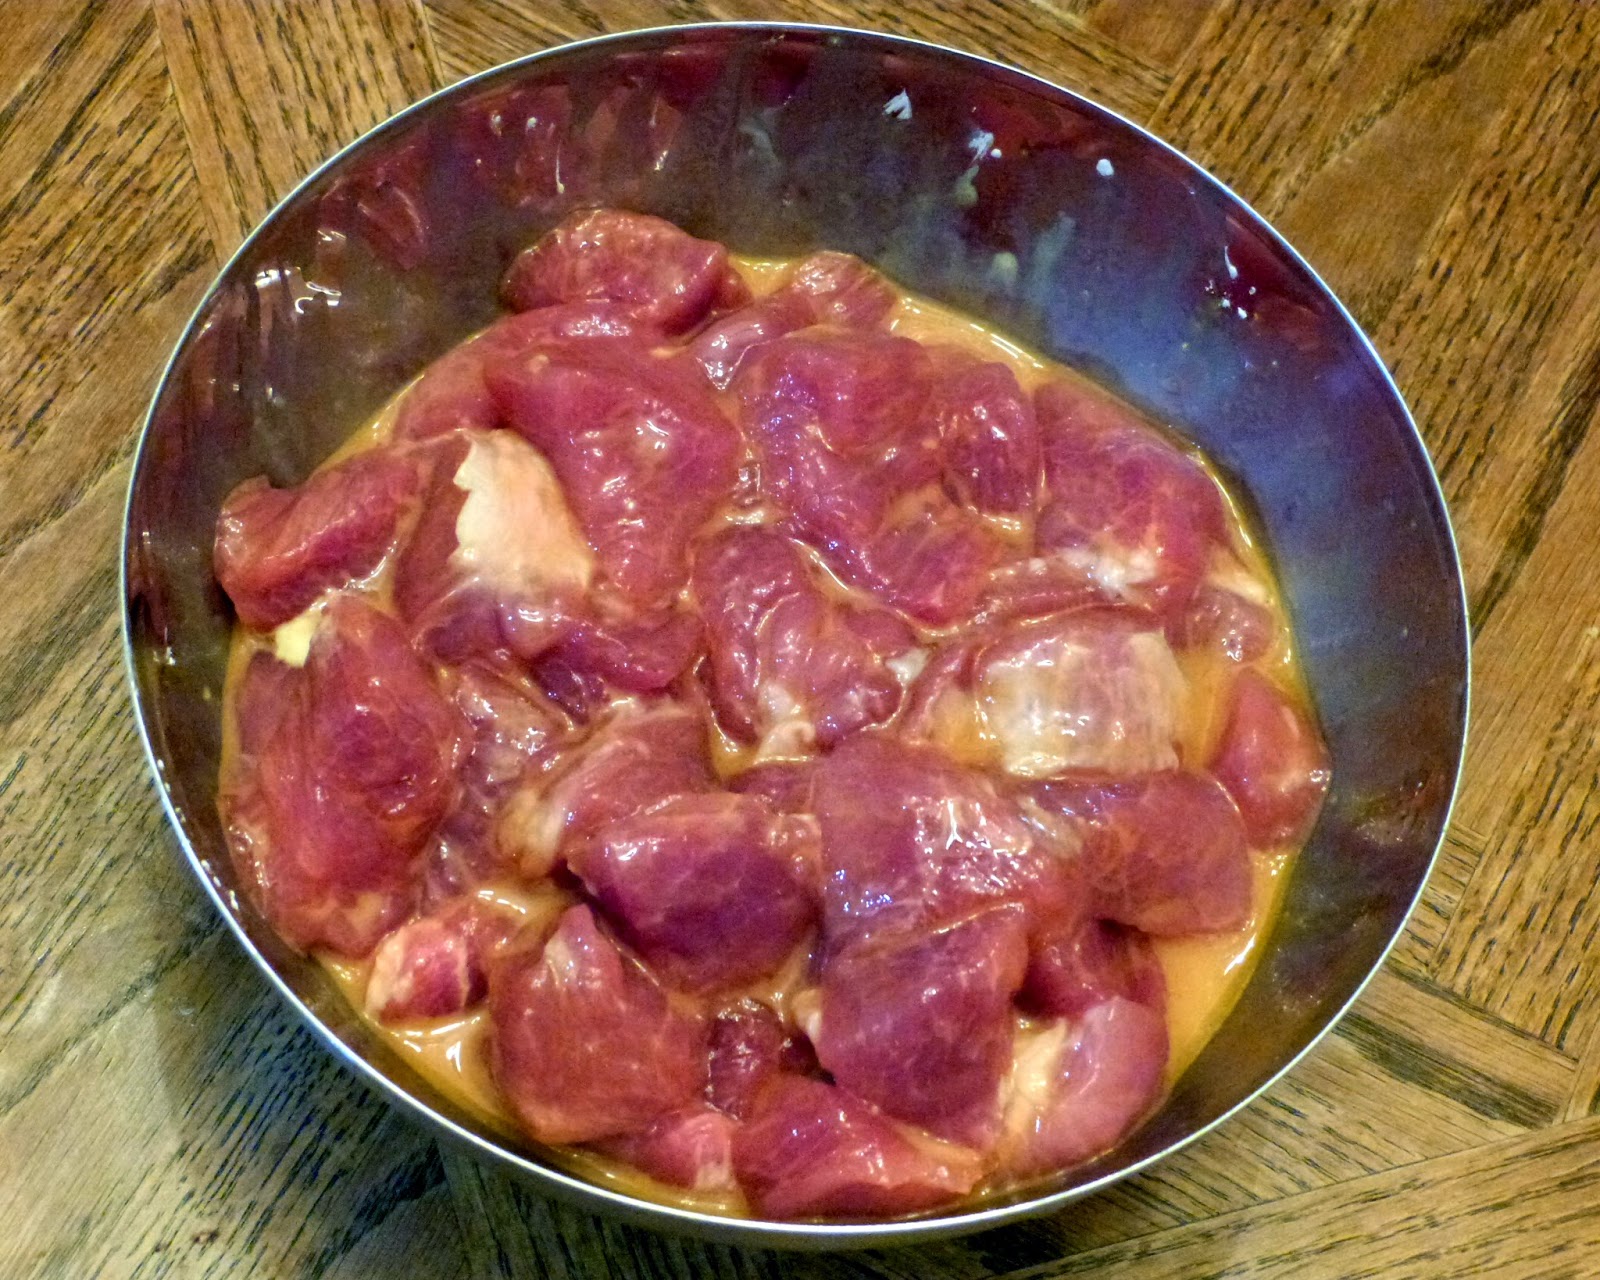
We'll start by preparing the pork. Cut the tenderloin into small chunks, about an inch or so across. Make sure to get rid of any bone pieces. Marinate the pork with the soy sauce, wine, and garlic for 20-30 minutes.
 |
| Pork after one hour |
Get some oil going in a hot wok, then stir fry the pork until browned, just a minute or two. When transferring the pork to the wok, try to get as little of the marinade as possible, as we want the pork to brown and the marinade left for later. Don't worry about it being cooked through at this point. Add water, vinegar, sugar, and the marinade left in the bowl. Bring to a boil. Simmer, uncovered, for about an hour on medium-high to let the sauce reduce. The pork will be fall-apart tender and the sauce an intense brown. After this is done, stir in the sesame oil. Transfer to a bowl and put it in the refrigerator.

Start soaking the mushrooms and shrimp in warm water. The mushrooms need at least 30 minutes to soften. Mince the shrimp as finely as possible. Mince the mushrooms and discard the stems. Finally, mince the pork. Combine rice, 1 cup of stewed pork (with some of the sauce), soy sauce, pepper, oil, shrimp, and mushrooms. Mix well. You can also add more soy sauce to taste and to darken the mixture, if desired.

You can start on the dough while the mushrooms are soaking. In a large bowl, combine flour and boiling water. Use a chopstick to mix until absorbed. Add cold water and knead, by hand, into a smooth dough. Be patient, as this does take a while. The dough will be very sticky at first. Cover with plastic wrap and let stand for at least 15 minutes.
Still with me? Great. Now comes the hardest part. On a floured counter or board, divide the dough into equal pieces. Pei Mei recommends 30 pieces. I experimented with different sizes, and I think the best is 32, as dividing the dough in half 5 times is a lot easier dividing it into fifths. I also tried 16-piece, 24-piece, and 48-piece sizes. 16 is definitely too big and 48 is definitely too small. 24 is not bad if you like the dumplings a little bigger, but still manageable. With my experiments, I ended up using 1 1/2 batches of dough to use up all the filling. Going carefully with 32 dumplings per batch may be fine.
 |
| Just before steaming |
Flatten the dough pieces and roll out as thin as possible into a roughly circular shape. With the 32-piece size, this ended up being about 3 inches across. Use just enough flour to get them rolled out. With too much flour, it will become impossible to fold the dumplings. I usually ended up carefully peeling the pieces off the counter after rolling. Place filling on the dough and pleat the dough around the sides to form a basket shape. Once pleated along all sides, pinch around the edge with all five fingers to form a "waist." I found that 1 1/2 Tbs of filling worked well. For the 24-piece size, use about 2 Tbs.
Steam the dumplings for about 15 minutes. My setup is put a bamboo steamer in a wok about 1/3 full of water on high. I use a wok ring to keep it steady. I have been using steamer liners from the Asian grocery store, which do a great job at preventing sticking. You can also use squares of parchment paper, or a cabbage leaf.
Additional Commentary
This was one of the most difficult and labor intensive dishes I have cooked in recent memory. Rolling out each skin and then wrapping them up was the toughest part. Unlike potstickers, the filling is very loose (being mostly rice) and wet, and if any of this gets into the pleats, it becomes hard, or even impossible, to get the pleats to stay. Another difficulty is the dough itself. From pictures I have from China, as well as the one in the cookbook, the skin is extremely thin and almost translucent, which I don't think is possible to achieve with just a rolling pin. Perhaps a pasta maker could do this better. Thinner dough would make the proportion of dough to filling lower, which is perhaps why I ran out of dough and had to make more. In any case, the dumplings were still very good, and I see them as the "homestyle" version, as opposed to the more refined, "restaurant," or "tiny street stall" version.