Friday, January 26, 2018

Birthday Special 2018

Happy birthday, Ariel! For the cake this year, I decided I had to step it up a little. I returned to the same recipes I used for 2015's cake. This was Mark Bittman's golden layer cake and chocolate buttermilk frosting. In that cake, I just poured the entire batter into a 9x13 pan. This time, I did what was actually prescribed by Bittman -- two 9-inch round cake pans. The actual layer cake construction was not as difficult as I was expecting. Bittman recommends placing the bottom layer upside-down so that the flat bottoms go in the middle of cake. There was still a gap around the edge, but I managed to fix this by adding more frosting and pressing down on the cake. Overall, I do think the improvement in presentation is worth the extra effort over a sheet cake. Since the cake becomes taller, frosting the sides is actually easier with the layer cake. 


For the decoration, we have the triumphant return of the ship cake! I was inspired by the 15th-16th century carrack, the ship that built the Portuguese empire. As always, I used the Betty Crocker cake decorating tubes, but I remain dissatisfied with them. I may have to investigate other options for next year.


The birthday feast included eggplant Sichuan style, potstickers, and Kenji's crab rangoons. If you've never made crab rangoons before, it's quite easy, and I highly recommend Kenji's recipe, which is heavier on the crab. I used imitation crab, which I maintain is one of the world's most underrated ingredients. 

Monday, January 15, 2018

Pulled Pork

If I had to choose one favorite cut of meat, it would probably be pork shoulder. It's a terrifically versatile cut that's popped up quite a few times on No Free Lunch, and it's usually fairly inexpensive. You can easily find a large shoulder roast (sometimes called a "Boston Butt") at most grocery stores, or at Sam's Club for a few dollars a pound. I generally separate the roast into two sections. I cut right at the edge of the shoulder blade to have a smaller bone-in roast and a boneless section that can be sliced into long strips for char siu. With the bone-in section, I either trim the meat off for grinding (the fat content is perfect for potstickers) or cook it whole, as I've done with this pulled pork recipe. If you trim off the meat, you can save the bone for making soup.


I have been a fan of pulled pork for years, but for some reason, I never tried making it at home until a few months ago. I did a quick survey of various braised pork recipes online to get a general idea, and devised this one myself. It is excellent in tacos, but can also be eaten with rice and some roasted vegetables. It takes well to freezing, and when I teach evening classes, I like having food ready to go in advance.

Chipotles in adobo are a key ingredient in this recipe. These are smoked jalapeños in a brown sauce, usually found in a can. I've been experimenting with these for a while, and most frequently use them as part of a marinade for grilled chicken. On their own, chipotles are very spicy, so you do need to be careful to add them in moderation. I've had no problem getting them from a regular supermarket. For the beer, I used a dark Belgian-style brew, but you can really use anything decent. The first time, I used a pilsner, and it turned out well. Although I haven't tried it, I would think something like Negra Modelo would be a great, affordable choice that's somewhat on-theme.

Ingredients
  • 1 bone-in pork shoulder roast, about 4-5 pounds
  • Vegetable oil
  • Limes for serving
  • Salt to taste
Rub (approximate)
  • 2-3 tsp salt
  • 1 tsp black pepper
  • 2 tsp cumin
  • 2 tsp paprika
  • 1 tsp smoked paprika
  • 1 tsp ground coriander
Braising liquid
  • 1 yellow onion, diced
  • 4 cloves garlic, smashed
  • 1 bottle of beer
  • 1 orange
  • 4 chipotles in adobo sauce, chopped
  • 1 bay leaf
  • 1 tsp oregano
  • 2 tsp dark soy sauce
  • Chicken stock as needed

Instructions

Preheat oven to 350 degrees F. Heat a little vegetable oil in a dutch oven or other similar vessel on medium-high heat. Rub the pork all over with salt and the rest of the rub. Brown the pork on all six sides, then set it aside.

Pork during browning

Add the onion and garlic to the pan and brown for a few minutes. Deglaze with the beer. Squeeze out the orange into the pan. Add the chipotles with a bit of their sauce, bay leaf, oregano, and soy sauce. Return the pork to the pan. Top up with chicken stock so that the pork is almost completely covered with liquid.

Ready to go in the oven

Cover the pan and transfer to the oven. Cook for about 3 hours, until fork tender. 90 minutes in, check on the roast and flip it over. Remove the pan from the oven. Take out the pork and place on a plate.

After 3 hours of braising

Use two forks to pull the meat apart into shreds. The meat should come right off the bone and tear apart easily. Large chunks of fat can be discarded.

Removing the grease

Transfer the pork to a ziploc bag or other container and refrigerate for later. Place the entire pan of sauce in the refrigerator and chill for a few hours, or overnight. The excess grease will congeal on the top of the sauce and can be easily removed. Remove the bay leaf.

Ready to serve

When ready to serve, add the meat back to the pan and bring up to heat on medium heat. Stir to thoroughly coat the meat with sauce. Salt to taste. Serve with lime wedges to squeeze on the pork. Leftover pork can easily be frozen for later use.

Tuesday, January 2, 2018

"Potsticker" Sandwich

Happy New Year, everyone! As 2018 arrives, so does the 6 year anniversary of No Free Lunch. Sadly, 2017 was the leanest year in its illustrious history, though I've emerged from it as Dr. Wai. When I started No Free Lunch, I was midway through my first year of graduate school, a year where I learned a lot both in the classroom and in my evenings churning out seventy-four blog posts. It's still fun to go back and see how my approach has evolved. I am very proud of the few recipes I did manage to post last year, including one of my best Chinese dishes yettwo "modernized" takes on Jewish holiday traditions, and a fantastic blind dive into Pei Mei's Chinese Cookbook. I hope 2018 will be a fruitful year for this blog, and I already have the next post in the works. My new year's resolution is that I will be less of a perfectionist when it comes to recipes and give you a few more works in progress.


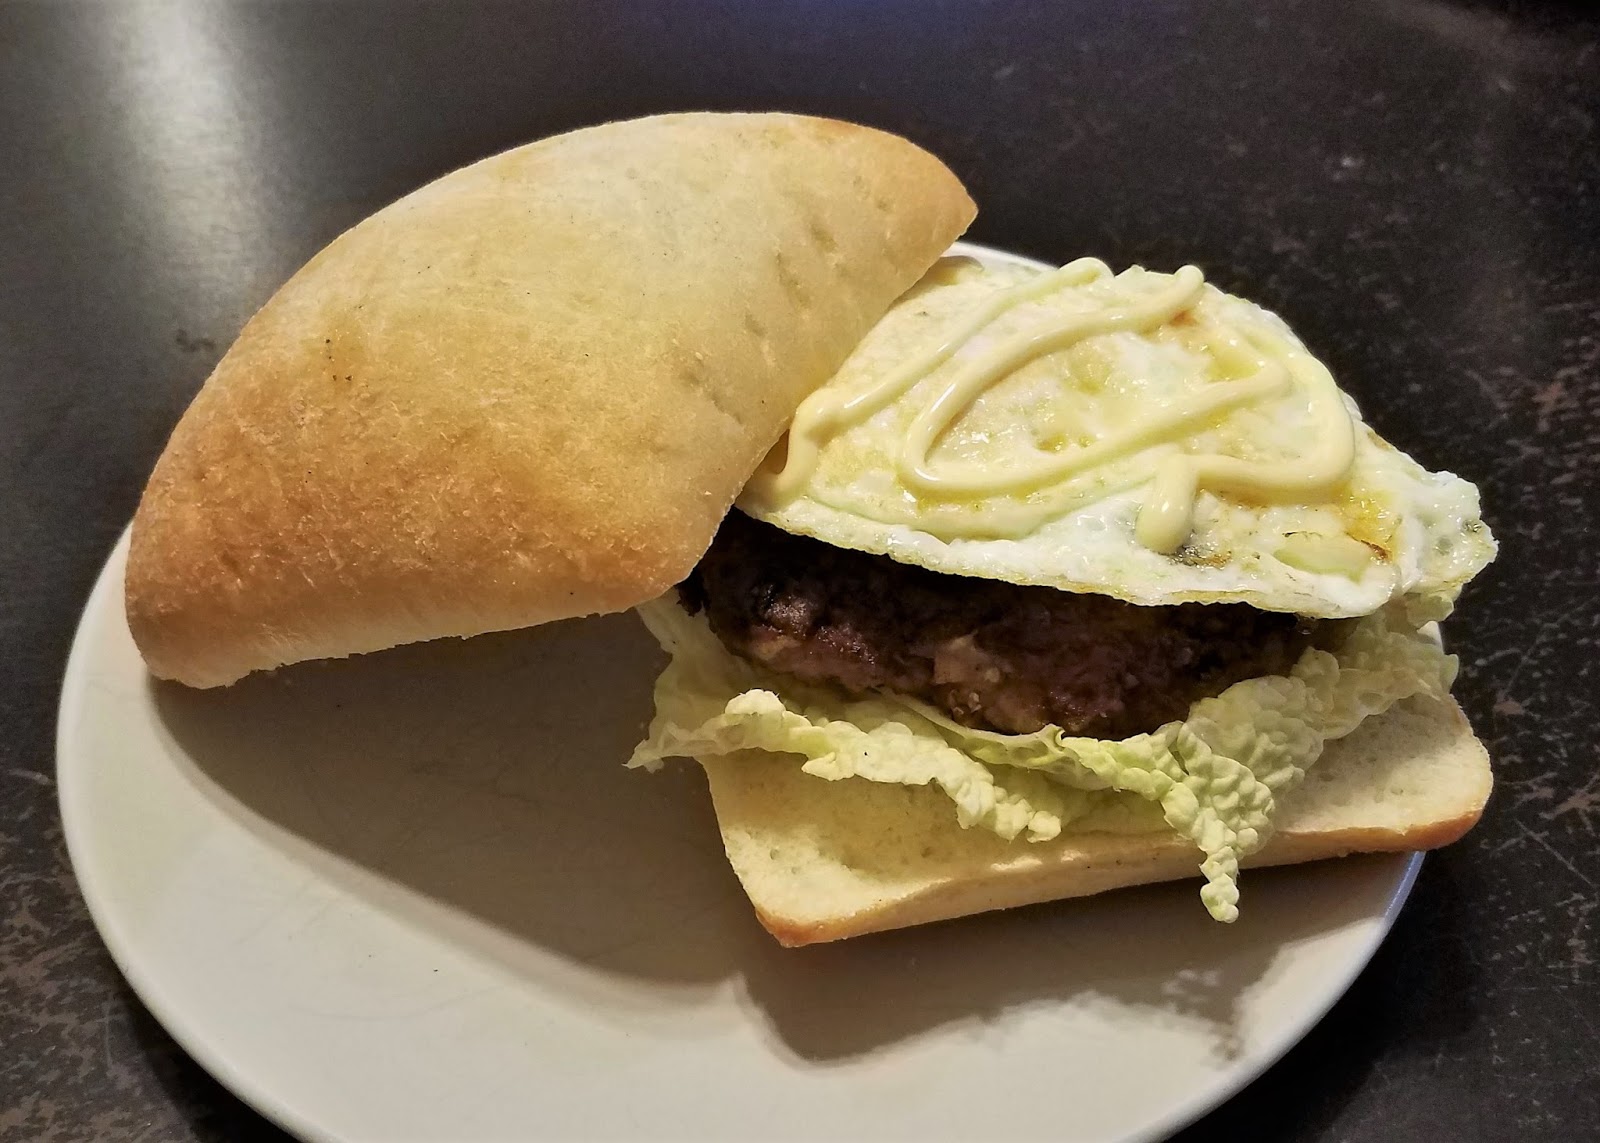
For the first post of the new year, I've got a real oddball that turned out incredibly well. Making a huge batch of potstickers can be time consuming and tiring. Sometimes you run out of dough, and have a little filling left, but not enough to justify another batch of dough. Sometimes you just get hungry. I have the solution: potsticker sandwiches. I've made these here and there over the years, but doing this post made me sit down and think about how to make them as delicious as possible, and I believe I have achieved it. Crunchy cabbage, gooey egg, and savory potsticker filling combine beautifully into a satisfying, self-contained meal. 

The ingredients are pretty mundane, aside from the potsticker filling that forms the center of the sandwich. I used ciabatta rolls for the bun here. While good, I think they are a little too robust for this sandwich, and a regular hamburger bun or the large-size King's Hawaiian would be best the way to go. For the greens, anything you have on hand is fine, but if you are using my potsticker recipe, you'll have some napa cabbage on hand. Just tear off some of the green leafy parts. I felt the sandwich needed some lubrication, and Japanese mayo (Kewpie is the most common brand) fits the bill nicely. If you've never tried it, I highly recommend giving it a go.

Ingredients (per sandwich)

  • 4 oz. leftover potsticker filling (see my recipe, "Potstickers, the Hard Way")
  • 1 Tbs panko
  • Flour for dredging
  • Vegetable oil
  • 1 egg
  • 1 bun of your choice
  • Cabbage or lettuce leaves
  • Japanese mayonnaise (Kewpie)

Instructions

Note that the photos here are for two sandwiches, which can easily be made in a single pan.

Mix the panko into the potsticker filling. Press the filling into a disk, about 3 1/2 inches across. Spread a little flour out on a plate and dredge the disk on both sides. 


Heat a little vegetable oil in a frying pan on medium heat. Fry the meat disk for a few minutes on each side, until well browned and cooked through. Set aside when done.

This pan from IKEA replaced the old, battered potsticker pan

Wipe out the pan and add a bit more oil. Fry the egg to your preference. For sandwiches, I like mine over medium, so that the yolk is still soft, but does not run out when you bite into it. While the egg is cooking, slice the bun in half and warm it up in a toaster oven.

To assemble the sandwich, squirt a little mayo on the bottom bun, add the greens, then the meat. Top with the egg and some more mayo.