Showing posts with label stir fry. Show all posts

Friday, May 20, 2022

Upgrade: Fish-Fragrant Eggplant (魚香茄子)

I first wrote about fish-fragrant eggplant (yuxiang qiezi) back in 2017. That post was already the product of quite a bit of experimentation. In the years since, the dish has remained a family favorite and we've had it many times both at home and from restaurants. In that time, I have continued to tweak the recipe. The basic structure of this new version is consistent with my previous one, but subtle changes can bring great improvements. A great lesson from the upgrades series has been that recipes aren't settled things. Make the food that you like, which is not necessarily what someone else wrote down.

The dish continues to be built around 1 1/2 lb. of Chinese eggplants. Traditionally, the eggplant is deep fried, and that's how you would get it at a Sichuanese restaurant. Eggplants absorb a lot of oil, so they have to be pressed to expel it before continuing on. Getting a pot of hot oil ready is a hassle for what amounts to a single step in the recipe, so I previously got by with stir frying the eggplant. This also takes a long time and doesn't quite achieve the right effect. Instead, I now "air fry" the eggplants to brown them and drive off moisture. This can be done unattended while you prepare the rest of the ingredients. I also do the same for dry-cooked string beans

The other big change is in the sauce. In my old version, it's simply too salty, so I cut the soy sauce in half. Instead, I lean into the sweet-and-sour aspect of the dish and bring up both the vinegar and sugar. The result is a more nuanced flavor which is no longer dominated by the soy sauce. I now like to add some ground meat to the dish, a familiar flavoring method seen in other Sichuan dishes like mapo doufu and the aforementioned string beans. Traditionally, only a small amount is used (1/4 lb. would probably be about right), but I like to bulk it up a bit to make this the main event in a dinner for two. In a meal for more people, I would make a separate meat dish. To make this vegetarian, the pork can certainly be omitted and the stock replaced with mushroom broth. As with my other versions of Sichuanese dishes, I split the spicy doubanjiang with Koon Chun bean sauce to take the heat down - feel free to adjust to taste. 

Sunday, January 9, 2022

Upgrade: Pork Fried Rice

It's hard to believe I posted my very first recipe on this blog ten years ago today. That makes me feel pretty old. At the time, I was one semester into graduate school, living by myself, and figuring out cooking as I went along. I look at some of those early recipes and laugh about how wordy they were despite the simplicity of the dishes. I thought the best way to celebrate this anniversary would be to "upgrade" that first post. A lot has changed since then, but plenty has stayed the same: look carefully and you'll see both the original wok and spatula still in service. After all these years, fried rice remains a staple weeknight dinner and I'm still as much of a fan as I was then. 


Fundamentally, I stand by the original recipe even though I probably never made it like that again. It was quite gratifying to learn (many years ago) that my future in-laws started making fried rice after reading that post. Instead of making the pork, they would get pork from a Chinese takeout to put in it. Although it amuses me to this day, I don't exactly disagree with the approach. To tell the truth, I rarely cook meat specifically for fried rice. Usually, I use a few pieces of lap cheong sausages or char siu from the freezer. So, let's consider this one a special occasion fried rice, fit for a ten-year blog anniversary. I switched from pork loin to the ever-versatile pork shoulder and applied the same marinade from my more recent beef chow fun recipe. These days, I rarely stir fry meat without a marinade.

In recent years, I always include some kind of vegetable in fried rice. Napa is my most commonly used choice, but I happened to have some Shanghai bok choy on hand this time. Another change from the 2012 recipe is how I cook the eggs, a technique I learned from a Kenji video. You can save a little time by pushing the rice over and cooking the eggs in the other half of the pan. I continue to serve with Worcestershire sauce, but also enjoy some Lao Gan Ma chili crisp to spice things up.

Sunday, August 15, 2021

Upgrade: Mapo Doufu (麻婆豆腐)

I first made mapo doufu seven years ago, the first of my many adaptations from Peimei's Chinese Cook Book. Although I love the dish, Ariel did not, and stopped making it for years. Recently, I've reexamined the recipe and come to the conclusion that it needed an upgrade. My new version offers plenty of savory sauce, a well-balanced spice level, and delicious silken tofu, while not being overly oily. I'm pleased to say this one won her over. It helped to leave the mouth-numbing Sichuan pepper on the side and allow individuals to sprinkle it on their own portions. I enjoy it, but not everyone is a fan!

The tofu is the centerpiece of the dish. Peimei recommended deep frying the tofu before adding to the sauce. Not only do I find this completely unnecessary, I think it's wrong. No mapo doufu I've ever had involves that. In my old version, I stir fried it, but I don't do that now. The tofu can remain soft and simply warm up in the sauce. Since I'm not frying it, a firm tofu is also not needed. Instead, I recommend soft silken tofu. It will break up a bit, but that's fine. Silken tofu usually comes in a carton instead of a plastic tub and can typically be found at Asian markets.

Another major change here was increasing the amount of sauce. I like lots of sauce to serve over rice. To balance the spice level, I mix the Sichuan-style hot bean paste (doubanjiang) with Koon Chun bean sauce. This is not traditional, but keeps it balanced. If you like it spicier, feel free to shift the balance towards more doubanjiang. I used the chunky version of the Koon Chun sauce, rather than the ground one. The final major upgrade is the stock. I used my homemade pork stock, made by simmering two pork shoulder blades with ginger and scallion for a few hours. The stock is unsalted; using a salted stock could result in the sauce getting too salty.

Wednesday, May 26, 2021

Diced Chicken with Walnuts (桃仁雞丁)

To kick off the summer, we're taking on another recipe from Pei Mei's Chinese Cook Book. This one is adapted from one I found in the Southern China section of volume I. The Chinese name taoren jiding translates to "walnut diced chicken." Interestingly, this recipe bears a striking resemblance to what most Americans picture as Chinese food. American-Chinese cuisine evolved specifically from Cantonese cooking, and this dish is a clear predecessor. Some combination of meat, vegetables, and nuts stir fried together in a sauce is a formula that comes up again and again. Years ago, even I threw together a cashew chicken recipe that's not all that different to this. 

I made a few changes from Pei Mei's original. As with so many of her dishes, she deep fries the chicken. I decided to streamline the process by stir frying the chicken instead, avoiding the hassle of cleaning up so much oil. I might try it that way in the future. She also recommends using hot peppers, while I used bell peppers. Some or all of those can be substituted for something spicier if you so choose. I chose to not salt the sauce ahead of time. You can always add salt at the end if you want to, and I added a few pinches. It's also worth mentioning she approves of cashews a substitute for the walnuts. 

This dish came out well. In the past, I've typically minced ginger, but I liked the bursts of ginger here from the larger slices. I might put in a little more next time. The flavor profile is pretty classic. A little more sugar would likely tilt it in American-Chinese direction, if you're into that. There's also plenty of leeway in the choice of chicken. Pei Mei suggests either deboning an entire (small) chicken or using breasts. I used thighs here. I served with steamed rice to complete the meal.

Sunday, January 17, 2021

Shrimp Noodle Bowls

About a year on from the initial COVID-19 outbreak in Hubei, our lives continue to be dominated by the pandemic. Ariel and I have maintained our own safety protocols, which include contactless pickup of groceries about every two weeks. It's important as ever to plan for meals which lack the freshest of produce. The noodle bowls in today's post were a recent invention of mine, intended as an easy lunch that uses up odds and ends with a long shelf life. When Ariel asked me to make them again, I knew it was time for a blog post!

The noodles I used here are thin rice noodles called Xinzhu mifen (新竹米粉), which originate in the Taiwanese city of Hsinchu. I have only used these in one other recipe (minced pigeon), where they are just a fried topping and not the main event. Being so thin, they don't need to be parboiled and only need to soak for a few minutes to be ready to eat. All the vegetables I used have a long shelf life, and the shrimp can be defrosted just before cooking. This is the kind of dish with infinite variations depending on what is on hand. Scallions are a nice addition if available, but don't hold up quite as well as carrots and regular onions. The runny egg on top was Ariel's idea. While I have labeled it "optional," it's a great addition which pulls the whole thing together. This recipe makes enough for two bowls.

Tuesday, September 8, 2020

Sliced Beef with Broccoli (玉蘭炒牛肉)

Other than last week's braised spare ribs (a loose adaptation at best), it's been nearly 3 months since I've directly taken on a Pei Mei recipe. Today's dish is sliced beef with broccoli. The Chinese name is yulan chao niurou. This translates to "magnolia stir fried beef," yet another reference to a flower in the name of a dish. I assume this is a poetic flourish, but yu also means jade, which might refer to the green broccoli. Everything in this dish is pretty much classic Chinese, but it's notably one (like egg drop soup) that became a staple of American Chinese takeout. Ariel noted this was very similar to what she grew up eating.

Pei Mei's original recipe calls for gailan, a Chinese broccoli that has leaves at the ends. It's commonly found at Chinese stores, but as we have very limited access during the pandemic, I used regular "western" broccoli instead. Either way works, but if you do have access to gailan, it is delicious. For the beef, she calls for tenderloin (the Chinese just says tender beef), which I think is an odd choice. Since we are using the baking soda tenderizing technique and slicing it very thin, a tougher, more flavorful cut makes more sense. I use flank steak, which is widely available. I previously used the exact same tenderizing (sometimes called "velveting") in the beef chow fun recipe. My recipe roughly doubles Pei Mei's.

The sauce consists mostly of oyster sauce, which is an ingredient I haven't discussed before on the blog. It's another of the many umami-rich Chinese sauces and pastes, but instead of fermented beans, it's made from oysters. This makes it a relative of Hong Kong's famous XO sauce, which is made from scallops. I don't use it all that often, but it's good to have on hand for when it does come up. The sauce in this recipe is enough to coat everything, but is not meant to dominate the dish. The takeout style is definitely saucier, so take that into account if you want to go that route. Overall, this one comes together reasonably easily, and is a very satisfying meal. Additionally, swapping out the gailan for regular broccoli means everything can be found at an average Midwestern grocery store.

Sunday, June 21, 2020

Beef Chow Fun (乾炒牛河)

Beef chow fun is a famous Cantonese dish combining wide rice noodles with tender sliced beef. Several years ago, I posted a chicken chow fun recipe using the same noodles. While this is not exactly an "upgrade," this recipe improves upon it with a better marinade inspired by Pei-Mei, and a sauce to tie it all together. This is also a companion recipe to my chow mein recipe from a few weeks ago. Grandpa and grandma would often serve us both in one meal! The name qianchao niu he is interesting. The first part - qianchao means "dry fried," similar to dry-cooked string beans. I'm not sure of the history of this dish, but this name may suggest the beef was originally deep fried. The rest of the name refers to beef (niu) and the wide noodles (he fen) in the dish. I was very happy with how this turned out, but in retrospect, this recipe makes a lot of food. I would probably halve everything next time, but there's nothing wrong with having some leftovers. 


I took the recipe for the beef from "Sliced Beef with Broccoli" in Pei-Mei Volume II. She tosses the beef with some blanched gailan (Chinese broccoli) and a sauce. The beef is phenomenal on its own, and I would happily gobble it up with some rice. When I cook flank steak whole, I typically pan fry it to medium rare to avoid drying it out. Here, the thinly sliced beef is cooked through completely, yet remains super tender. The key is the marinade, which includes baking soda as a tenderizer. If you've never tried this technique before, it will amaze you.

This recipe uses mostly pantry staples and easily found ingredients. The noodles can sometimes be hard to find, though. Rice noodles come in many shapes and sizes. I previously used the super-thin kind for minced "pigeon" lettuce cups. Medium-width rice noodles are used for pad thai. The widest rice, called shahe fen (sometimes transliterated ho fun), are essential to this dish. Part of the problem is that this usually doesn't appear on the package and, unless you know the Chinese word (沙河粉), you'll have to eyeball it. Although dark soy sauce is not typically added at the end of stir frying like it is here, it's essential to achieving the signature brown look for the noodles. Classic beef chow fun usually has mung bean sprouts, which are tragically not sold in Vermillion. I included napa and onion instead, which also makes this into more of a complete meal.

Friday, May 29, 2020

Char Siu Chow Mein (叉燒炒麵)

When we're in need of a quick, easy meal, we often turn to char siu. I usually make a few pounds at a time, and it holds in the freezer quite well. Along with fried rice, char siu chow mein is my most common way of using char siu to put together a meal. I've been making this for several years, and it's definitely become a family favorite. Chow mein was also one of grandpa's favorites. He liked to put a little hot Chinese mustard on it, while grandma liked chili oil. I put a little of both on mine. This recipe makes enough to enjoy dinner for two and lunch the next day, which is always a plus when you're stuck at home.


This is a relatively simple dish, which relies on the core trio of napa cabbage, char siu, and egg noodles. I'm still using my second char siu recipe (from 2016), though I've been experimenting with maltose instead of honey. The egg noodles can be reliably found at Chinese stores in their dried form. Look for a bag of thin, yellow noodles with pictures of chickens on it. Fresh noodles sometimes be found in the refrigerated section. One of these days, I'd like to try making them at home. A nice variation to this is to add some thinly sliced garlic in with the napa cabbage. For a vegetarian version, you could replace the char siu with black mushrooms.

Sunday, March 17, 2019

Sausage and Napa Cabbage Fried Rice

It is safe to say fried rice is central to the mission of No Free Lunch. Not only was it a staple of my family's diet from when I was young, it can also be endlessly customized. Fried rice was my first recipe here (can you tell it's the same wok?), and I've done three more of them over the years. Most recently (in 2014), I wrote about how Pei Mei's Chinese Cook Book  led to me thinking more about fried rice and what really makes it good. To me, fried rice is about using humble ingredients to get something greater than the sum of its parts. Over time, I've settled into a go-to base fried rice recipe - the one I'm sharing today. 


This recipe makes use of some classic Chinese staples: napa, sausage, egg, and green onion. The amounts given here are flexible and can be adjusted to taste. The method of slowly cooking the sausage to render the fat is similar to how bacon is cooked. If Chinese sausage is unavailable (or if it is preferred), bacon could be used. Various other ingredients can also be added, such as shrimp or black mushrooms. 

Also, happy St. Patrick's Day. While we didn't have any corned beef and cabbage, I hope you enjoy this dish that also involves preserved meat and cabbage. I did have a Guinness with it!

Ingredients
  • 1 1/2 lb. Napa Cabbage (about 1/2 head)
  • 4 Chinese sausages (lap cheong)
  • 4 eggs
  • Dash of sesame oil
  • 4 cups cooked rice
  • 3 green onions
  • Vegetable oil
  • Kosher salt and white pepper to taste

Instructions

Slice the napa crosswise, into strips about 1/2 inch wide. Place the napa in a large bowl (I use this bowl for serving the fried rice later) and salt generously. Toss to coat. Let the napa stand for about 20 minutes. 


Take this time to prepare the remaining ingredients. Slice the sausages into thin disks. Crack the eggs into a bowl, beat with a fork, and add a dash of sesame oil and a pinch each of salt and white pepper. Chop the green onions. When ready, take a handful of napa, wrap in a dish towel, and squeeze out as much water as possible. Continue working in batches until all the napa has been squeezed out. Finely chop the napa and set aside.


Heat up a wok on medium heat. Add some oil and cook the eggs, constantly scraping the bottom. Cook until mostly solidified, but still soft. Set the eggs aside. Scrape out the wok. Still on medium heat, cook the sliced sausage. Toss frequently. The goal is to render out the fat in the sausages while not burning them. Tilt the wok to reserve the rendered fat in the wok and set the sausage aside. 


Turn the heat up to high and stir fry the napa. Depending on how fatty the sausages were, you may have to either remove some fat or add vegetable oil. Cook a few minutes, until lightly browned, and set aside. 


Add more oil to the wok, then add the rice and chopped green onion. Break up the rice as you add it to the pan. Stir fry for a few minutes, letting the rice stand briefly before tossing. Add the cooked napa, sausage, and eggs. Break up the eggs while adding them in. Cook a few more minutes, continuing to periodically toss the rice. 


Serve with condiments of your choice. As always, I recommend Worcestershire sauce, but Lao Gan Ma sauce is good if you like it spicy.

Friday, February 23, 2018

Fish Slices with Tomato Sauce (茄汁魚片)

Without any premeditation on my part, the last four recipes I've posted have involved pork, so I'd say its time to shift gears and do some fish. Sweet and sour fish is one of those dishes I frequently enjoy when eating out, but had never tried making at home. Along with eggplant Sichuan style, it's often one of the first dishes I try at Chinese restaurants. There are a lot of variations, and I tend to prefer a more vinegar-forward profile rather than a sweeter one. Peimei has a sweet and sour fish recipe found in the Eastern China section of her first book (this refers to Jiangsu, Zhejiang, and Anhui provinces, along with the city of Shanghai). This recipe begins with chopping the head off the fish, butterflying and deboning. The fish is battered and fried to spectacular results, and Peimei comments that "most of our foreign friends prefer this way." I did not have a whole fish nor the desire to undertake this. 


What I did have was a pound of assorted cod bits I picked up at Trader Joe's for four bucks. I found another recipe in the Southern China section (Guangdong and Fujian provinces and the city of Hong Kong) that involved fish slices and a very similar sauce, called "fish with tomato sauce." The Chinese name is pronounced qiezhi yupian in Mandarin. I was puzzled by this at first, since the most literal translation would be "eggplant sauce fish slices." This being a southern recipe, I asked Dad for some context and found out the Cantonese pronunciation of qiezhi contains the key: keh jup, thought by many to be the origin of the English word ketchup. The usage of qie here is just an abbreviation for fanqie, the Chinese word for tomato. Amusingly, this literally translates to "foreign eggplant."

The recipe itself is pretty simple. Rather than battering the fish, we simply dredge it in cornstarch after marinating, much like in the sweet and sour pork recipe I posted three years (it's been that long already?) ago. As I mentioned above, I used cod pieces, which were of assorted shapes and sizes. This wasn't ideal, and I would recommend starting with proper fillets and cutting the slices to be more uniform. Cod worked well here, but other fish would do fine. I will probably try it with swai in the future. Overall, I enjoyed the dish, but would make it more vinegar-heavy next time to suit my own preferences.

Ingredients

  • 1 lb. white fish fillets (I used cod)
  • 1/2 small onion, diced
  • 10 (approx.) small black mushrooms
  • 1/4 c green peas
  • 1/2 c (approx.) cornstarch for dredging
  • Vegetable oil for frying
Marinade
  • 1 egg white
  • 1 Tbs cornstarch
  • 1/2 tsp salt
Sauce
  • 3 Tbs sugar
  • 3 Tbs white rice vinegar
  • 6 Tbs water
  • 3 Tbs ketchup
  • 1 Tbs Shaoxing wine
  • 2 tsp cornstarch
  • 1/2 tsp salt
  • 1 tsp sesame oil

Instructions

Start out by soaking the black mushrooms in warm water. I press a folded paper towel on top of the mushrooms to keep them covered with water. Check after half an hour. If the mushrooms are still firm, chop in half, remove stems, and resume soaking. When mushrooms are fully softened, squeeze water out and dice.

Fish pieces marinating

After starting the mushrooms soaking, prepare the fish. Cut fish into small pieces, about one inch squares. In a large bowl, mix the marinade ingredients, add fish, and toss to coat well. Let the fish marinate in the fridge for about 30 minutes.

While the fish is marinating, mix all the sauce ingredients in a bowl and keep ready for later. This is also a good time to dice the onion.

Fish after frying

Preheat oil in deep fryer or wok to 375 degrees F. When the oil is ready, spread cornstarch on a plate and dredge the fish slices on both sides. Fry in batches until crunchy. Each batch should take no more than a minute in the oil. Set the cooked fish aside on a paper towel lined plate.

Sauce, ready to add the fish

Heat a small amount of oil in a wok on high heat. Stir fry the onion and mushroom for about one minute. Stir the sauce again and add to the wok. Add the peas and cook for another minute. Add the fish. Turn the burner off and toss to fully coat the fish. 

Notes

This is one of my most faithful recreations of a Peimei dish. I did increase the amount of peas from the original. The amount of mushrooms and peas can be adjusted to personal taste. If I made this again, I would probably also increase the vinegar-to-sugar ratio bring the sourness forward a little more.

Monday, October 23, 2017

Eggplant Sichuan Style (魚香茄子)

This is a post that's been a long time coming. I think back to five years ago, when I would dig something out of the fridge, make whatever came to mind, and throw together a post. I don't do that anymore, and I've become something of a perfectionist when it comes to my recipes. I've made this dish several times over the last year or so, and I finally feel it's ready to see the light. I based this recipe on Peimei's version, with some adjustments for clarity, accessibility, and my own (garlic-favoring) taste.


The name yuxiang qiezi directly translates to "fish fragrant eggplant." As an aside, the character 香 (xiang) is the "hong" in Hong Kong, which means "fragrant harbor." As I understand it, the sauce in this dish was originally associated with fish, but substituted for more readily available ingredients, such as eggplant. Over the last few years, I've tried many versions at local Sichuanese restaurants in both Bloomington and Lafayette, and I often use it as a benchmark when trying a new place. On English menus, it's often called "eggplant with garlic sauce," but to make sure, 魚香茄子 is a Chinese word worth learning!

The stars of the show here are the eggplants themselves. You want to use Chinese eggplants, which are longer and thinner than regular ones. I got the pictured specimens at the farmers' market, but most Asian stores have them. Try to select firm eggplants of similar width. As with the other Sichuan dishes I've done, doubanjiang (spicy bean paste) -- is featured here. Usually, I recommend toning it down to a desired heat by mixing with Koon Chun bean sauce. I generally go half and half, as stated in the ingredient list, but for true-blue Sichuan style, you'd want to use the full 2 tablespoons of the hot stuff.

Ingredients

  • 1 1/2 lb. Chinese eggplant (about 4 eggplants)
  • 2 tsp ginger, minced
  • 4 large cloves garlic, thinly sliced
  • 1 Tbs hot bean paste (doubanjiang)
  • 1 Tbs Koon Chun bean sauce (adjust ratio of bean sauces to desired spiciness)
  • 4 Tbs light soy sauce
  • 1 Tbs black vinegar
  • 2 tsp sugar
  • 1 cup stock (chicken, pork, or seafood)
  • 1 Tbs sesame oil
  • 1 Tbs cornstarch
  • Handful green onion, chopped
  • Vegetable oil

Instructions

With this dish, it helps to get all your ingredients ready ahead of time. Remove the ends of the eggplant and cut into 1 1/2 to 2 inch long segments. Quarter each piece lengthwise. You should end up with roughly "thumb sized" pieces (Peimei's words). 


Heat oil in wok on high heat. Working in batches, stir fry the eggplant until well browned on all sides. Be careful not to crowd the pan. I recommend 3 batches for 1 1/2 lb. of eggplant. When each batch is done, set aside in a paper-towel lined bowl or plate. You will need plenty of oil, as eggplant is highly absorbent. When done, use paper towels to press excess oil out of the eggplant.


Add more oil to pan and briefly cook the ginger and garlic, just a few seconds. Add both bean sauces and cook a few more seconds while stirring together. 


Add the vinegar, sugar, stock, and sesame oil. Bring to a boil and return the eggplant to the pan. Cook, stirring frequently, until the sauce reduces by about half. Mix cornstarch in a bowl with a little water to form a slurry. Add cornstarch mixture to the sauce and stir to combine. 


Transfer to a serving bowl and mix in green onions. Serve with rice.

Thursday, July 6, 2017

Minced "Pigeon" in Lettuce Cups (生菜鴿鬆)

This is one post I'm very excited about. I have flipped past this recipe many times while looking through Pei Mei's books, and had not given much thought until recently. It's called "Minced Pigeon," after all. After trying some excellent versions of it in the Bay Area recently, I decided to give it a go, and I'm so glad I did. I'd venture to say this is almost a perfect dish. It really has it all: three meats, four vegetables, mushrooms, and noodles, all wrapped up in crunchy lettuce leaves. It comes together terrifically, and this is one I'll certainly be making again.


Pei Mei's recipes are almost universally simple. They all fit on one page, with a maximum of about four steps. That being said, this one has a lot going on. As usual, I made some adjustments to the recipe. The main change is replacing the pigeon with chicken thighs (this substitution is in the original recipe). Another big one was reducing the amount of noodles by about half. She recommends using water chestnuts, with bamboo shoots as a substitute, but I went for a mix of both. The Chinese name, shengcai ge song, translates to "lettuce pigeon mince." For the last character, I had to consult dad and grandpa, but overall this was another straightforward translation.


The new exotic ingredients in this recipe are the thin rice noodles. These are often called "rice sticks." There seems to be some variance in the width of the noodles, and I went with the thinnest ones I could get. I haven't tried them in anything else, but my guess is they would work pretty well in soup or pan fried. It's worth mentioning the chicken liver as well, since I've only used them once before. I bought a tub of them, and only used 4. The rest become a fantastic pâté using Jacques Pepin's recipe.

Ingredients
  • 3 oz. (approx.) thin rice noodles
  • 1 lb. boneless chicken meat
  • 3/4 lb. boneless pork shoulder
  • 4 chicken livers
  • 1 onion (about 1 1/2 cup diced)
  • 8 dried black mushrooms
  • 1 8 oz. can water chestnuts, drained and chopped
  • 1 8 oz. can bamboo shoots, drained and chopped
  • 1 cup green peas
  • Vegetable oil
  • Iceberg lettuce leaves
Marinade
  • 1 Tbs. light soy sauce
  • 2 tsp. salt
  • 2 egg yolks
  • 4 tsp. cornstarch
  • 1 tsp. sugar
Seasoning Sauce
  • 2 Tbs. light soy sauce
  • 2 Tbs. chicken stock
  • 2 tsp. cornstarch
  • 2 tsp. salt
  • 2 tsp. sesame oil
  • 1/2 tsp. black pepper

Instructions

Soak the mushrooms in warm water for about 30 minutes. The mushrooms will float, so use something to weigh them down and keep them in the water. When done, discard the stems and dice the rest.


While the mushrooms soak, prepare the meat. Trim off excess fat from the chicken and pork, and mince into small pieces, about 1 cm. square. Mince the chicken livers and combine all three meats in a bowl. Add all marinade ingredients and set aside for about 10 minutes.


Heat a few inches of vegetable oil in a wok on high heat. Break up the noodles into chunks that will easily fit in the wok. Once the oil is very hot, carefully place the noodles in the oil. The noodles will immediately and dramatically puff up. Flip over to puff the other side, and set aside to cool. Do this for all the noodles. Allow the oil to cool a bit and transfer to a container. We will use the oil to stir fry the other ingredients later.


In batches, stir fry the marinated meat mixture on high heat until cooked through and browned. I did this in three batches. Set aside when done. Stir fry the diced onion for a few minutes, then add the mushrooms, water chestnuts, and bamboo shoots. Mix all seasoning sauce ingredients in a bowl. Stir fry another minute or two, then add the meat, peas, and sauce. Stir together.


Crush the fried noodles into small pieces. Pour the meat and vegetable mixture over the crushed noodles to serve. Serve with the lettuce leaves, which can be used to wrap the mixture.

Tuesday, December 22, 2015

Sautéed Chicken Chengdu Style (成都子鷄)

A few days ago, Ariel asked me to make "five spice chicken," which I had apparently made before from a Peimei recipe. Unfortunately, I had no idea what this was and had no recollection of making it. I eventually realized it was an edited version of her "Sautéed Chicken Chengdu Style." The Chinese name (Chengdu ziji - Chengdu chicken) refers to the capital city of Sichuan province. As such, the recipe includes the two classic hallmarks of Sichuanese food: Sichuan peppercorn and hot bean paste. Peimei very rarely uses five spice, but I find it is a useful substitute for the peppercorns if a less pungent flavor is desired. 


This is an interesting recipe coming from Peimei. With no marinade and no deep frying, this one is unusually quick and hassle-free. I follow the basic premise of the dish, but make significant alterations to my own taste; as such, this one is best considered "inspired by" Peimei. While simple, this dish is very nice. The chicken is tender and juicy, and the sauce is great soaked up into a bowl of rice. The five spice itself lends a subtle aroma, as opposed to the assertive Sichuan pepper.

Ingredients
  • 1 1/2 lb boneless chicken (any parts of your choice)
  • 1/2 Tbs five spice powder (can use Sichuan pepper here)
  • 2 stalks celery, diced
  • 2 cloves garlic, minced
  • 1 Tbs minced ginger
  • 2 Tbs bean sauce (use hot bean paste or a combination of the two for a spicier dish)
  • 1 Tbs sherry or Shaoxing wine
  • 1 Tbs black vinegar
  • 1 tsp sugar
  • 1 cup hot water
  • 2 green onions, chopped
  • 1 Tbs corn starch
  • Splash of cold water
  • Salt to taste
  • Vegetable oil

The original recipe suggests using a half chicken. I used thighs instead, and whatever you have on hand should work fine. Oddly enough, Peimei says to cut the chicken into cubes, bones and all. This didn't make much sense to me, so I deboned mine. The spice level can be adjusted by mixing regular fermented bean sauce and hot bean paste (doubanjiang). Going full hot bean is very spicy, and you may wish to experiment with half-hot or quarter-hot. I do this to tone down many Sichuanese recipes, such as Mapo doufu

Instructions

Cut the chicken into 1 inch cubes. Remove bones, leave skin if desired (I removed it). Heat oil on high heat. Toss chicken with five spice powder. 


Stir fry the chicken for a few minutes, until lightly browned, but not cooked through. Add the celery, garlic, and ginger. Stir fry briefly. Add the bean sauce and continue cooking for a few more minutes.


Mix wine, vinegar, sugar, and hot water and add to the pan. Bring to boil, reduce heat to medium. Cook, covered, for 5 minutes. Mix the corn starch into a paste with a little water and add to the pan. Reduce for a few minutes and stir in green onion. Salt to taste. Serve with rice.

Wednesday, July 1, 2015

Shredded Pork with Steamed Buns (京醬肉絲)

Today's post is inspired by two recipes I found in Peimei's Chinese Cookbook. The first recipe, the shredded pork, is transliterated jingjiang rousi. This is a classic northern Chinese dish, and as such was sort of outside my normal milieu when it comes to Chinese cooking. Peimei serves it with dan bing, the same super-thin pancakes which often wrap Peking duck. As these are quite labor intensive, I decided to save them for another day and make the much simpler sandwich-style buns in the picture. I have been dabbling with various bun recipes for a few years now, but have been waiting to perfect them before posting. These buns, by contrast, are stunningly simple, containing no yeast and requiring no raising. Peimei's recipe, called "Flower Shaped Buns," has a few extra steps to make them prettier, which I omitted.


The name translates literally to "capital city paste meat strings," but as with many Chinese expressions, brevity rules over ease of translation, and implied meaning is left out. A more accurate translation might be "shredded meat with bean paste from Beijing." Peimei goes with "Shredded Pork with Bean Sauce." I made relatively few departures from the original recipe, other than roughly doubling it. For the buns, we used butter instead of lard, and they came out just fine.


Today's recipe features a new "exotic ingredient" -- sweetened soybean paste. Just when I think I have used just about every possible fermented bean product, another one always manages to pop up. This stuff is quite thick, and has a smooth consistency and that deep umami that only fermented beans can provide. It's definitely milder than the funky fermented black beans or fermented tofu I have used in the past. Despite the name, I did not find the paste to be all that sweet, as the whole fermented bean thing tends to take over. I found it at the Asian grocery store.

Ingredients

Pork
  • 3 1-inch thick slices pork loin (about 20 oz)
  • 2 Tbs soy sauce
  • 2 Tbs cornstarch
  • 3 Tbs cold water
  • Vegetable oil for frying
  • 4 large green onions
Sauce
  • 3 Tbs sweetened soybean paste
  • 1 Tbs sugar
  • 1 1/2 Tbs water
  • 3 Tbs vegetable oil
Buns
  • 1 1/2 cup all-purpose flour
  • 2 tsp baking powder
  • 1 Tbs melted butter (substituting for lard)
  • 1 Tbs sugar
  • Sesame oil

Instructions

Shredded Pork

Cut the pork into long, thin strings. I cut each piece of pork loin into thin strips, then halved these lengthwise, as shown in the picture. In retrospect, I think going thinner is better, perhaps into 3 or 4 pieces instead. In a bowl, mix the pork with the soy sauce, cornstarch, and water. Let this marinate in the refrigerator for about 45 minutes. Cut the green onions into pieces about 2 inches long, then slice them up lengthwise into 2-4 smaller pieces. Set these aside. If you are making the buns, you can make them while the pork marinates. The recipe for the buns is set aside at the end of this post.


Heat up plenty of oil in a wok on high heat. Stir fry the pork until browned and cooked through. Set aside and clean out the wok. I found the marinade really burned onto the wok, and had to deglaze with water and scrape before moving on.


Heat up the 3 Tbs oil for the sauce, again on high. Combine soybean paste, sugar, and water in a dish and stir well. Add this mixture to the hot oil and cook for about 30 seconds. Add the pork and stir to coat. Serve with the green onion and buns and eat as small sandwiches.

Buns

Combine the flour, baking powder, butter, and sugar in a large bowl. Use your hands to mix together, then knead into a smooth dough. Cut the dough into about 20 equal pieces (for larger buns, you can do fewer). 


Flatten each piece of dough into rounds by hand, with the cut sides aligned as the top and bottom. These should be around 3 inches in diameter. Brush one half of each round with sesame oil, and fold them over into half-circles. This method is quite rustic, and they will not all end up exactly the same, but that's fine.


Place the buns in a bamboo steamer and steam for 8 minutes. As usual, we used steamer liners, but you can also put parchment paper under each bun.

Saturday, May 23, 2015

Rice Cakes Revisited

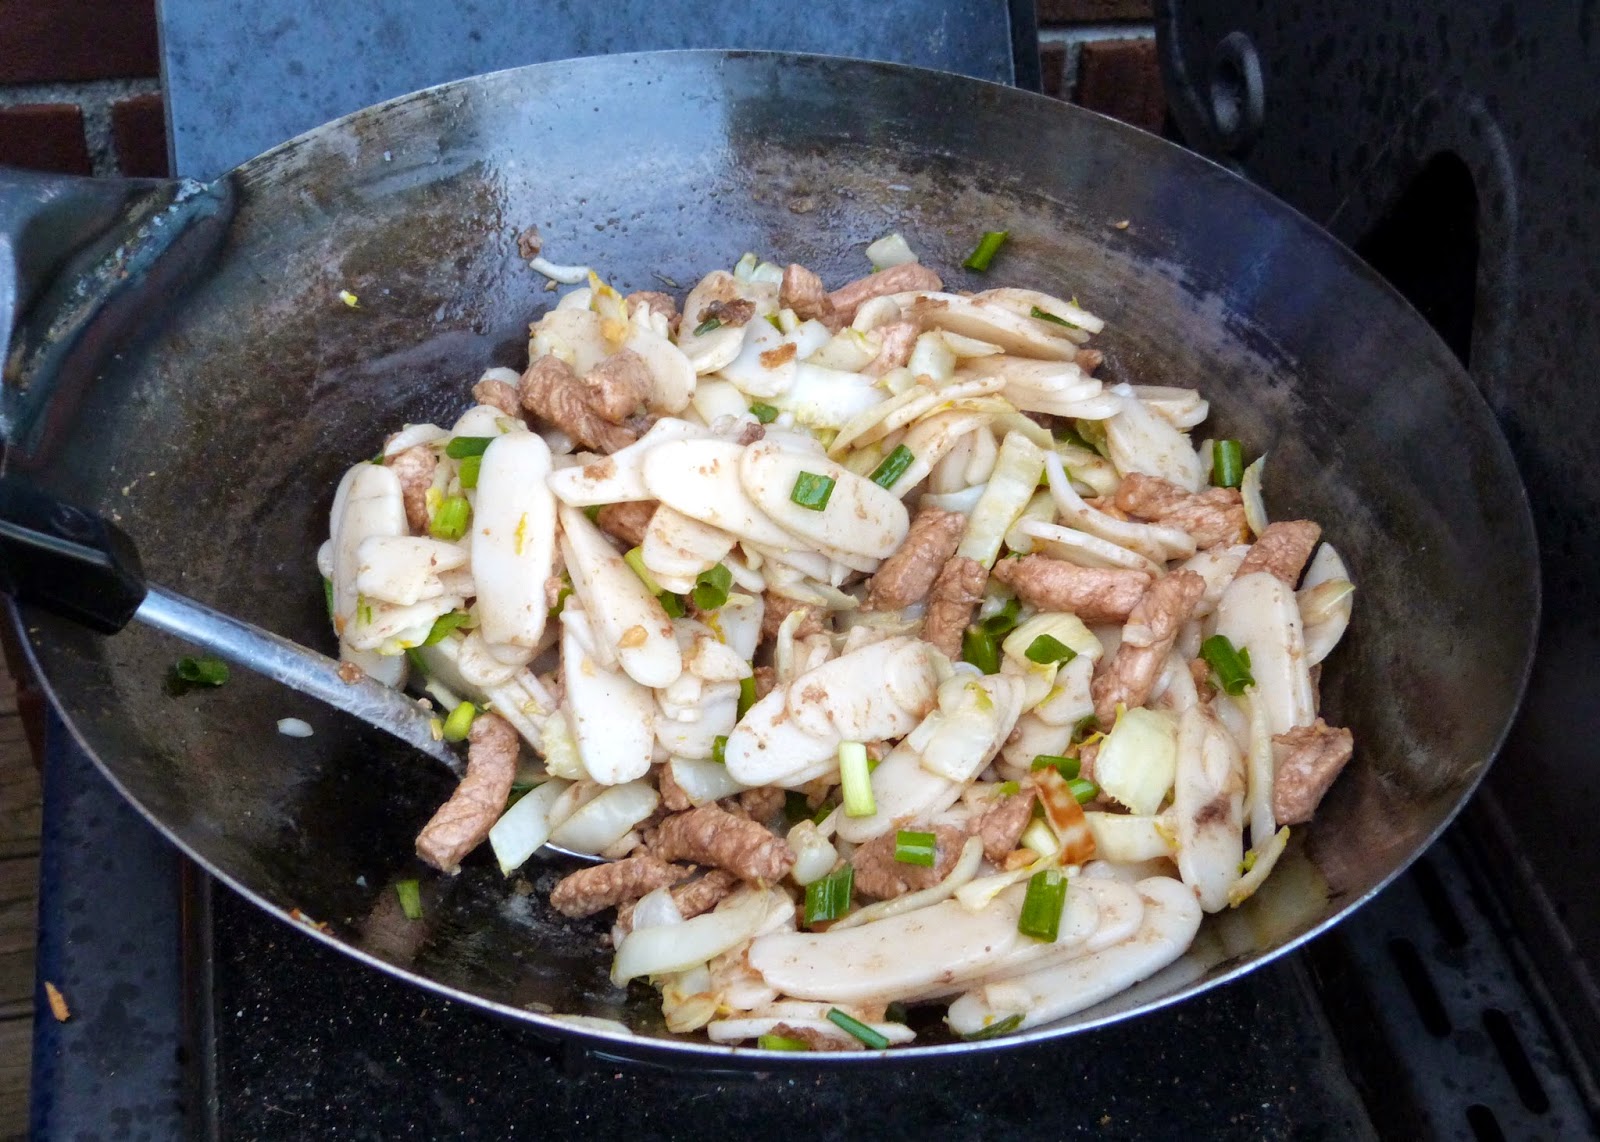
Stir fried rice cakes, known as "tongue depressors" in my family, were an early post on No Free Lunch. Since then, I have continued to make them regularly, and Ariel now regards them to be as much of a comfort food as I do. Since the original post, a lot has changed in how I go about preparing these beauties. Today's recipe is basically a more sophisticated, yet still easy update. The main differences are that I'm using marinated strips of pork rather than ground, salted napa cabbage instead of regular green cabbage, and lightly saucing the dish to pull it all together. I have also figured out that there is no need to parboil the rice cakes. Soaking them for a day softens them enough to go straight to the stir frying stage. This also makes them a little less prone to clumping together, though this does still happen.


Since this is the first time I've done a full-blown recipe using napa cabbage, it is worth a short discussion. Napa, known as da bai cai (big white vegetable) in Chinese, is a gentle and versatile vegetable that I have only recently starting using, and I am hooked in a big way. Each piece has a firm white center that is great for stir frying, and green leaves that are excellent raw. I usually trim off the leaves and save them. This particular head of napa provided greens for fish tacos and hot sandwiches. The leaves are also nice in salads. This recipe also uses my old stir frying standbys, bean sauce and ground bean sauce. These two sauces are more or less interchangeable in terms of use, but I elected to use ground for the marinade and non-ground for the sauce. I like the little bean bits to show up in the sauce, but they aren't necessary in the marinade. If you only have one or the other, it will be perfectly fine.

Ingredients
  • 1 500g package of dried rice cakes (nian gao)
  • 1 lb pork loin (about 4 pieces, if sliced)
  • 1 head Napa cabbage (about 1 lb)
  • Salt
  • Several green onions, chopped
  • 1 Tbs bean sauce
  • 1/2 cup stock (chicken or beef)
  • Vegetable oil
Marinade
  • 2 Tbs ground bean sauce
  • 2 cloves minced garlic
  • Splash of dry sherry
  • Splash of black vinegar
  • Black pepper

Instructions

About 24 hours in advance, start soaking the rice cakes in room temperature water. You can get away with less soaking, but I try to plan ahead. Change the water the next morning.

The cakes after 24 hours

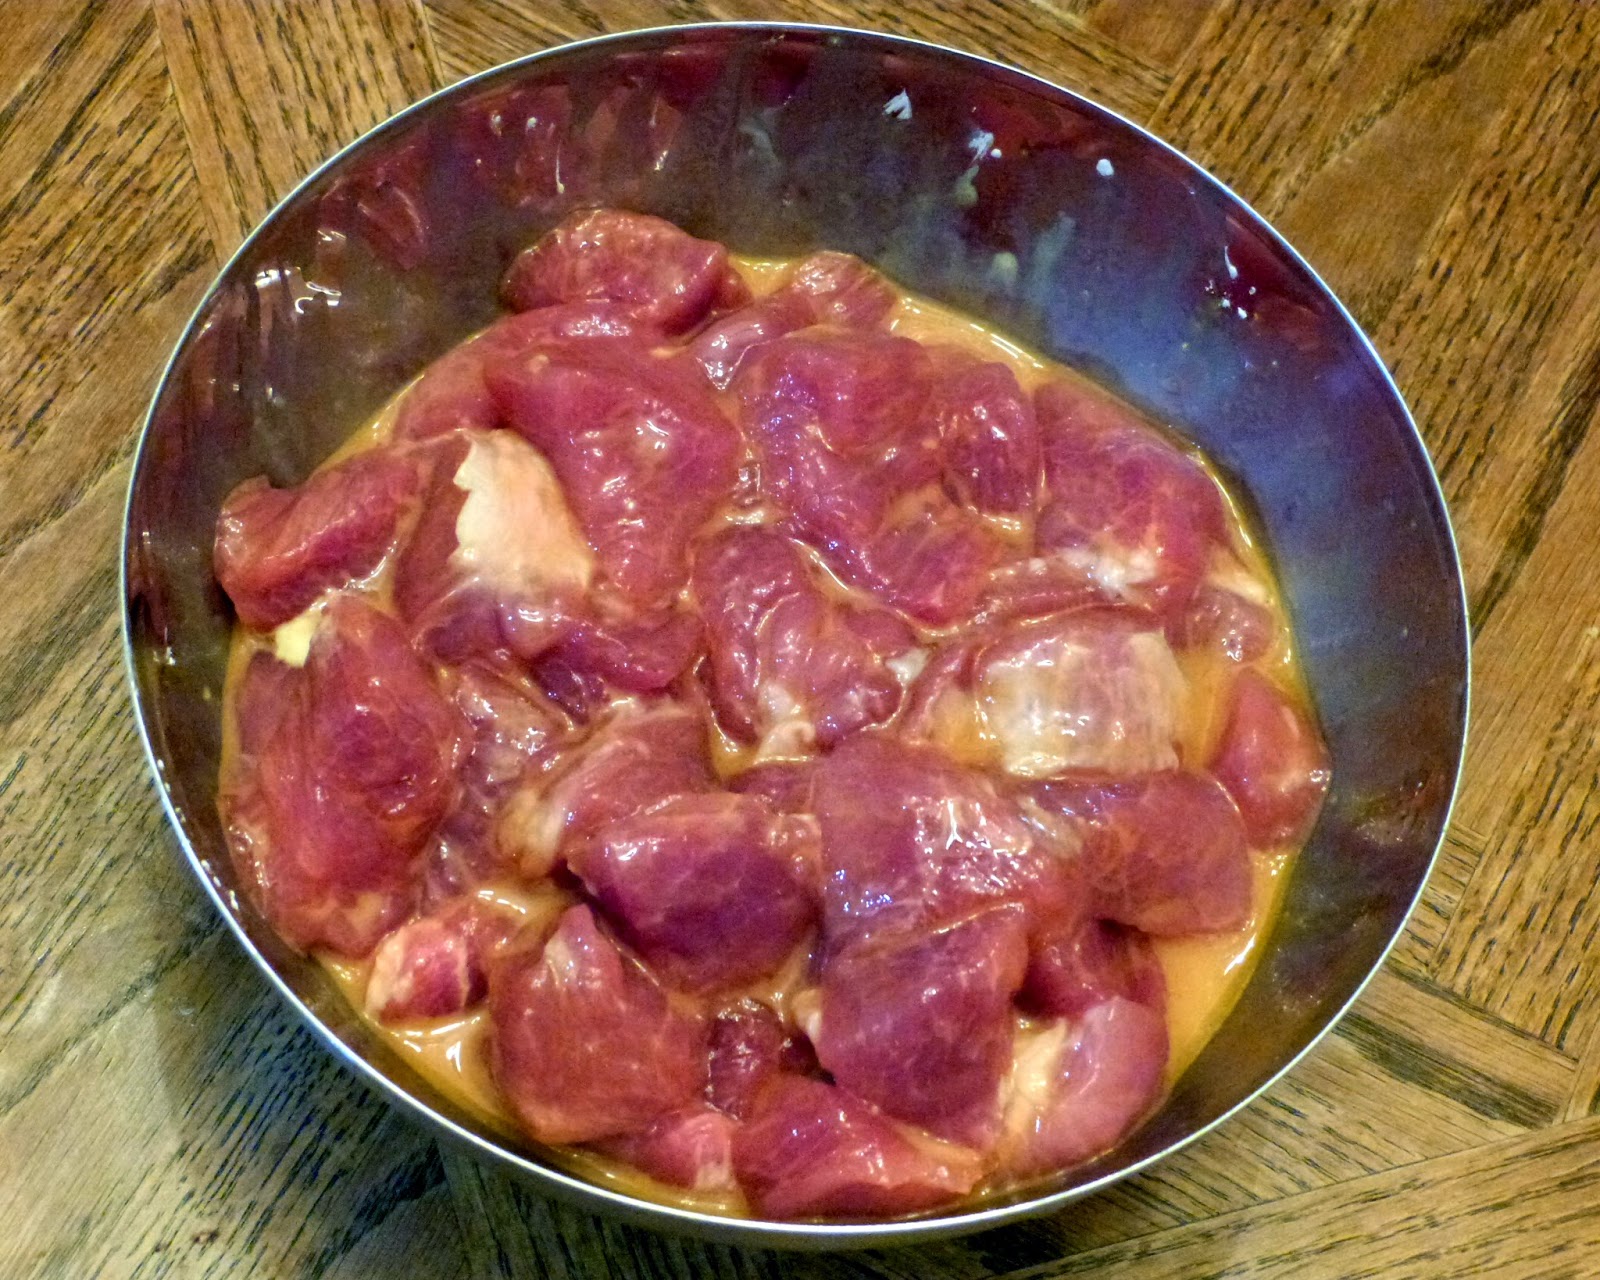
2-3 hours ahead of cooking time, start preparing the pork. Cut the pork into strips, about 1 to 1 1/2 inches long. Working with the standard supermarket pork loin slices, I cut each piece in half, lengthwise, and then cut these into the strips pictured. Combine the pork with marinade ingredients in a bag, then leave this to marinate in the refrigerator.

Sliced pork, ready to marinate

Next, prepare the napa. Pull each leaf and trim the leafy parts off, leaving the firm white centers. This can be done with two cuts. Save the leaves for other uses. Cut the napa into half-inch strips, across the grain. For the big, outer leaves, consider halving the strips.

Untrimmed and trimmed napa

Put the napa in a bowl and salt heavily. Toss to coat and let sit for 20 minutes. Working in batches, wrap the napa in a towel and wring out as much water as possible.

After squeezing dry

Heat up oil in a wok on high heat. Stir fry the napa for a few minutes, until lightly browned. Set aside. Next, empty the bag of pork and garlic into the wok. Add oil as needed. Stir fry until cooked through, then set aside.

Frying on the side burner

Add more oil to the wok, then add the drained rice cakes. Try to get as little water as possible in the wok. Stir fry these briefly. Be careful to keep them moving so that they do not stick too much. The rice cakes will start to get softer and stickier as they cook. Finally, add the green onion, pork, and napa. Stir fry everything together for a minute, then add bean sauce and stock. Stir to coat well and reduce sauce to a thin coating on the food.

Monday, March 23, 2015

Sweet and Sour Pork (咕嚕肉)

A lot of Pei Mei's recipes follow the same basic pattern: Marinate meat, deep fry meat, cook aromatics and sauce, and toss meat in sauce. Lovers' Shrimp and Diced Fish with Fermented Black Beans are good examples of this kind of recipe. It's a formula that works well. The one step I usually skip, as I did with both those recipes, is the deep frying. I usually don't think it's worth using so much oil and going through the hassle when the meat is going into a sauce anyway, so I just stir fry the meat. Sometimes, though, the crunchiness that only deep frying can provide is an integral part of the dish. 


I believe sweet and sour pork is one of those dishes where crunchiness is important, so the Fry Daddy (last featured in 2012's "Pub Week") came out to play. I did not make too many changes from the original recipe this time. The salt is lowered a bit, and the pepper-to-pork ratio is a little lower (Pei-Mei's ambiguous "2 green peppers" may have been smaller than mine). The main change is that the whole recipe is scaled up from the original 1 lb. of pork so that I could use up the pork left in the aftermath of last week's shaomai. As usual, I dug into what the Chinese name actually means, and gu lu rou literally means "mumbling meat." Maybe your mouth is supposed to be too full of delicious pork to talk properly. I'm going with that.

The only special ingredient that needs mentioning is white rice vinegar. Compared to black vinegar, this is a lot more common in the international section of the grocery store.

Ingredients
  • 1 3/4 lb pork tenderloin
  • 2 bell peppers (I used 1 red and 1 green)
  • 6 slices canned pineapple
  • Cornstarch for dredging
  • Oil for frying
Marinade
  • 1 Tbs soy sauce
  • 2 Tbs cold water
  • 2 Tbs cornstarch
  • 1/2 tsp salt
  • 2 egg yolks
Sauce
  • 5 1/3 Tbs white rice vinegar
  • 7 Tbs sugar
  • 7 Tbs ketchup
  • 8 Tbs cold water
  • 5 tsp cornstarch
  • 1 3/4 tsp salt
  • 1 3/4 tsp sesame oil

Instructions

Cut pork into small chunks, about 1 inch cubes. Toss in a bowl with marinade ingredients to coat. Let rest in refrigerator for at least 30 minutes.


Cut the peppers in half and remove stems and seeds. Dice into small pieces. Cut the pineapple slices into similar-sized pieces. I made 8 small pieces out of each slice. Side all this aside for later. This is also a good time to mix together the sauce ingredients. Use a whisk to combine well.

The mighty Fry Daddy

Heat oil in a wok, deep fryer, or pot. If using a wok, especially on an electric stovetop, you need to be careful about stability. For this reason, I used the Fry Daddy. Dredge each pork piece in cornstarch and deep fry until lightly browned and cook through, about 2 minutes. You will want to work in batches, and let the oil rest slightly between batches, so that it can heat back up. Once all the pork is cooked, let the oil heat up again and fry the pork again until crispy. This will only take about one minute per batch. Set aside.

Pork after second frying
Heat a little oil in a wok on high heat. Stir fry the pepper and pineapple until softened and browned. This will take several minutes. Water will sweat out of the peppers; let this cook off so that they can brown. 


Add the sauce, and cook for 1-2 minutes, reducing to desired thickness. It should be quite sticky. Turn the heat off and add the pork. Toss until pork is thoroughly coated. Serve with rice.