Showing posts with label cabbage. Show all posts

Sunday, February 4, 2018

Lion's Head Meatballs (獅子頭)

We recently acquired a copy the Joyce Chen Cook Book. Joyce Chen was a pioneering figure in the development of Chinese food in the United States. Chen is credited with inventing both the flat-bottomed wok and the Chinese buffet. After leaving China, she made her home in the Boston area. In her restaurants, potstickers were re-branded as "Peking ravioli" to appeal more to American audiences. Many Chinese restaurants in Boston still call them that. The book itself is out of print, but we found a very good quality used copy on Amazon. Like Peimei's books, this one also comes from the 1960s, but the perspective is from making Chinese food in the United States, as opposed to Taiwan. Chen's recipes are generally quite simple in terms of ingredients, but go into a lot more detail on the step-by-step instructions than Peimei does. As with Peimei, I'm going to be making recipes from this book, discussing them, and updating them for the 21st century. It will be especially interesting to see dishes that appear in both.


For my first Joyce Chen creation, I'll be looking at shizitou, literally translated as "lion's head." These are large, soft meatballs made from ground pork, so named for their resemblance to, well, lion heads. They aren't the most common thing to see in Chinese restaurants, so I often order them when they're available. Shizitou are a classic dish of eastern China, and I ate quite a few of them in Shanghai. I've featured a lot of western and southern Chinese dishes on the blog, and I really need to delve deeper into this region. I've preserved most of the original Chen recipe here, though I have scaled it down to one pound of meat rather than two pounds. I did, however, use the original amount of sauce, and I don't think it would have been enough sauce for the full two pounds. Overall, I think Chen nailed it here, and they turned out great. Next time, I may tweak the seasoning a bit, but the texture was perfect.

There is nothing particularly unusual in this recipe, but this is a good time to discuss the various kinds of Chinese cabbage. There are three main types you'll commonly see: napa, bok choy, and Shanghai bok choy. I use napa a lot, and you can see it popping up as a component in many different recipes here. For eating on its own, though, I prefer Shanghai bok choy. Compared with regular bok choy, they are smaller (about 6 inches long as opposed to a foot) and the whole thing is a pale green instead of white stalks with green leaves. They are tender and mild and also work well as the center component of lovers' shrimp. While you can usually find napa and regular bok choy in supermarkets, I usually only see Shanghai bok choy in Asian markets. The last thing I wanted to mention is MSG (monosodium glutamate). Chen adds a little of it to the meatballs, and it shows up in a lot of her recipes (and a few of Peimei's, as well). I omit it, not because I buy into the fear mongering surrounding it, but because I expect most people won't have it on hand. 

Ingredients

Meatballs
  • 1 lb pork shoulder, with fat
  • 2 Tbs + 2 tsp light soy sauce
  • 1/4 c cold water
  • 1 tsp Shaoxing wine or Amontillado
  • 1/2 tsp brown sugar
  • 1/2 tsp salt
  • 1/2 Tbs cornstarch
Coating
  • 2 Tbs cornstarch
  • 1 1/2 Tbs water
Sauce
  • 1/2 c water
  • 1 tsp sugar
  • 1 Tbs dark soy sauce
  • 1/2 Tbs light soy sauce
Everything else
  • Vegetable oil for frying
  • 1 - 1 1/2 lb Shanghai bok choy (can also use regular bok choy or napa)
  • 1/2 Tbs cornstarch
  • 1 tsp water


Instructions

If using whole pork shoulder, grind the meat. Chen recommends running the meat through the grinder twice. Since I had already ground my pork, I chopped it with my knife a bit. Combine the meat with the rest of the meatball ingredients. Mix well and let set in the refrigerator for about 15 minutes.

Meat after resting

While the pork is resting, mix the cornstarch and water for the coating in a bowl. Heat a little vegetable oil (just enough to cover the bottom) in a dutch oven or saute pan on medium heat. 

Forming the meatballs

Divide the meat into four equal portions. Form each portion into a ball and roll in the cornstarch mixture to coat. Carefully place each meatball in the pan. Fry until browned. 

Meatballs frying -- note the white cornstarch coating

Carefully turn to brown on as much of the outside as you can. When flipping, make sure to loosen the bottom with a spatula first. The mixture should be quite loose, so the meatballs will naturally flatten a bit. 

Ready to braise

When done browning, remove the meatballs and set aside. Drain the excess oil from the pan. Add the water, sugar, dark soy sauce, and light soy sauce for the sauce. Place the meatballs back in the pan and bring to a boil. Back off the heat to low, cover, and cook for 90 minutes. Flip the meatballs halfway through. 

Stir frying the vegetables

While the meatballs braise, prepare the vegetables. If using Shanghai bok choy, remove the bottom half inch and separate the sections. The center core can stay together. Rinse well to get rid of any dirt. If using regular bok choy or napa, cut into 2-inch slices after rinsing. When about 10 minutes of the meatball cooking is left, stir fry the vegetables on high heat. Vegetables do not need to be cooked through, just browned. I did this in two batches -- do not crowd the wok.

Before going in the oven

Preheat the oven to 350 degrees F. Arrange the vegetables in a casserole dish. Place the meatballs on top. Mix the last 1/2 Tbs of cornstarch and 1 tsp of water into a slurry. Add to the sauce and pour all over the meatballs and vegetables. Bake for 20 minutes. Serve with rice. If you start cooking the rice about when you start the vegetables, it will finish at about the same time.

Notes

In Shanghai, I often ate shizitou in a bowl of soup noodles rather than with rice. Chen also recommends that the meatballs can be made in advance and held in the refrigerator. As the braising process is lengthy, I like this suggestion. When ready, you can just start at the vegetable stir frying and bring the meatballs up to heat in the oven. She also notes that crab meat can be mixed into the pork. 

Sunday, September 6, 2015

Potstickers, the Hard Way

I've been working on perfecting my potstickers for years now. I look at my original post from 2012, and it's almost funny how simplistic it is. Last year's "Part II" stepped things up considerably, and at the time I thought that was going to be it. In that post, I said "the entire process is now done from scratch." As it turns out, that wasn't completely true. The day has finally arrived where I decided store-bought ground pork is not good enough. That's right, folks, the meat grinder, passed down from Ariel's bubbie, came out to play for the first time today. You might be wondering if it was worth it. Oh, yes. These are the best potstickers I have ever made. 


Creating the perfect potsticker filling is the real focus of this post, but I also include all the other steps for completeness. As I've mentioned before, grandpa and grandma have always been vague about what goes into the filling, and I have tinkered with it a lot over the years, incorporating elements of other recipes and my own experimentation. I think I've finally nailed it here. The dried mushrooms contribute their nice earthiness. Using both parts of the napa, and lots of it, lightens the texture and adds a little crunch. The classic combination of ginger and garlic comes through on each bite. And then, of course, there's the meat.


The trouble with prepacked ground pork is that the customer typically gets no information about either the cut it came from or the fat content. Contrast this with beef, where you get the lean/fat ratio and the cut (sirloin, chuck, and so forth). Last time I made dumplings, the pork was too lean and they ended up a little dry. I chose pork shoulder for grinding. Importantly, there is a good amount of fat throughout that keeps the dumplings moist. It's also my preferred cut for char siu, which was the delicious destiny of the rest of the roast. Shoulder is also excellent for any kind of stew. Using the rather ancient and venerated grinder was a little intimidating at first, but it ended up working very well. It will no doubt feature in future posts.

This recipe will make at least 150 potstickers, with a little filling left over. It's a good thing they freeze well. I like making potstickers in large batches, as you save time in the long run. You can put frozen potstickers right in the pan and they defrost as they steam for a quick and easy meal. The leftover filling can be cooked like a burger and put on a sandwich. It can be stir fried with a little bean sauce and noodles, or it can go into a frittata. The possibilities are quite endless.

Ingredients

Filling
  • 2 lb pork shoulder, with fat
  • 2 lb napa, both stalks and leaves
  • 1 cup dried black mushrooms, minced (about 12-15 mushrooms)
  • 4 cloves garlic, minced
  • 2 Tbs fresh ginger, minced
  • 2 large eggs
  • 1/3 cup green onion, finely chopped
  • 1/4 cup fresh chives, finely chopped
  • 3 Tbs soy sauce
  • 1 Tbs salt
  • 1 Tbs sesame oil
  • 1 tsp black pepper
  • Extra salt for the napa
Wrappers
  • 7 cups all-purpose flour
  • 2 cups boiling water
  • 2/3 cup cold water
Everything Else
  • Vegetable oil for frying
  • Chinese black vinegar for dipping
  • Splash of soy sauce for dipping

Instructions

Filling

Ahead of time, put the mushrooms in a bowl of hot tap water. Let stand at least 30 minutes. Once soaked, remove the stems and finely mince the caps.


Roughly chop the napa, including both the white center parts and the yellowish/greenish leafy parts. In a large bowl, salt the napa and toss to combine. Let stand at least 20 minutes. Working in batches, wrap the napa in a clean towel and wring. Squeeze out as much water as possible. Once this is done, finely chop the napa.


If using ground pork, skip the next step. Otherwise, continue on. Cut the pork into small chunks, making sure to include the fat, and grind. A food processor can be used in place of a grinder. The grinder was quite straightforward to use, and the only challenge was figuring out how to best clamp it down. We ended up opening a drawer to give it room to screw in, and then putting some cardboard on the contact spots to protect the surfaces and stabilize the grinder.

Meat grinder or time machine? Maybe both.

Combine mushrooms, napa, and pork in a large bowl. Add all other filling ingredients and mix thoroughly but gently. Cover with plastic wrap and set aside in the refrigerator until ready to fill dumplings.


The filling can be varied to taste. A good way to test the filling is to form a small patty and cook it in a frying pan.

Wrappers

Mix the flour and boiling water, and let stand for 3 minutes. Add cold water and knead into a smooth dough. Roll out on a floured surface, as thin as possible. Using a pint glass or similarly sized glass, cut circles out of the dough. Ball up and scraps and roll out again until all the dough is used.

To avoid dough drying out, it is best to keep the dough in a bag or under plastic wrap. Roll out dough as needed as the dumplings are filled. Usually, we make the dough in two batches -- the amounts given in the ingredients section reflect a double recipe.

Assembly

Prepare the "assembly station" with a large sheet pan and a bowl of water. For each dumpling, take a round wrapper and add a small amount of the filling, around 1/2 Tbs. Take care not to overfill. Over time, you will get the feel for it. It is important to also make sure the filling stays in the center and does not get into the seal. Usually, I form the filling into a slightly elongated shape parallel to the direction of the fold.

Dip a finger in the water and run it around the edge of the wrapper. Fold over and pinch into a moon shape, making sure to seal tightly. Wet the top edge and form 2-3 pleats in the same direction. For detailed photos of wrapping potstickers, see my original post.


Once the sheet pan is filled, place in the freezer. Once the dumplings are fully frozen, they can be transferred safely to a bag. If the dumplings are bagged too early, they will stick together. The potstickers can also be cooked immediately, but I find they are much easier to detach from the sheet pan once they are at least a little frozen.

Cooking

The key to cooking is the right pan. Nonstick with a well-fitting cover is essential. Add just enough oil to the pan to make a thin layer. On medium high heat, cook the potstickers until the bottoms are lighly browned. Add about a centimeter of water (if the pan is full) and cover. Cook until the water is fully absorbed. Add more oil if needed and fry until the bottoms are crunchy and well-browned.


Serve with Chinese black vinegar, either straight or with a splash of soy sauce.

Thursday, August 6, 2015

Pork and Cabbage Goulash

Longtime readers of No Free Lunch know that I am a big fan of stews. We have traveled from Ireland to France to Belgium, and even to Africa in search of the most delicious stews. Today, we land in a new country: Hungary. Goulash is a dish virtually synonymous with Hungary, though the dish has become popular, in various forms, all over central and eastern Europe. My version is based on  the Goulash à la Széged recipe from Plachutta and Wagner's 100 Classic Dishes of Austria (Hungary's neighbor and historical partner). The biggest difference is that their recipe, and others I have found, use sauerkraut. Cooking for someone who does not like sauerkraut, I used fresh cabbage instead. For those wishing to use sauerkraut, simply add a pound of sauerkraut to the stew about halfway through cooking instead.


There are two interesting ingredients at work here. The first is Hungarian paprika, also called sweet paprika. This type of paprika has a nice pungency and is less dark in color than others. I have seen it in grocery stores, so I don't think it is terribly hard to find, but other paprika can be substituted if unavailable. The other ingredient is caraway. I had never used it before, but it is apparently quite common in central European cuisine. The aroma is quite striking, and it immediately struck me as the smell of rye bread, which is flavored with caraway.

Ingredients
  • 2 lb pork shoulder
  • 1 onion, diced
  • 3 cloves garlic, minced
  • 2 Tbs flour
  • 3 cups chicken stock
  • 2 1/2 Tbs Hungarian paprika
  • 2 tsp caraway
  • 1 bay leaf
  • 1 1/2 lb cabbage, roughly chopped
  • Salt and pepper to taste
  • Canola oil
For serving
  • Sour cream
  • Boiled potatoes

Instructions

I used two different vessels -- a saute pan and a stock pot -- to prepare this dish. I will refer to these as the "pan" and the "pot." With a large enough dutch oven or similar equipment, it could be made using one. However, using two does speed things up a bit.


Cut the pork into one inch squares. Lightly season with salt and pepper. Heat some oil in the pan on medium-high heat. Working in batches, sear the pork on both sides and set aside. This should take 3-4 batches. Be sure not to crowd the pan.


While the pork is browning, heat some oil in the pot on medium heat. Brown the onions. When the pork is almost done, add the garlic to the pot. Once the pork is all browned, add it to the pot. Add flour and mix together. Add chicken stock, paprika, caraway, and bay leaf, and bring to a boil on high heat. Reduce to low and simmer.

While the stew cooks, clean out the saute pan. Work in batches to cook down the cabbage. Heat a little oil on medium heat, fill with cabbage and a dash of salt and pepper. Cook for a few minutes. Add each batch to the pot when done.


Let the stew cook on low heat for 90 minutes, stirring occasionally. Add salt and pepper to taste. Serve with boiled potatoes and top with sour cream. If preferred, noodles or dumplings could be substituted for the potatoes.

Discussion

Compared to the original recipe, I have greatly increased the amount of onion. The original is also quite vague and does not do any pre-browning of the meat, a step I find difficult to omit. 

Saturday, May 23, 2015

Rice Cakes Revisited

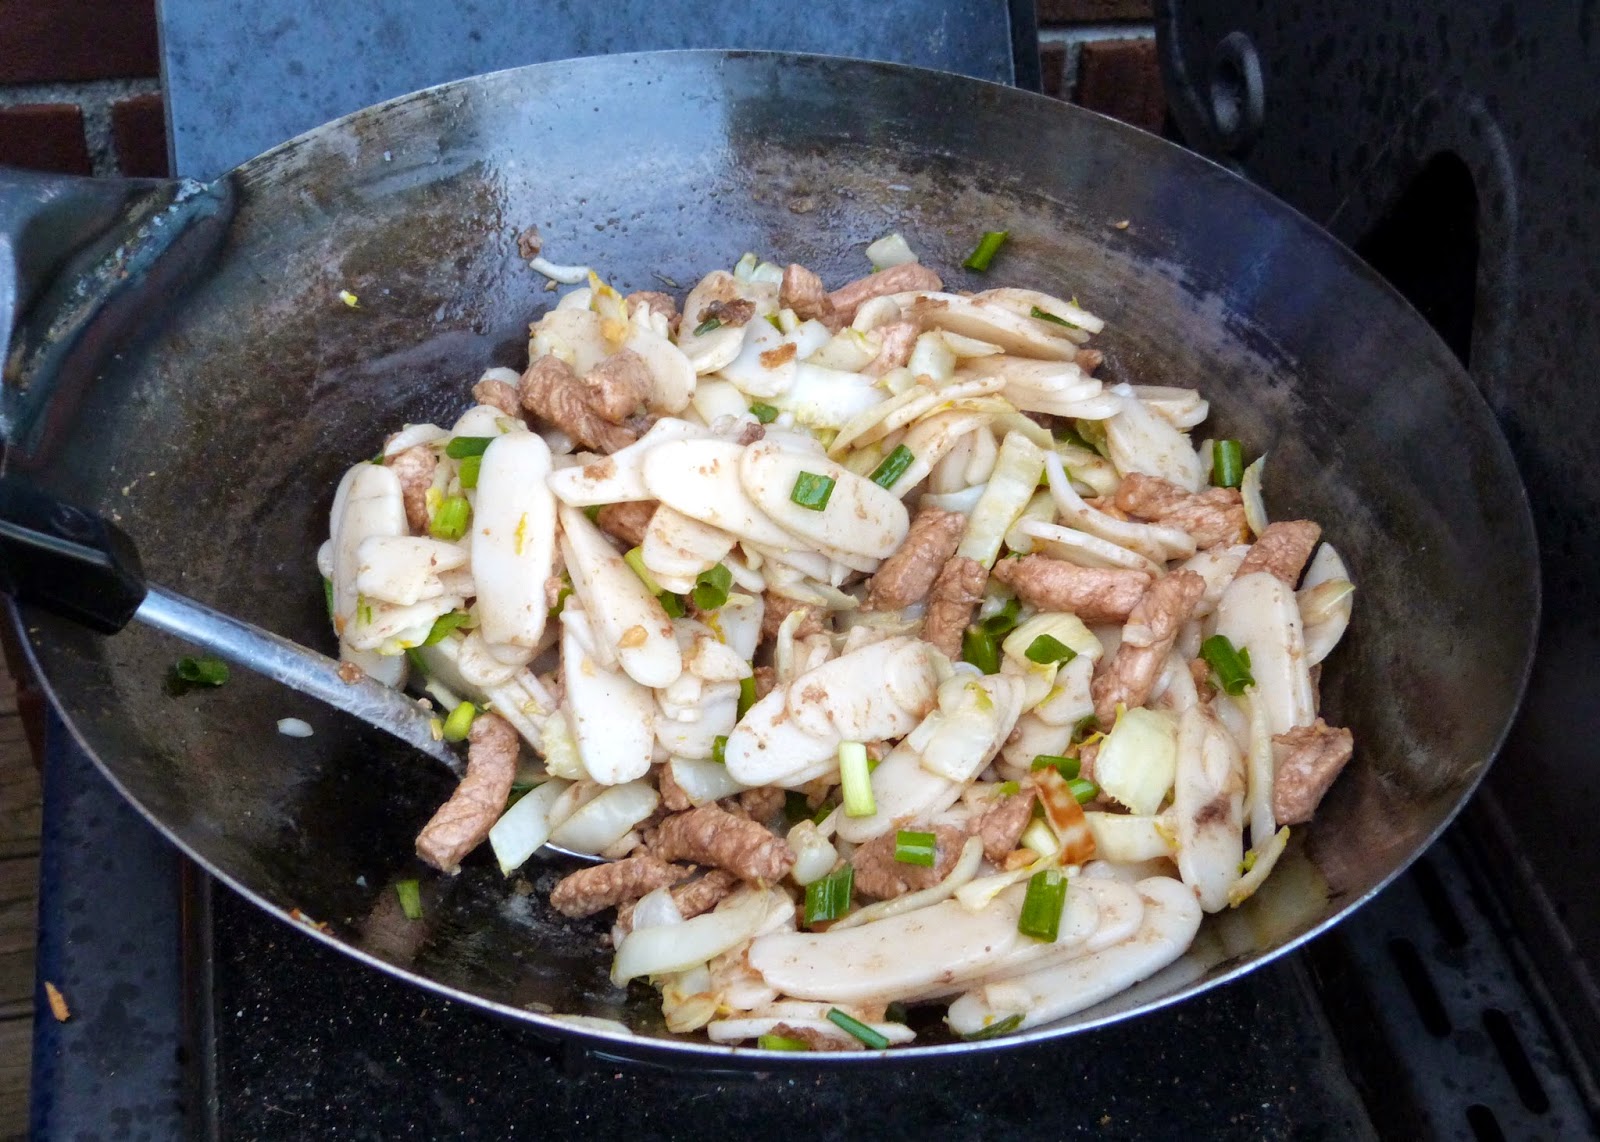
Stir fried rice cakes, known as "tongue depressors" in my family, were an early post on No Free Lunch. Since then, I have continued to make them regularly, and Ariel now regards them to be as much of a comfort food as I do. Since the original post, a lot has changed in how I go about preparing these beauties. Today's recipe is basically a more sophisticated, yet still easy update. The main differences are that I'm using marinated strips of pork rather than ground, salted napa cabbage instead of regular green cabbage, and lightly saucing the dish to pull it all together. I have also figured out that there is no need to parboil the rice cakes. Soaking them for a day softens them enough to go straight to the stir frying stage. This also makes them a little less prone to clumping together, though this does still happen.


Since this is the first time I've done a full-blown recipe using napa cabbage, it is worth a short discussion. Napa, known as da bai cai (big white vegetable) in Chinese, is a gentle and versatile vegetable that I have only recently starting using, and I am hooked in a big way. Each piece has a firm white center that is great for stir frying, and green leaves that are excellent raw. I usually trim off the leaves and save them. This particular head of napa provided greens for fish tacos and hot sandwiches. The leaves are also nice in salads. This recipe also uses my old stir frying standbys, bean sauce and ground bean sauce. These two sauces are more or less interchangeable in terms of use, but I elected to use ground for the marinade and non-ground for the sauce. I like the little bean bits to show up in the sauce, but they aren't necessary in the marinade. If you only have one or the other, it will be perfectly fine.

Ingredients
  • 1 500g package of dried rice cakes (nian gao)
  • 1 lb pork loin (about 4 pieces, if sliced)
  • 1 head Napa cabbage (about 1 lb)
  • Salt
  • Several green onions, chopped
  • 1 Tbs bean sauce
  • 1/2 cup stock (chicken or beef)
  • Vegetable oil
Marinade
  • 2 Tbs ground bean sauce
  • 2 cloves minced garlic
  • Splash of dry sherry
  • Splash of black vinegar
  • Black pepper

Instructions

About 24 hours in advance, start soaking the rice cakes in room temperature water. You can get away with less soaking, but I try to plan ahead. Change the water the next morning.

The cakes after 24 hours

2-3 hours ahead of cooking time, start preparing the pork. Cut the pork into strips, about 1 to 1 1/2 inches long. Working with the standard supermarket pork loin slices, I cut each piece in half, lengthwise, and then cut these into the strips pictured. Combine the pork with marinade ingredients in a bag, then leave this to marinate in the refrigerator.

Sliced pork, ready to marinate

Next, prepare the napa. Pull each leaf and trim the leafy parts off, leaving the firm white centers. This can be done with two cuts. Save the leaves for other uses. Cut the napa into half-inch strips, across the grain. For the big, outer leaves, consider halving the strips.

Untrimmed and trimmed napa

Put the napa in a bowl and salt heavily. Toss to coat and let sit for 20 minutes. Working in batches, wrap the napa in a towel and wring out as much water as possible.

After squeezing dry

Heat up oil in a wok on high heat. Stir fry the napa for a few minutes, until lightly browned. Set aside. Next, empty the bag of pork and garlic into the wok. Add oil as needed. Stir fry until cooked through, then set aside.

Frying on the side burner

Add more oil to the wok, then add the drained rice cakes. Try to get as little water as possible in the wok. Stir fry these briefly. Be careful to keep them moving so that they do not stick too much. The rice cakes will start to get softer and stickier as they cook. Finally, add the green onion, pork, and napa. Stir fry everything together for a minute, then add bean sauce and stock. Stir to coat well and reduce sauce to a thin coating on the food.

Thursday, May 14, 2015

Atakilt Wat (Ethiopian Vegetable Stew)

Today, No Free Lunch is proud to celebrate its 100th post! Due to end of semester madness, it's been more than a month since my last post, but I'm hoping to pick up the pace again soon. I'm also dipping my foot into Twitter, and I am posting all blog updates there, as well. You can follow me there @SebastianWai.

Looking back at the past 99 posts, there are many I am very proud of, and others that clearly need work. My all-time most popular has been my recipe for Galinha à Portuguesa, which is actually on the first page of Google hits for that dish. The second most popular, the recipe for "tongue depressors," is actually one I may have to revisit, as I have vastly improved the dish over the last three years with my increased knowledge of Chinese ingredients and techniques. Perhaps this means I've carved out a tiny internet niche in obscure Chinese dishes. In any case, I'm looking forward to another 100 chances to share some fun and unique recipes. Today is no exception, featuring my first African dish on the blog.


One evening a few months ago, I was trying digging through the fridge, trying to figure out what to make for dinner. I found I had about half a head of cabbage and some carrots, so I did a Google search for "cabbage and carrots" and came across what I now know to be called "atakilt wat," an Ethiopian stew. This dish is easy to make, and it consists completely of ingredients I generally have on hand. In many of the recipes I've shown recently, the moisture retained in cabbage is a problem that we address by salting it ahead of time; this time, though, the water in the cabbage is the basis for the stew. The result is a gentle and aromatic dish that is great on its own or as an accompaniment.

Ingredients
  • 1 onion, diced
  • 2 Tbs minced ginger
  • 4 cloves minced garlic (about 2 Tbs)
  • 1 lb red potatoes (about 5 small ones)
  • 3/4 lb carrots, peeled
  • 1 1/2 Tbs ground turmeric
  • 1/2 cup water
  • 1 1/2 lb green cabbage, roughly chopped
  • Salt and pepper to taste
  • Olive oil

Instructions

It is a good idea to prepare the vegetables ahead of time, as there is a lot of chopping. I cut the carrots into pieces about 1 1/2 to 2 inches long, then halved or quartered them according the thickness. I cut each potato into 8 pieces, but you may want to do more with bigger potatoes (to get an idea of size, my potatoes were 5 to a pound).

Onion, garlic, and ginger cooking

Heat olive oil on medium-high in a dutch oven or large pot with a lid. Cook the onion for a few minutes, until starting to soften and brown. Add ginger and garlic and cook another minute, stirring frequently. Add the potatoes, carrots, turmeric, and water. Stir together and cover. Cook for a few more minutes. 

Note the difference in liquid from the lead photo

Next, turn the heat down to low and add the cabbage, one handful at a time. Stir in each batch until slightly wilted, then add more. Once all the cabbage is in, cover and cook for about 45 minutes. Stir every 10 minutes. Once done, the potatoes and carrots will be completely soft and the cabbage will have sweated out. As always, taste and adjust seasoning. I added both salt and pepper. The stew can be served on its own, with rice, or (if you have it) Ethiopian bread.

Thursday, September 4, 2014

Emerald Fried Rice

I have been making fried rice for a long time. Not only was it my first-ever blog post, it was one of the first dishes I taught myself how to make. So why are we here now, looking at the fourth fried rice recipe on No Free Lunch? Not long ago, I realized my fried rice was getting increasingly complex, usually incorporating lots of soy sauce, mustard, hot sauce, and Worcestershire into the cooking process. When I looked at Pei-Mei's standard fried rice recipe, it had none of that. Just rice, vegetables, ham, egg, and regular old vegetable oil. This prompted a back-to-basics approach one night that had excellent results.


Today's dish is based on Pei-Mei's second fried rice recipe, "emerald fried rice." This does something I had never considered -- adding lots of cabbage to the dish. This was immediately appealing to me. I buy cabbage frequently, for use in fish tacos, potsticker filling, "tongue depressors," and more, but I always end up throwing some away. Emerald fried rice is the answer to all your leftover rice and cabbage woes. After years of making and eating fried rice, new ideas continue to surprise and excite me -- this recipe was quite a hit!

Ingredients
  • 1 lb green cabbage
  • 1/2 Tbs salt
  • 3 large eggs
  • 1/2 lb shrimp, shelled and de-veined (equivalent of 10 U-15 shrimp)
  • 5 Tbs green onions, finely chopped
  • 5-6 cups cooked rice
  • Salt and pepper to taste
  • Vegetable oil for frying

Instructions

Chop up the cabbage into small pieces and combine with 1/2 Tbs salt in a large bowl. Toss to coat and let stand for 15 minutes. This will draw water out of the cabbage. 

Cabbage after the first chopping

Next, squeeze the water out. I used paper towels to do this. Finally, chop the cabbage again and set aside.

Cabbage after the second chopping

Beat the eggs and lightly season with salt and pepper. Heat a bit of oil in a wok or large frying pan on high heat. Cook the eggs and set aside. Add more oil to the pan and stir fry the cabbage for about 1 minute. Set the cabbage aside. If using larger shrimp, chop these into smaller pieces. Toss with a bit of salt and pepper, add more oil and fry these briefly, until just cooked through. Be careful not to overcook.

This blog clearly needed another picture of rice frying

Put more oil to the pan and add the green onions and rice. Stir fry until heated through and salt to taste. Add the cabbage, eggs, and shrimp. Toss a few times to combine and serve immediately.

Notes

This recipe is essentially a 1.5 times scale-up of Pei-Mei's original, though with some changes. I have  also increased the proportions of both egg and green onion and used shrimp instead of ham. I am confident this dish will work just fine with whatever protein you like.

As a final note, I want to mention that Pei-Mei's instructions on the cabbage simply say to pickle the cabbage in the salt. I was really not familiar with this technique and found little on the internet. The closest thing I could find was a Japanese dish called tsukemono. I think what I did was correct, but if anyone knows otherwise, let me know in the comments!