Sunday, June 28, 2015

Dashi

Katsudon turned out to be such a hit that I made it again. By that time, I had noticed and bought some kombu (dried kelp) at the Asian grocery, and started looking at dashi recipes. I ended up following Alton Brown's method, which worked very well. As such, I will focus on the ingredients and general usage in this post and simply refer the reader to AB for the nuts and bolts. I roughly halved his recipe.

Kombu sheet and katsuobushi flakes

As it turns out, there are only a two ingredients for dashi: kombu and katsuobushi. My investigations turned up that there are two kinds of kombu: lighter, younger kombu for eating and firm, dark, aged kombu for making dashi. This second kind of kombu is usually labeled as "dashi kombu" and comes in large sheets, whereas the kombu for eating comes in smaller strips.


The other ingredient is katsuobushi, which is dried flakes of smoked skipjack tuna. The skipjack tuna is a popular fish in Japan, often used for sushi. The flakes have a strong aroma that reminds me of smoked salmon. Be aware that katsuobushi is often labeled as "bonito flakes," despite the fact that bonito is a different, though similar fish. 


I was able to find both ingredients in the Japanese section of the Asian grocery store. Actually making the dashi is very simple. You will also need some cheesecloth to strain out the katsuobushi. The end result is a gentle and light broth that can be used for many things, not just katsudon. Dashi also forms the basis for miso soup. I used it to make a quick and delicious noodle soup. I mixed the dashi with a little sriracha, hoisin sauce, chopped green onion, cilantro, and napa cabbage, then poured this over boiled Chinese egg noodles and fishballs. A bit of a cultural mashup, but quite delicious nonetheless. 

Wednesday, June 24, 2015

Crab Salad

Crab salad is, for me, almost the definition of a comfort food: simple, delicious, and tied to memory. When I was a kid, it showed up in the fridge only as an occasional treat, but when it did, I loved it. I don't really know the origin of crab salad, but it seems to be part of the greater world of mayonnaise-based salads that are Midwestern deli staples. The seafood-mayo-celery combination is also a common one in other places, from New England's lobster salad rolls to mom's salmon salad sandwiches (another childhood favorite, to be sure). Crab salad is great as a snack on crackers or as a side dish for your summer grilling escapades. 


While one could certainly make a nice crab salad using real crab meat, that is not the point of this recipe. Imitation crab is actually made from pulverized fish parts, which makes it a close relative of Chinese fish balls (another old favorite of mine). This recipe is based on various deli crab salads I have eaten, as well as recipes from the internet. My spin on the recipe is to use some fresh herbs from the garden, which is always a pleasure.

Ingredients
  • 1 1/2 lb imitation crab
  • 1 cup diced celery
  • 4 Tbs chopped fresh chives
  • 1 Tbs chopped fresh parsley
  • 1/2 cup mayonnaise
  • 1/2 large lemon
  • Salt and pepper to taste

Instructions

Roughly chop the imitation crab. Mine came pre-cut into half inch thick coins, which I cut in half. If yours is in "leg" form, you have a bit more work to do. Next, separate out the layers of each piece. This is time consuming, but worth it for the right texture.


Combine the crab, celery, chives, parsley, and mayo in a large bowl. Squeeze the juice from the half lemon into the bowl and mix thoroughly. Add salt and pepper to taste. Cover with plastic wrap and let chill overnight. Serve with crackers.

Wednesday, June 10, 2015

Katsudon

Although I don't cook a lot of Japanese food (today's is only the second on the blog), I have long been a fan. In particular, I have a real soft spot for tonkatsu -- breaded and fried pork cutlets. Belonging to the same family of dishes as Wiener schnitzel, tonkatsu is a true food of my childhood. Tonkatsu is very good on its own with a drizzle of sauce, sliced cabbage, and rice. However, we're taking it a step further today. Katsudon is a type of donburi, a Japanese word which apparently simply translates as "bowl." As the name suggests, donburi is a very broad category of dishes. What unifies them is the basic construction of a bowl of rice topped with meat or fish and some kind of sauce. If you make a lot of tonkatsu to eat in the traditional way, making katsudon the next day is a fun and tasty way to transform it into something new.


The inevitable comparison between tonkatsu and schnitzel is certainly worth a quick discussion. The main difference, in my mind, is that katsu is not pounded. Schnitzel simply must be ultra-thin, but katsu should have more body to bite into. I also use panko instead of regular breadcrumbs. Katsudon takes variations well. The pictured one was made with 3 eggs, but if you like more eggs, add another. If you like it saucier, use more. I also recently had katsudon in a restaurant, and they included carrots and zucchini, which was a surprising and tasty addition. 

I make one departure from the traditional preparation, for practical reasons. Most katsudon recipes call for dashi as the basis of the sauce. Dashi is a Japanese soup broth made from seaweed. As one might expect, I do not typically have seaweed laying around the house, and chicken stock works just fine. Instant powdered dashi does exist, and I will be on the lookout for this in the future.

Ingredients

Tonkatsu
  • 3 pieces thinly sliced, boneless pork loin
  • Salt and pepper
  • Flour
  • 1 egg
  • Panko
  • Vegetable oil for frying
Everything else
  • 1 onion
  • 2/3 cup chicken stock (or dashi, if available)
  • 1 1/2 Tbs soy sauce
  • 2 tsp sugar
  • 3-4 eggs
  • Vegetable oil
  • Steamed rice

Instructions

Start by preparing the tonkatsu and rice. These can be done ahead of time, if desired. The basic technique is almost identical to Wiener schnitzel, but the pork does not need to be pounded. Preheat oil in a saute pan on medium-high. Salt and pepper both sides of the pork. Next, pour out some flour on a plate and dredge the pork. Beat the egg and dip the tonkatsu, making sure it is well coated. Finally, pour some panko on a plate and press the pork in, coating both sides. Fry the pork until golden brown on both sides, turning once. Set aside to cool. Once cooled a bit, slice the katsu into half-inch wide strips.


Pour out most of the oil, leaving enough to saute the onions. Prepare all the remaining ingredients: Slice the onion into strips. Mix together the stock, soy sauce, and sugar. Beat the remaining eggs.


Saute the onion on medium-high until softened and lightly browned. Mix together the stock, soy sauce, and sugar and add to the pan. Add the sliced katsu and pour in the eggs. Stir together and cover the pan. Cook until eggs are done. 

Donburi is served in large bowls. Put a layer of rice in each bowl and top with the katsu and sauce. This recipe will comfortably feed two.

Saturday, May 23, 2015

Rice Cakes Revisited

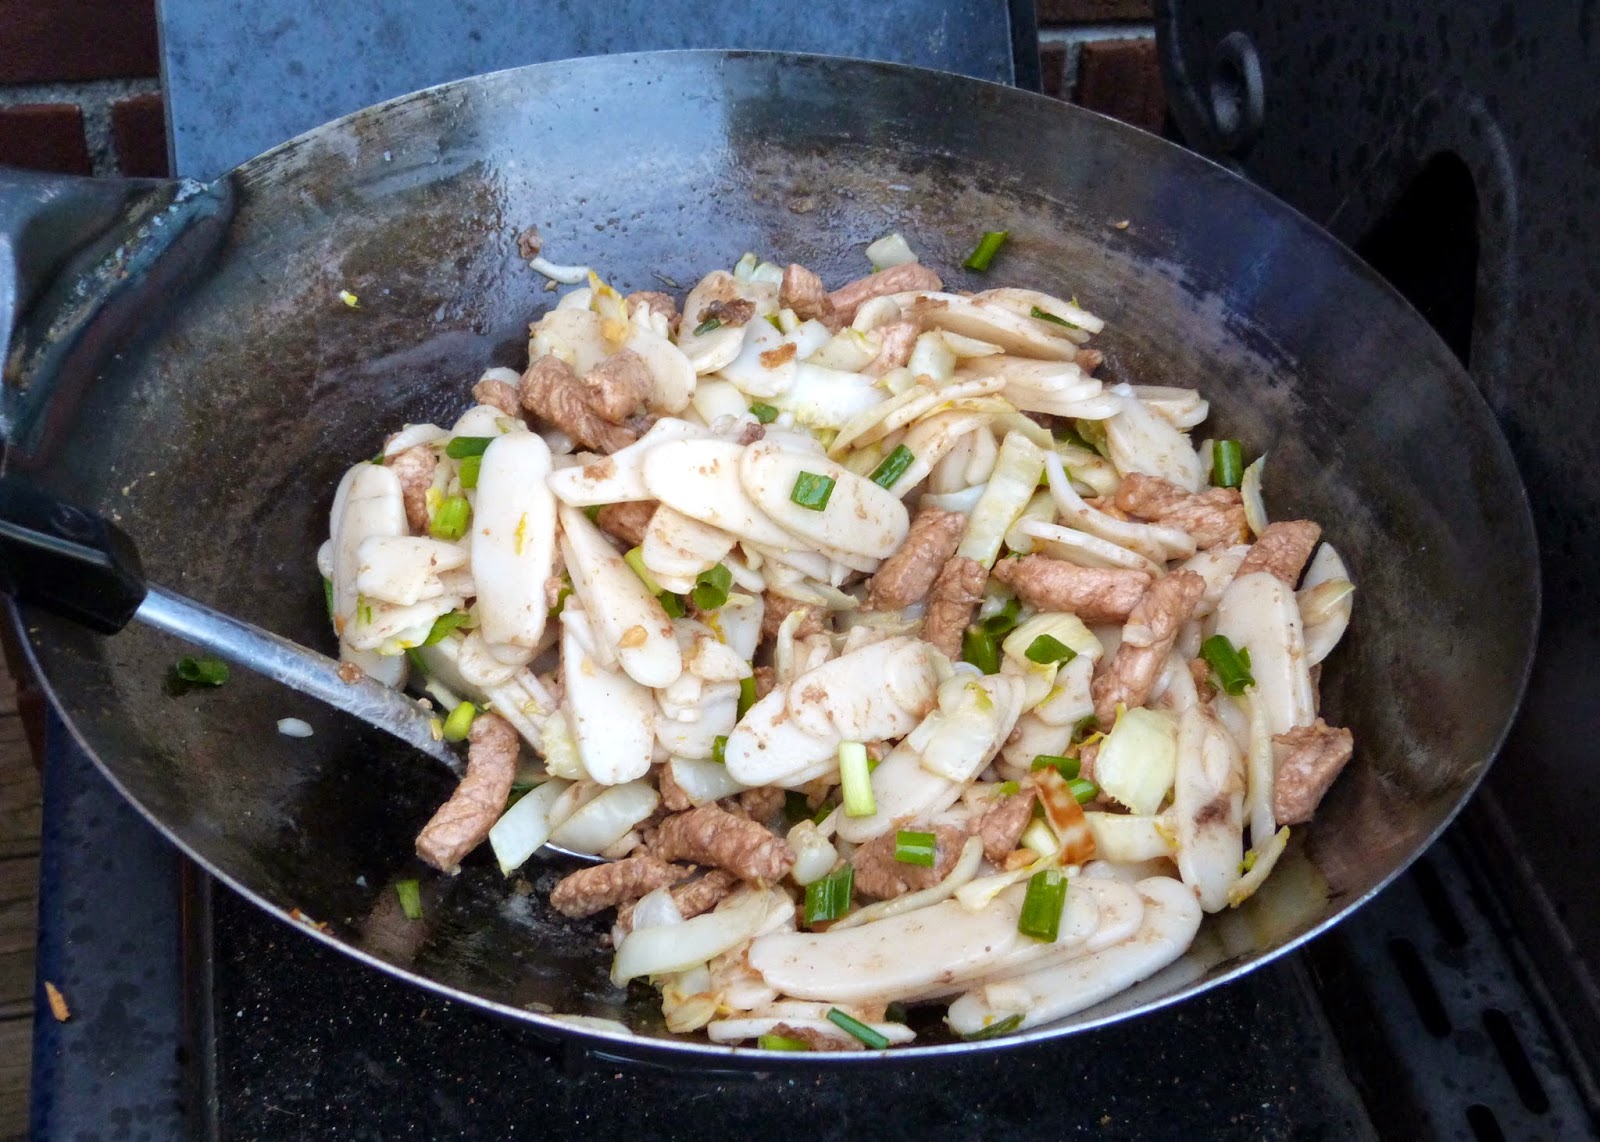
Stir fried rice cakes, known as "tongue depressors" in my family, were an early post on No Free Lunch. Since then, I have continued to make them regularly, and Ariel now regards them to be as much of a comfort food as I do. Since the original post, a lot has changed in how I go about preparing these beauties. Today's recipe is basically a more sophisticated, yet still easy update. The main differences are that I'm using marinated strips of pork rather than ground, salted napa cabbage instead of regular green cabbage, and lightly saucing the dish to pull it all together. I have also figured out that there is no need to parboil the rice cakes. Soaking them for a day softens them enough to go straight to the stir frying stage. This also makes them a little less prone to clumping together, though this does still happen.


Since this is the first time I've done a full-blown recipe using napa cabbage, it is worth a short discussion. Napa, known as da bai cai (big white vegetable) in Chinese, is a gentle and versatile vegetable that I have only recently starting using, and I am hooked in a big way. Each piece has a firm white center that is great for stir frying, and green leaves that are excellent raw. I usually trim off the leaves and save them. This particular head of napa provided greens for fish tacos and hot sandwiches. The leaves are also nice in salads. This recipe also uses my old stir frying standbys, bean sauce and ground bean sauce. These two sauces are more or less interchangeable in terms of use, but I elected to use ground for the marinade and non-ground for the sauce. I like the little bean bits to show up in the sauce, but they aren't necessary in the marinade. If you only have one or the other, it will be perfectly fine.

Ingredients
  • 1 500g package of dried rice cakes (nian gao)
  • 1 lb pork loin (about 4 pieces, if sliced)
  • 1 head Napa cabbage (about 1 lb)
  • Salt
  • Several green onions, chopped
  • 1 Tbs bean sauce
  • 1/2 cup stock (chicken or beef)
  • Vegetable oil
Marinade
  • 2 Tbs ground bean sauce
  • 2 cloves minced garlic
  • Splash of dry sherry
  • Splash of black vinegar
  • Black pepper

Instructions

About 24 hours in advance, start soaking the rice cakes in room temperature water. You can get away with less soaking, but I try to plan ahead. Change the water the next morning.

The cakes after 24 hours

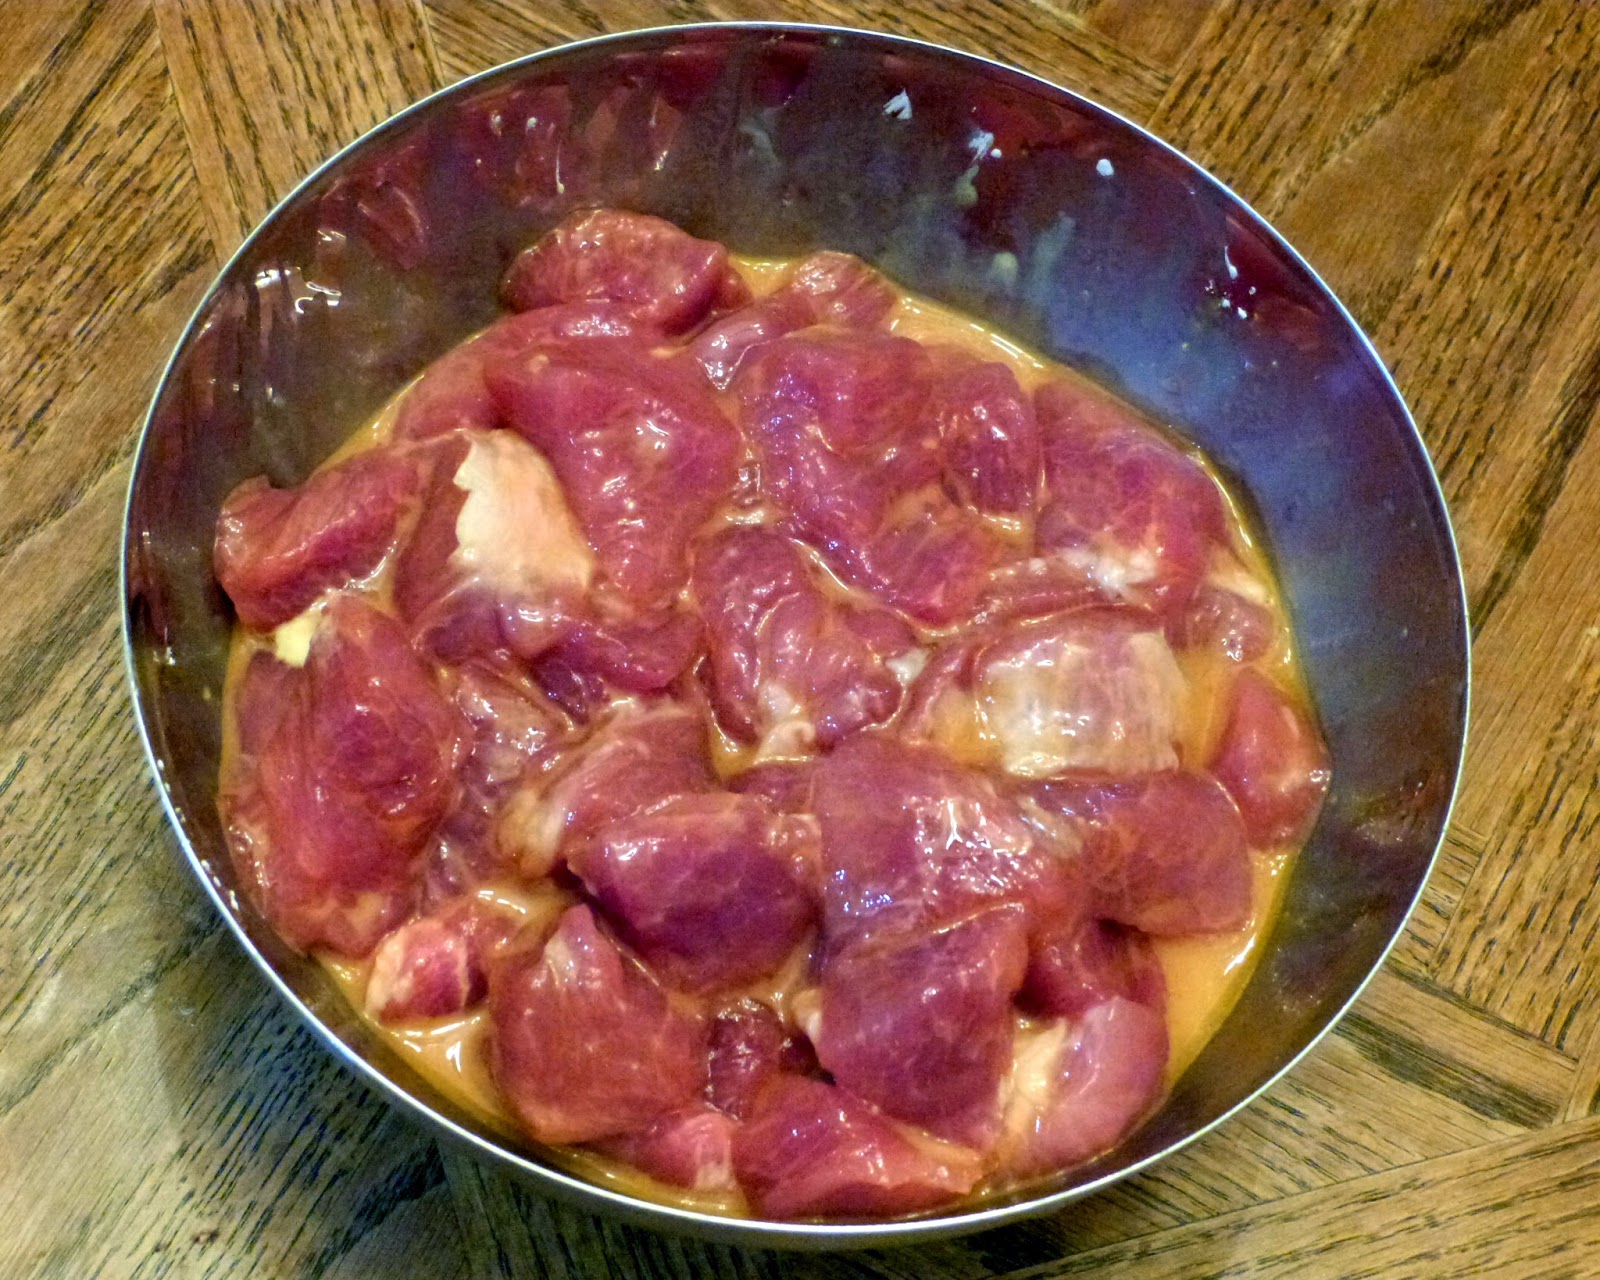
2-3 hours ahead of cooking time, start preparing the pork. Cut the pork into strips, about 1 to 1 1/2 inches long. Working with the standard supermarket pork loin slices, I cut each piece in half, lengthwise, and then cut these into the strips pictured. Combine the pork with marinade ingredients in a bag, then leave this to marinate in the refrigerator.

Sliced pork, ready to marinate

Next, prepare the napa. Pull each leaf and trim the leafy parts off, leaving the firm white centers. This can be done with two cuts. Save the leaves for other uses. Cut the napa into half-inch strips, across the grain. For the big, outer leaves, consider halving the strips.

Untrimmed and trimmed napa

Put the napa in a bowl and salt heavily. Toss to coat and let sit for 20 minutes. Working in batches, wrap the napa in a towel and wring out as much water as possible.

After squeezing dry

Heat up oil in a wok on high heat. Stir fry the napa for a few minutes, until lightly browned. Set aside. Next, empty the bag of pork and garlic into the wok. Add oil as needed. Stir fry until cooked through, then set aside.

Frying on the side burner

Add more oil to the wok, then add the drained rice cakes. Try to get as little water as possible in the wok. Stir fry these briefly. Be careful to keep them moving so that they do not stick too much. The rice cakes will start to get softer and stickier as they cook. Finally, add the green onion, pork, and napa. Stir fry everything together for a minute, then add bean sauce and stock. Stir to coat well and reduce sauce to a thin coating on the food.

Thursday, May 14, 2015

Atakilt Wat (Ethiopian Vegetable Stew)

Today, No Free Lunch is proud to celebrate its 100th post! Due to end of semester madness, it's been more than a month since my last post, but I'm hoping to pick up the pace again soon. I'm also dipping my foot into Twitter, and I am posting all blog updates there, as well. You can follow me there @SebastianWai.

Looking back at the past 99 posts, there are many I am very proud of, and others that clearly need work. My all-time most popular has been my recipe for Galinha à Portuguesa, which is actually on the first page of Google hits for that dish. The second most popular, the recipe for "tongue depressors," is actually one I may have to revisit, as I have vastly improved the dish over the last three years with my increased knowledge of Chinese ingredients and techniques. Perhaps this means I've carved out a tiny internet niche in obscure Chinese dishes. In any case, I'm looking forward to another 100 chances to share some fun and unique recipes. Today is no exception, featuring my first African dish on the blog.


One evening a few months ago, I was trying digging through the fridge, trying to figure out what to make for dinner. I found I had about half a head of cabbage and some carrots, so I did a Google search for "cabbage and carrots" and came across what I now know to be called "atakilt wat," an Ethiopian stew. This dish is easy to make, and it consists completely of ingredients I generally have on hand. In many of the recipes I've shown recently, the moisture retained in cabbage is a problem that we address by salting it ahead of time; this time, though, the water in the cabbage is the basis for the stew. The result is a gentle and aromatic dish that is great on its own or as an accompaniment.

Ingredients
  • 1 onion, diced
  • 2 Tbs minced ginger
  • 4 cloves minced garlic (about 2 Tbs)
  • 1 lb red potatoes (about 5 small ones)
  • 3/4 lb carrots, peeled
  • 1 1/2 Tbs ground turmeric
  • 1/2 cup water
  • 1 1/2 lb green cabbage, roughly chopped
  • Salt and pepper to taste
  • Olive oil

Instructions

It is a good idea to prepare the vegetables ahead of time, as there is a lot of chopping. I cut the carrots into pieces about 1 1/2 to 2 inches long, then halved or quartered them according the thickness. I cut each potato into 8 pieces, but you may want to do more with bigger potatoes (to get an idea of size, my potatoes were 5 to a pound).

Onion, garlic, and ginger cooking

Heat olive oil on medium-high in a dutch oven or large pot with a lid. Cook the onion for a few minutes, until starting to soften and brown. Add ginger and garlic and cook another minute, stirring frequently. Add the potatoes, carrots, turmeric, and water. Stir together and cover. Cook for a few more minutes. 

Note the difference in liquid from the lead photo

Next, turn the heat down to low and add the cabbage, one handful at a time. Stir in each batch until slightly wilted, then add more. Once all the cabbage is in, cover and cook for about 45 minutes. Stir every 10 minutes. Once done, the potatoes and carrots will be completely soft and the cabbage will have sweated out. As always, taste and adjust seasoning. I added both salt and pepper. The stew can be served on its own, with rice, or (if you have it) Ethiopian bread.

Thursday, April 9, 2015

Chopped Liver

It's Passover, which means my house has been inundated with traditional Jewish foods. We've had matzo ball soup, braised brisket, gefilte fish, and now chopped liver. Chopped liver is one of those simple, delicious, and very satisfying foods that is perfect for the holidays. As with last year, the duty to make it falls upon me. The concept is certainly not alien to me, as it is pretty much just pâté. I also strongly support spreads of any kind that help spruce up the matzos, which I still believe are very much an acquired taste. There seems to be a reasonable consensus among recipes on the internet, and mine is based closely around this general formula. The proportion of egg is a little higher here than most, and that is a matter of taste, easily adjusted.


The exotic ingredient du jour is, of course, schmaltz, or rendered chicken fat. Until I first made chopped liver, this was not something I had ever worked with, but it is apparently a key ingredient of traditional Jewish cuisine. Last year, we were able to find it in a grocery store, but this time around we weren't so lucky. However, it's not difficult to make your own. It just takes some time.

Ingredients
  • 1/4 cup schmaltz (rendered chicken fat, see below)
  • 1 onion, diced
  • 1 lb chicken livers, drained and rinsed
  • 3 hard boiled eggs
  • Sprig of fresh parsley
  • Salt and pepper to taste
Schmaltz
  • Fat and skin trimmed from 4 chicken thighs (or equivalent)
  • 1/2 onion, diced
  • Pinch of salt and pepper

Instructions

I'll start with making the schmaltz. If you have it canned, go ahead and skip this part. As it happens, 4 chicken thighs will provide you with just enough fat for the chopped liver, but of course, any fat and skin you can harvest from other parts of the bird is just fine. If you happen to be making matzo ball soup, or some similar dish, you have the perfect opportunity to trim fat. 


I removed all the skin, and cut the smaller deposits off the bottom and sides. Chop the skin up as finely as possible. Lightly season with salt and pepper. Put all the skin and fat into a nonstick pan on low heat. You can experiment with the heat a little -- I had it halfway between low and medium for a while, and then lowered it back when it got too hot. Once a little of the fat has started to melt out, add the diced onion.


Cook the fat for about 90 minutes, stirring every once in a while to prevent sticking and burning. Once the bits of onion and skin have browned and crisped, you are done. Remove these bits (known in Yiddish as gribenes), which apparently have their uses, as well. Measure out 1/4 cup of the rendered fat, and refrigerate the rest. I ended up with exactly 1/4 cup.


Heat up half (1/8 cup) of the schmaltz in a frying pan, on medium-high heat. Add the onions and cook until lightly browned. Season the livers with salt and pepper, then add to pan. Cook until just done, about 8-10 minutes. 


Transfer the liver, onions, and any juices into a food processor. Add the parsley and remaining schmaltz and pulse to desired smoothness. Remove shells from eggs, slice in half, and add these to the food processor. Pulse a few more times. Taste the chopped liver, and add salt and pepper to taste. Transfer to a container and refrigerate, where the chopped liver will set and become more spreadable. Serve with matzos, toast, or crackers.

Monday, March 23, 2015

Sweet and Sour Pork (咕嚕肉)

A lot of Pei Mei's recipes follow the same basic pattern: Marinate meat, deep fry meat, cook aromatics and sauce, and toss meat in sauce. Lovers' Shrimp and Diced Fish with Fermented Black Beans are good examples of this kind of recipe. It's a formula that works well. The one step I usually skip, as I did with both those recipes, is the deep frying. I usually don't think it's worth using so much oil and going through the hassle when the meat is going into a sauce anyway, so I just stir fry the meat. Sometimes, though, the crunchiness that only deep frying can provide is an integral part of the dish. 


I believe sweet and sour pork is one of those dishes where crunchiness is important, so the Fry Daddy (last featured in 2012's "Pub Week") came out to play. I did not make too many changes from the original recipe this time. The salt is lowered a bit, and the pepper-to-pork ratio is a little lower (Pei-Mei's ambiguous "2 green peppers" may have been smaller than mine). The main change is that the whole recipe is scaled up from the original 1 lb. of pork so that I could use up the pork left in the aftermath of last week's shaomai. As usual, I dug into what the Chinese name actually means, and gu lu rou literally means "mumbling meat." Maybe your mouth is supposed to be too full of delicious pork to talk properly. I'm going with that.

The only special ingredient that needs mentioning is white rice vinegar. Compared to black vinegar, this is a lot more common in the international section of the grocery store.

Ingredients
  • 1 3/4 lb pork tenderloin
  • 2 bell peppers (I used 1 red and 1 green)
  • 6 slices canned pineapple
  • Cornstarch for dredging
  • Oil for frying
Marinade
  • 1 Tbs soy sauce
  • 2 Tbs cold water
  • 2 Tbs cornstarch
  • 1/2 tsp salt
  • 2 egg yolks
Sauce
  • 5 1/3 Tbs white rice vinegar
  • 7 Tbs sugar
  • 7 Tbs ketchup
  • 8 Tbs cold water
  • 5 tsp cornstarch
  • 1 3/4 tsp salt
  • 1 3/4 tsp sesame oil

Instructions

Cut pork into small chunks, about 1 inch cubes. Toss in a bowl with marinade ingredients to coat. Let rest in refrigerator for at least 30 minutes.


Cut the peppers in half and remove stems and seeds. Dice into small pieces. Cut the pineapple slices into similar-sized pieces. I made 8 small pieces out of each slice. Side all this aside for later. This is also a good time to mix together the sauce ingredients. Use a whisk to combine well.

The mighty Fry Daddy

Heat oil in a wok, deep fryer, or pot. If using a wok, especially on an electric stovetop, you need to be careful about stability. For this reason, I used the Fry Daddy. Dredge each pork piece in cornstarch and deep fry until lightly browned and cook through, about 2 minutes. You will want to work in batches, and let the oil rest slightly between batches, so that it can heat back up. Once all the pork is cooked, let the oil heat up again and fry the pork again until crispy. This will only take about one minute per batch. Set aside.

Pork after second frying
Heat a little oil in a wok on high heat. Stir fry the pepper and pineapple until softened and browned. This will take several minutes. Water will sweat out of the peppers; let this cook off so that they can brown. 


Add the sauce, and cook for 1-2 minutes, reducing to desired thickness. It should be quite sticky. Turn the heat off and add the pork. Toss until pork is thoroughly coated. Serve with rice.

Sunday, March 22, 2015

Diced Swai with Fermented Black Beans (豉汁魚球)

In the last year or two, I have cooked and eaten a lot of swai. Swai is a type of catfish, native to southeast Asia, with a slightly softer texture than American catfish. The best part (other than the name, of course), is that it typically sells for around $3.99 per pound. Generally, swai is found frozen in fillets. Swai is a versatile fish, and takes well to being cooked on its own as whole fillets, or as part of another dish. Given how often I eat it, it's about time it made it into the blog!


Today, I'm also featuring yet another Chinese fermented bean product. Adding to the fermented tofu, bean sauce, ground bean sauce, and hot bean paste already in the fridge are "fermented black beans." Also known as douchi (豆豉), these fermented soybeans are quite salty, and have a distinct and funky pungency that distinguishes them from the laundry list of fermented beans.


This dish is another find out of Pei Mei's Chinese Cook Book. The Chinese name translates to something like "fermented bean sauce fish balls." It's quick, easy, and pretty tasty. The only thing to watch out for here is the salt level. Because the fermented beans add a lot of salt on their own, I recommend leaving the salt out of the sauce and adjusting later. I suspect every brand of fermented beans has a different amount of salt, so this is up to you.

Ingredients
  • 2 swai fillets (approx. 14 oz)
  • 1 Tbs minced garlic
  • 1 Tbs minced ginger
  • 2-3 Tbs chopped green onions
  • 1 1/2 Tbs fermented black beans
  • 1 Tbs chopped red chili peppers (optional)
Marinade
  • 1 Tbs Shaoxing wine or dry sherry
  • 1/4 tsp white pepper
  • 1/4 tsp salt
Sauce
  • 3 Tbs chicken stock
  • 1 tsp Shaoxing wine or dry sherry
  • 1/2 tsp sesame oil
  • 1/4 tsp black pepper
  • 1 tsp cornstarch
  • 1/4 tsp salt (to taste, see instructions below)
Instructions

Lightly score the fish on one side with a sharp knife in a crosshatch pattern. This is easier to do on the softer side of the fish. Be careful not to cut too deep. (This is Pei Mei's first step. I believe this is to let the fish pick up more sauce later on.) Cut the fish into small pieces, about 1 square inch each. In a bowl, toss the fish pieces with the marinade ingredients, and set aside for 30 minutes. The marinade will be pretty minimal, really just enough to coat the fish.


While the fish is resting, prepare the garlic, green onion, ginger, and red pepper (if desired). Mix the sauce in a bowl, making sure to integrate the cornstarch. Be careful with the salt here. The ingredient list above has preserved the original recipe's recommendation, but I found the dish too salty. My recommendation is leaving it out at this stage, and tasting later on. The rest of the recipe will go very quickly, and you want to have everything ready to go.


On high heat, coat the wok with oil and quickly stir fry the fish, for about one minute. If you want, you can also deep fry the fish, as in the original recipe. I chose to avoid this hassle, but it's up to you. Set the fish aside when done.


Add more oil, then throw in the garlic, ginger, green onion, and pepper (if using). Toss for a few seconds, then add the fermented beans and prepared sauce. Add the fish, and stir together for about one minute, allowing the sauce to reduce and coat the fish.

I served the fish with rice and bok choy. While probably not traditional, I actually think this dish could benefit from a small splash of lemon juice to brighten it up.