Saturday, March 31, 2012

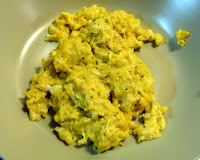
Tomato and Egg

During my time in Shanghai in the summer of 2009, I encountered many interesting foods. Tomato and egg quickly became a staple of our diets. You could buy a bowl of rice and a plate of tomato and egg for next to nothing. Although very common in China, the dish is relatively rare in American Chinese restaurants, although Carnegie Mellon's esteemed eatery Asiana, to their credit, does serve it. As I note below, juicier tomatoes make this even better, as the juice naturally forms the sauce. This dish marries perfectly with white rice, as the juice integrates nicely. For me, the perfect accompaniment to this nostalgia-laced dish would be a bottle of Tsingtao.


Ingredients
  • 4 large eggs
  • 2 tomatoes (the juicier the better)
  • 1/4 medium sweet onion
  • 1 clove garlic
  • 1/4 tsp sesame oil
  • 1/2 tsp sugar
  • Salt and pepper
  • Vegetable oil

Instructions

As with making fried rice, we'll do the eggs first. In a bowl, beat eggs and add sesame oil, salt, and pepper. Heat a little oil in a wok and cook the eggs until the liquid is gone, but they are still soft. As always, avoid overcooking scrambled eggs. Set aside.


Clean the stuck egg bits out of the wok, and add more oil. Slice the onion into strips. Cook on medium-high heat until softened. Once the onions go in, mince the garlic and add to the wok. While this cooks, cut the tomatoes into wedges. I cut 12 wedges out of each one. Once the onions are nice and soft, add the tomato wedges. Cook covered until the tomatoes are heated through. Add sugar and eggs. Mix well, and cook together briefly. Serve with rice.

Thursday, March 29, 2012

Irish Coffee

The inspiration for this post came a few weeks ago when I saw the last five minutes of an episode of Blue Bloods. Tom Selleck's character and his glorious moustache were showing his family how to pour the perfect Irish coffee. I had intended to get this one out for St. Patrick's Day, but as you can see, that did not happen. As it turns out, I didn't get it right until my fourth attempt. It seems that the key to this classic cocktail is to beat the cream and add lots of sugar to the coffee. My version is weaker than the International Bartenders' Association standard, using only one shot of whiskey, which to me is quite sufficient. This makes for a very smooth, tasty drink.


Ingredients
  • About 1 cup freshly brewed hot coffee
  • 1 shot Irish whiskey
  • 2 tsp brown sugar
  • Heavy cream

Instructions

Get the coffee started first. You can make this in any way you like. I prefer to use a one-cup French press for its ease of use. I grind up about 15 grams of beans, add those to the beaker, and pour hot water over them. Brew for 5 minutes.

Traditionally, Irish coffee is served in stemmed glass mugs. Since I don't have actual Irish coffee mugs, I used a wine glass instead. Fill the glass with hot tap water to warm it up. Pour cream into a bowl and whisk to thicken. Don't take it all the way to whipped cream. Transfer the cream to a container that's easy to pour from, such as a beaker or measuring cup. I find that the cream is more likely to float if you do this.

Once the coffee is ready, empty the water from the glass. Add the whiskey and coffee, filling up until there is about a half inch from the top of the coffee to the rim of the glass (more if you like extra cream). Add the brown sugar and stir it into the coffee. From what I've read, this is an important step for the floating of the cream, so do this even if you're a black coffee-guzzling Minnesotan.

The last step is the most important for the presentation of the drink. Lower a small spoon, backside-up, into the glass, with the end barely touching the coffee. Slowly pour the cream over the back of the spoon. If all the steps have been done correctly, the cream will float on top. Do not mix it in. The coffee should remain black below, and not clouded with cream. Serve immediately.

Tuesday, March 27, 2012

Stir Fried Rice Cakes (炒年糕)

Note: this recipe has been updated! See Rice Cakes Revisited for more.

Never before have I struggled so much to come up with a title for a blog post. These things just have no good translation. Due to the shape of the rice cakes, my family has always called them "tongue depressors." Until now, I have not tried to ascertain their true name. Some internet searches revealed one possibility is Shanghai Niangao, niangao being a somewhat generic term for all types of rice cake. Once cooked, the rice cakes are basically a thick, wide noodle. The consistency is very soft and they almost melt in your mouth.


It was always a special treat when grandpa and grandma would make these, since they are exceedingly rare in places where people don't speak Chinese. You can, however, sometimes buy a package of the dried rice cakes in Chinese grocery stores. Look for a package with the words "白粿乾," "White Rice Cakes" or "White Rice Slices." I should add also that this is a really cheap meal. The whole package of tongue depressors was less than $2. The cabbage used is only a small fraction of a head, and the green onions would cost about 50 cents total. Ground pork is also one of the cheaper meats you can buy.

Ingredients
  • One bag (350 g) dried white rice cakes
  • 1 pound ground pork
  • 2 cups coarsely chopped cabbage
  • 1/2 cup chopped green onion
  • 1 Tbs soy sauce
  • Salt and pepper
  • Vegetable oil

The finest super quality.

Instructions

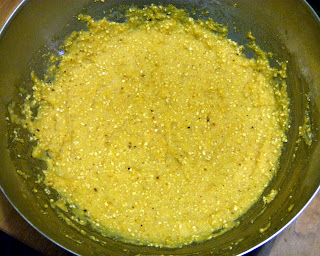
Be aware that you need to plan to eat these at least a day in advance. Soak the rice cakes in water for about 24 hours. Change the water every once in a while (I did it three times). The rice cakes will absorb water and become less brittle. Interestingly, during the second half of the soaking period, a vague fragrance filled my whole apartment.

Pictured after soaking.

After soaking, cook the rice cakes in boiling water for 5 minutes. This roughly coincides with the rice cakes floating. Take them out immediately and drain. Don't overcook them, or they will become too mushy and sticky, which they already are to begin with.


While the rice cakes are cooking, heat up a wok on high heat. Add a small amount of vegetable oil. Add the pork and season with salt and pepper. Break up the pork and brown it all over. Add green onions and cabbage. Toss together as everything cooks. After another minute, pour in the rice cakes and soy sauce. Toss for another minute or two to get it all integrated. Make sure to keep all the food moving once you add the rice cakes so that nothing gets burned. Serve immediately.

Saturday, March 24, 2012

Matzo Ball Soup

Welcome to a very special edition of No Free Lunch. For the first time, I'm featuring a dish not made by me. Ariel so kindly made me a pot of Matzo Ball Soup with the secret family recipe, to which you, my dear readers, are now privy to. With great power comes great responsibility; use this information with care. This soup is relatively simple in ingredients, but it is very tasty. The matzo balls are soft and tender, but they don't fall apart either. The chicken, cooked for 3 hours, falls right off the bone. This soup is quite reminiscent of the chicken and dumpling soup typically enjoyed by us gentiles, but the matzo balls are on a scale like nothing I've seen since experiencing the knödel of Germany.


Ingredients

Soup
  • One whole chicken
  • 1 bag baby carrots
  • 1 bag celery
  • 1 large onion
  • Dried parsley
  • 2 bay leaves
  • A lot of Salt
  • Black pepper
Matzo Balls
  • 4 eggs
  • 1/2 cup cold water
  • 2 Tbs oil
  • Dash pepper
  • 1 cup matzo meal

Instructions

Soup

Cut the chicken into quarters. Place chicken, carrots, onion, and celery in a large stock pot. Fill up the pot with water. Sprinkle a bit of parsley and black pepper. Generously salt the water, remembering that the pot is large and there is a lot of soup in there. Add bay leaves and bring to a boil, then reduce to simmer. Simmer for 3 to 4 hours.

Consider the gargantuan scale of this pot.

After simmering, fish out the onion and bay leaves, and discard them. Take out all the chicken and discard all bones, skin, and other undesirable parts. Set the chicken meat aside until serving.

Matzo Balls

Crack eggs in a bowl and beat. Add water, oil, and pepper. Mix together. Add the matzo meal and mix this in as well. Refrigerate the mixture for 1 hour.

Matzo meal mixture before forming balls

Form into balls no more than 2 inches in diameter. Size is up to your preference. Be aware they will absorb water while cooking and swell somewhat. Bring water to a boil in a large pot. Salt the water like you were making pasta. Cook the balls for 20 minutes. Push them down once when they float.

Matzo balls after cooking

To assemble the dish, heat up the chicken separately. Add however many matzo balls you and your pals intend to eat into the soup. Heat up the soup on the stovetop. Put the chicken in bowls and pour soup over them. Add matzo balls to each bowl.

Thursday, March 22, 2012

Yangzhou Fried Rice (揚州炒飯)

With a large stockpile of char siu now on hand, we now have one of the most recognizable Chinese dishes - Yangzhou fried rice. This is a far cry from the simple fried rice which was the first recipe on No Free Lunch. Often served as the last savory course of a Chinese banquet, Yangzhou fried rice is characterized by shrimp, egg, and char siu, along with vegetables. As with all my fried rice, this also features the indispensable Worcestershire sauce.


Ingredients
  • 5-6 cups cooked, day-old rice
  • 8-10 marinated shrimp (see below)
  • 6-8 strips Char Siu
  • 1/2 cup frozen peas
  • 3 large eggs
  • 1 bunch green onions
  • 10 splashes Worcestershire
  • 5 splashes soy sauce
  • 3 splashes sesame oil
  • Vegetable oil
  • Salt and pepper
Shrimp
  • 8-10 large, raw shrimp
  • Salt, pepper, and garlic powder
  • 5 splashes soy sauce
  • 1/3 lemon

Instructions

Prepare the shrimp first. If using frozen, defrost with cold running water. Remove shells. Next, de-vein the shrimp. To do this, slice each shrimp down the top, all the way from the head to the tail, then remove the vein. Note that some will have more to get out than others.


Place the shrimp in a bowl. Dust with salt, pepper, and garlic powder to taste. Splash the soy sauce over them, and squeeze in a bit of lemon juice. Let sit for 15 minutes. Heat a bit of vegetable oil in a wok on high. Sear the shrimp on both sides, a few minutes each. Set aside.

Crack the eggs into a bowl and beat. Add salt and pepper. Cook the eggs in the wok on medium-high heat. Cook until there is no more liquid, but the eggs are still soft. Set aside with the cooked shrimp.


Slice the whole bunch of green onions crosswise into small discs. Cut the char siu into bite sized pieces. With a little vegetable oil, stir fry both until hot. Add the rice. Sitting in the refrigerator, the rice will likely have formed into chunks. Break these up as you add them into the wok; the looser, the better. Add the peas. You do not have to defrost them ahead of time; the heat from the wok and rice will thaw them. Add Worcestershire sauce, soy sauce, and sesame oil. Toss to mix everything together. Let the whole thing sit on relatively high heat for a few minutes. Cover if you like.


Once this is done, add the shrimp and eggs. Break up the eggs a little and toss the rice. Let sit for a few more minutes, and serve.

Tuesday, March 20, 2012

Char Siu (叉燒)

Char siu is one of the most famous elements of Cantonese and Hong Kong cuisine. It appears in a variety of dishes, some of which will be forthcoming on No Free Lunch. I consulted with both Dad and Grandpa on this one, who both made this when I was growing up. In fact, Grandpa said he generally always has some stocked up. I've come up with my own recipe using suggestions from both of them. The liquor is Dad's recommendation. I would have used Shaoxing rice wine if I'd had it, but a shot of Jameson will do. Some restaurants and delis add red food coloring, but that's not necessary at home.


You can use any cut of pork you want, really. This time, I used four pieces of pork butt steak, totaling just over three pounds. This cut has some nice marbling on it. Pork loin works just fine, too. The cut you use will affect the flavor and texture, so experimentation is good. The two "exotic" ingredients here are the ground bean sauce and the fermented bean curd. Both are soy bean-based products. I had to get these from a Chinese grocery. The ground bean sauce seems pretty standard, but the fermented bean curd was harder to find. Mine came in a delightful little clay pot with a plastic bag tied up with a string inside. Sometimes, even often, China is great.


Ingredients
  • 3 pounds (approx.) pork butt
  • 1/3 cup ground bean sauce
  • 1/3 cup red fermented bean curd
  • 1 tbs honey (more if desired)
  • 1 tbs whiskey
  • 1/2 tsp five spice powder
  • Water

Instructions

Remove any bones from the pork and cut into strips. Trim off excess fat from the sides, though you want to have some fat throughout. Place the pork into a large bowl or Ziploc bag. Add the ground bean sauce and fermented bean curd, with some of the juice from the bean curd. Crush up the bean curd and add a little water to thin out the marinade. Add honey, whiskey, and five spice powder, and mix thoroughly so all the pork is coated. If using a bowl, cover with plastic wrap. Refrigerate for 5 hours. Don't leave it much longer than that to preserve the texture.


Preheat broiler. Line a large sheet pan with foil and lay out the pork pieces. Brush excess marinade over each piece. Broil until browned, then turn over each piece and broil until the other side is browned. The pork will be cooked through, as the pieces should be fairly thin. I did about 8 minutes on each side. To serve, cut into thin slices.


There are a lot of possibilities for serving char siu. Char siu bao (barbecue pork buns) are a dim sum favorite. It's also great with steamed rice or as part of chao mian (pan fried noodles), as seen above. Char siu is also a key component of the venerable Yangzhou fried rice. You can keep cooked the pork pieces in the freezer until needed.

Sunday, March 18, 2012

Foods of Fargo-Moorhead


Fargo-Moorhead is nestled in the idyllic Red River Valley, and is birthplace of many (one?) famous blogger(s). It was also the one-time home of celebrated action star Kevin Sorbo. On my recent visit, I returned to many of my favorite restaurants, and it is now my duty to illuminate the world about the culinary wonders of these fine cities. You heard it here first; Fargo is more than snow and funny accents, don'tcha know?

Passage to India

The third in the succession of Indian buffets in Fargo, and the second in its location, Passage to India stands among the best Indian food I've had. Hit the buffet on weekends for the life-changing goat curry stew. You can also count on them to serve one or two weird Indian desserts. I, for one, have tried them all. Go for the rava kesari (cream of wheat with turmeric, cashews, and raisins) or the rice kheer. Avoid the carrot halwa. Those fainter of heart will enjoy the mango cake.

The buffet has a wide variety of curries, soups, rice dishes, tandoori, and pakoras. Dinner is à la carte. Best of all, though? The TVs in the middle of the dining room with constant Bollywood hits. What better way to dine than to be serenaded by Shahrukh Khan?

Cafe Aladdin

My family has frequented Cafe Aladdin since they first opened. I was probably four or five. The owners are such nice people, and they've watched us grow up over the years. The place is very casual, and even since opening a second location, have stuck with Styrofoam plates and plastic forks.

Gyro (shawarma) sandwich with fries

Everything they serve is delicious, and very consistent, over all these years. The food is typical Middle Eastern (the owners are from Jordan), which was quite a novelty in Fargo back then, and really still is. They have all the classics - lamb shawarma, falafel, hummus, stuffed grape leaves, and more. Mom's favorite is a rice platter with lentils and caramelized onions.

Altonys
Dilworth is a small city, slowly being surrounded by the bustling urban expanse of its westward neighbor, Moorhead. Dilworth was historically home to many Italian-Americans. Today, Altonys is essentially what's left of this legacy. But what a legacy it is. In America, before there was risotto, gnocchi, and prosciutto, there was spaghetti and meatballs. This is the kind of place you don't see much anymore; all they're missing is the red checkered tablecloth.

Veal parmesan with spaghetti

Originally, Altonys was a bumbling little family operation that once, in a story famous in my family, turned us away because they had "run out of food." Now under new ownership, they've moved into a former Taco Bell in Moorhead and breathed some class into the old fast-food joint. Along with the good old spaghetti, you can get all the Italian-American favorites: Chicken Parmesan, Penne Alfredo, Lasagna, and ravioli. All this for under ten bucks, with salad and ice cream included, not to mention lunch the next day. What's not to love?

Acapulco
Mexican food is probably the most common ethnic cuisine in the US, with the possible exception of Chinese take-out. Forget about your run-of-the-mill burrito joints and taco shops; Acapulco is the real deal. Like the rest of the restaurants I've written about here, it is a fun, family-run restaurant. Expand your mind away from tacos, and you can sample delicious seafood, soups, and more.

Carne asada with beans, rice, and guacamole

They have an extensive stock of Mexican beers, all served in a frosted glass with a lime wedge: anathema to "beer purists," but to me, it's all part of the experience. Great, fast service and good prices make Acapulco very much the complete package.

Saturday, March 17, 2012

Fish Tacos with Salsa Verde

Happy St. Patrick's Day, my dear readers. While some of you might have been expecting something more along the lines of Guinness Stew today, I've chosen another way to celebrate the spirit of the day - salsa verde. This serves as the sauce for these tilapia tacos. Two tilapia fillets will give you about 6-7 tacos.


Ingredients

Fish Tacos
  • 2 tilapia fillets
  • 6-7 small corn tortillas
  • 1/2 lemon
  • Chopped tomato
  • Sliced cabbage
  • Crumbled queso fresco
  • Salt
  • Black Pepper
  • Smoked Paprika
  • Ground cumin
  • Flour
  • Olive oil

Salsa Verde
  • 10 tomatillos
  • 1 poblano pepper
  • 4 cloves garlic, unpeeled
  • 1/2 lime
  • 15-20 sprigs cilantro, stems removed
  • 3/8 sweet onion, roughly diced

Instructions

Fish Tacos

Slice the tilapia fillets down the center. Dust each side with salt, pepper, smoked paprika, and cumin. Squeeze a bit of lemon on them. Put flour on a plate or shallow bowl and press each fillet into the flour. Coat both sides. Heat olive oil in a non-stick pan, medium-high to high. Sear the fillets on both sides and set aside.


Next, prepare the tortillas. With a little hot olive oil in the pan, lightly fry the tortillas on both sides, to make them pliable and hot. Don't cook them long enough to make them crispy. Chop up the tomato, and slice the cabbage into strips. Assemble the tacos. Break up the fish and put a line of fish on each tortilla. Add a little tomato, cabbage, and crumbled queso fresco. Spoon a bit of the salsa verde on the tacos, and fold up.

Salsa Verde

Remove the husks from the tomatillos. Place the tomatillos, garlic, and poblano pepper on a sheet pan. Broil until the tops of the tomatillos are blackened just a bit. Flip them over, and do the same. Rotate the pepper until each side is blackened. You'll want to remove the garlic early (be careful, as one of mine exploded). The pepper should take the longest; remove the tomatillos when done.


Let everything cool off a bit. Peel the garlic. Remove the really black parts of the tomatillo skin, being careful to not lose the juice and seeds. Peel off the whole poblano skin and remove seeds and stem.


Combine the tomatillos, pepper, garlic, cilantro, and onion in a blender. Squeeze the lime in. Pulse until everything is integrated and the salsa smooths out. It should be thick, but not chunky. This salsa recipe will make an entire bowl of salsa, much more than the several spoonfuls you'll need for the tacos.

Thursday, March 8, 2012

Mexican-Style Meatballs

This recipe was inspired by meatballs Iron Chef Bobby Flay made on the Food Network a couple weeks ago. The sauce is my own invention. The meatballs use Mexican-style chorizo sausage. This is a distinct product from the chorizo of Spain and Portugal. Unlike the Iberian versions, Mexican chorizo is not cured and must be cooked before eating.


Ingredients

Meatballs
  • 1/2 pound ground beef
  • 1/2 pound ground pork
  • 2 links Mexican-style chorizo
  • 1 egg
  • 1 tsp ground cumin
  • 1 tsp smoked paprika
  • 1/2 tsp garlic powder
  • 1 cup breadcrumbs
  • 1/2 cup chicken stock
  • Olive oil
Sauce
  • 1 1/2 red bell peppers
  • 2 red finger chiles
  • 2 cloves garlic
  • 1/2 small onion, diced
  • 1/3 cup tomato paste
  • Water
  • Olive oil
  • Salt and pepper
  • Crumbled queso fresco

Instructions

Meatballs


Decase the chorizo and mix the three meats together. Mix in egg, cumin, paprika and garlic powder. Slowly work the breadcrumbs into the meat mixture. Form into meatballs about 1 1/2 inch in diameter. Heat olive oil in a pan on medium-high heat. Brown the meatballs on all sides, then add chicken stock, cover, and cook until the meatballs are cooked through and the stock is partially absorbed.

Sauce


Place the peppers in a baking pan and broil until blackened on all sides. Let cool for a few minutes. Peel off the blackened skin and remove stems and seeds. Place roasted peppers, garlic, and onion in a blender and puree. Add the pepper puree, tomato paste, a little olive oil, and some water to a pan. Cook on high until the strong raw onion and garlic taste goes away and is replaced by slight sweetness. Add salt and pepper to taste.

To compose the dish, top each meatball with sauce and crumbled queso fresco.

Tuesday, March 6, 2012

Galinha à Portuguesa

This is fusion cuisine at it's oldest and best. For over 400 years, Macau was an outpost of the once far-flung Portuguese empire. Like Hong Kong, the food and culture is a mix of east and west. When I was in Shanghai, I occasionally encountered Macanese restaurants and a dish usually called "Portuguese Chicken." It is essentially chicken and potatoes in a mild, yellow coconut sauce. The yellow coloration comes from a generous helping of turmeric. Information about this dish on the internet turned out to be pretty scant. I don't claim my version is authentic, but it's close, and very tasty. You can definitely play around with the levels of the spices. The ginger and coriander amounts here are higher than what I conservatively used, and in hindsight, they needed to come out more.


Ingredients
  • 5 pieces dark meat chicken
  • 1/2 tsp paprika
  • 1/2 tsp salt
  • 1/2 tsp black pepper
  • 4 potatoes
  • 1 1/2 small onion
  • Vegetable oil
Sauce
  • 1 can coconut milk
  • 1/2 cup chicken stock
  • 1 cup diced tomatoes with a bit of juice
  • 2 tsp ground turmeric
  • 1/2 tsp ground coriander
  • 1/2 tsp ground ginger
  • 3 small cloves garlic, minced
  • Salt and pepper

Instructions

Set the oven to 375 degrees. Heat wok on high. Season chicken with salt, pepper, and paprika. You can use the gallon bag method here to speed things up. Wash the potatoes and cut into small pieces. Cut into more pieces if the potatoes are big, to make sure they cook through. Slice the onion into strips.


Heat oil in the wok, and fry the chicken until the outsides are browned. This is exactly the same method as in the Arroz con Pollo from last week. They won't be cooked through at this stage. Do the same for the potatoes, and set these aside. Lastly, brown the onions. 


To assemble the sauce, combine coconut milk, stock, tomatoes, turmeric, coriander, ginger, garlic, salt, and pepper in a casserole dish. Whisk together and add the chicken, potatoes, and onions. Bake until chicken and potatoes are cooked through, at least 35-40 minutes. Serve with rice. The rice tastes great once the sauce runs all over it. You can round off your Portuguese-inspired evening with a glass of port after dinner. Come to think of it, most evenings can be improved that way.

Sunday, March 4, 2012

Black Bean and Egg Tostadas

Eggs are an all-day food. Don't let anyone tell you differently. This meal was partially inspired by a visit last year to Chicago's fantastic Frontera Grill, where I ate corn masa cakes with egg, chicken, and chorizo with black beans and queso fresco. I've adapted this idea into tostadas. There are two keys to making great tostadas. First, you need to make sure the tortillas get crunchy, enough to be able to easily break them with a fork or with your teeth. No one wants a tough, rubbery tortilla. The second is to make sure everything stays hot to the moment it hits the plate.


Ingredients
  • 3 corn tortillas
  • 1/3 small onion, diced
  • 1 cup canned black beans, mostly drained
  • 3 eggs
  • Black pepper, salt, garlic powder to taste
  • Queso fresco
  • Vegetable oil
  • Butter

Instructions

Since this dish has three components that need to be prepared, set the oven on warm to start out. Pour a shallow layer of oil into a large frying pan, and heat on medium-high to high heat. You need the oil very hot, but not to the point where it starts to pop. Fry the tortillas on each side until they are crispy. Do not undercook the tortillas, or they will be tough instead of crunchy. This has been the downfall of many Chopped contestants. It is normal for the tortillas to puff up while cooking. Set the tortillas on a plate in the oven to keep warm.


Empty out most, but not all of the oil. Keep just enough to saute the onion. Cook until softened, then add beans. When I say "mostly drain" the beans, I mean keep a little of the juice from the can to add some moisture to the beans. Use a potato masher to smash up the beans. They don't have to be perfectly smooth; in fact, you probably want to retain some texture. Heat for a few minutes, and mix in salt, black pepper, and garlic powder. Set the beans in the oven to keep warm, as well.


Grease up a non-stick frying pan with butter, and crack the eggs into the pan. Cover and cook until the whites become fully firm. To assemble the tostadas, spread the bean-onion mixture over each tortilla. Top with an egg, and crumble queso fresco all over it.

Friday, March 2, 2012

Poor Man's Stir Fry

Ramen is an often maligned noodle. It's relegated in the public's hearts and minds to the bellies of cheap grad students. This is an unfair assessment of ramen (and perhaps also of grad students), because people lack imagination. In truth, ramen is your friend. When I was younger, my parents would often make ramen for a quick dinner, but they added meats and vegetables for a tasty boost to the otherwise boring noodles. In college, I poached eggs right in the ramen.

This time however, I have chosen to pan fry them. My grandparents have made chao mian (pan fried noodles) since I was a kid, and I love them. If you don't have high quality Chinese noodles on hand, ramen can do the job. Though the consistency is not quite right, it still makes for a good meal, a significant step up from a bowl of ramen and the old flavoring packet.


Ingredients
  • 3 packages ramen noodles
  • 1 small onion
  • 1/2 pound ground beef
  • 3 carrots
  • 1/2 tsp Maggi seasoning
  • 1 tsp soy sauce
  • 2 tsp chopped chives
  • Splash of sesame oil
  • Black pepper
  • Vegetable oil

Instructions

Slice the onion and julienne the carrots. Heat vegetable oil on medium-high heat in a wok or large frying pan. Cook onions until they become translucent. Add beef, Maggi sauce, soy sauce, black pepper, and a splash of sesame oil. Turn up the heat and brown the beef. When the beef is partially cooked, add carrots and chives. Cook everything together until the onions and carrots are softened. Stir frequently to prevent burning.


While this is going on, get some lightly salted water boiling. Break each "cake" of ramen into two pieces, and boil for 3 minutes. Rinse and set aside until everything else is ready. Add in the noodles. Mix everything together, and let it sit on the heat for a minute. Toss again, then let it sit for another minute before serving. And remember, ramen is your friend.

Thursday, March 1, 2012

Banana Smoothie

I don't showcase drinks or fruit on No Free Lunch very often. In fact, the last time I did either was the Pimm's cocktail during Pub Week. This is a really easy recipe for a thick, tasty banana smoothie, perfect for making after a long day at the office. The cinnamon gives you another flavor dimension if you choose to go that route. Makes one tall smoothie.


Ingredients
  • 2 ripe bananas
  • 3 ice cubes
  • 1/2 cup skim milk
  • 3/4 tsp sugar
  • Pinch of cinnamon (optional)

Instructions

Peel the bananas and place them in a freezer at least a few hours beforehand. Crush the ice cubes up in a blender. Add milk. Break up the frozen bananas into small pieces and add them, a few at a time, while blending. If you add them all at once, the blender may not be able to process them. Add sugar and cinnamon if you like, and blend on the highest setting until smooth. The consistency will still be thick at the end, but still sippable.