Showing posts with label marinade. Show all posts

Sunday, March 20, 2022

Buffalo Chicken Quesadilla

Back when I was a student at Carnegie Mellon, one of my favorite campus dining options was a place in the University Center called "Si Señor." Most people tried a wrap or a taco and dismissed it as a subpar Chipotle imitation. My friends and I, though, considered ourselves real connoisseurs of the lesser known offerings further down the menu, from Buffalo wings to lamburgers to a fried frankfurter covered with onions and peppers. The "Pittsburgh wrap" filled with French fries (in the style of Primanti Brothers) was another classic item. Over the years, the menu grew with various pieces of paper taped to the wall. Sadly, Si Señor closed shortly after I graduated, but the memories live on over a decade later. 

Among all these items, the Buffalo chicken quesadilla stands as my overall favorite, most frequently ordered meal, and the one I most wanted to recreate all these years later. There is no shortage of recipes for such a thing online, including one from the Frank's RedHot website. Like everything they did, the Si Señor version is a little different. The chicken (also available in a wrap if so desired) was bathed in a creamy, pale-orange sauce and was relatively mild. The quesadilla was made from an enormous tortilla, folded into a square envelope and crisped on a flattop, held down with a trowel. It was served cut in half with a choice of side and a small brownie known as a "sweet treat." Although not exactly the same, my version does capture the spirit of the original. 

As a student, I always wondered what exactly went into the Buffalo chicken and a few months back, I went digging using the Internet Archive's Wayback Machine. I managed to dig up a 2006 menu from the CMU website with the description: "Buffalo Chicken ~ marinated in hot sauce, baked and tossed with light mayo, blue cheese and spices. (hot)." With just this and my memory, I created this recipe, which turned out rather well. The only change I made is adding more Frank's to the final sauce to crank up the Buffalo wing flavor and make it a little spicier. I typically ordered the quesadilla with what the old menu calls "Morelia" hot sauce, so I think this works well. The leftover chicken (this recipe makes way more than is needed for one quesadilla) is also good cold as a chicken salad. Try adding a little celery. For the quesadilla itself, I went with the more typical half-moon form factor. The traditional cheese to use for quesadillas is Oaxaca from southern Mexico, but anything that melts well is good. I used Chihuahua cheese, which originates in northern Mexico (the brand I use, VV Supremo, is from Wisconsin and can be found at Sam's Club). Mozzarella is a good substitute if neither are available. 

Sunday, July 5, 2020

Grilled Adobo Chicken

Grills usually come to life when the weather warms up, especially in places where the winters are cold. I actually don't use the grill as much as I used to, which may be partially due to having a better indoor stove than our last house. It's also because I've discovered I can do a lot of "classic" grilled foods (burgers and steaks, particularly) better in a cast iron pan. That being said, there are quite a few dishes I always prefer to do on the grill. Boneless chicken thighs are probably my favorite thing to grill. They do well cooked to a high internal temperature, which gives ample time to develop browning on the grill. Taking out the bone allows more even cooking that doesn't take forever. My most common ways to prepare them are breaded cutlets and this marinated Mexican-styled chicken that's perfect for tacos, quesadillas, and the like.


We call this dish "adobo chicken" because it uses chipotles in adobo sauce, along with some of the sauce, in the marinade. It has nothing to do with the classic Filipino dish "chicken adobo," which is a vinegary chicken stew. Chipotles in adobo are a great product. You can take a few out with a little sauce to add a little Mexican flavor to anything, while reserving the rest in an airtight container, where they will last for months. Chipotles are smoked jalapeños, and as such are quite spicy. I remove the seeds to tone down the heat. Avoid touching your face after working with hot chili peppers of any kind. 


This chicken would be perfectly good as-is with some rice and beans, but we often use it as an ingredient. We made quesadillas with homemade tortillas from The Art of Mexican Cooking by Diana Kennedy. Making tortillas was easier than I expected, and are much better than the grocery store bagged ones. It's not something I would do all the time, but they are a nice treat if you have some lard on hand.

Wednesday, July 1, 2020

Thai Yellow Curry with Pork

Today's post is my first foray into Thai food on No Free Lunch. It's definitely not an area of expertise for me, and I've mostly enjoyed it through restaurants. Ariel is a big fan, so we frequented the excellent Siam House back in Bloomington. These days, we no longer have such easy access. I have attempted pad thai a few times, based on Leela Punyaratabandhu's fascinating, five-part manifesto on the subject. Curry is a core part of the Thai repertoire, and probably the most accessible for home cooks, and that's where I'm starting here. Yellow curry is generally the mildest of the Thai curries, although it's still quite spicy by American standards. I definitely leaned on my Chinese cooking experience making this dish. While Thai cuisine, like many in the region, is influenced by China, it's very much its own thing. Don't take me as an authority on authenticity here (or anywhere, really). I do think I know what tastes good, though, and this dish fits the bill. 


The flavor base of Thai curry comes from curry paste. Most Asian stores have a selection of packaged curry pastes. Commercial curry pastes are very spicy, and even yellow curry paste really wakes up the senses. While making it at home could potentially yield better results, curry paste contains some hard-to-find ingredients. As such, I'm using this one from Mae Ploy. I only used a small amount of what was in this tub. Most curry pastes have a basic recipe on the package, which I used to get some sense of proportions, but ended up putting in a lot more meat and vegetables for the recommended amount of sauce. This yields a much less saucy result than I have typically seen in Thai restaurants. That's fine with me, as I think those usually have way more sauce than needed, but if I did it again I would increase the sauce ratio a bit. I was constrained by only having one can of coconut milk on hand. Increasing the curry paste, coconut milk, and water by anywhere from 50% to double would work.


The recipe is pretty loose here, and having limited experience cooking Thai, I'm not going for high authenticity, just what I enjoy. The pork is based on my recent beef chow fun recipe, but I pushed it in a Thai direction with fish sauce and coconut sugar. I have found coconut sugar in both Asian stores and the supermarket. The pork turned out just as tender as the beef did. The rest of the ingredients can be whatever is on hand. Potatoes and bell peppers are some other good options. I would recommend resisting the temptation to throw everything you have into the curry. I think one meat, onion, and then up to three other items (I used carrots, bamboo shoots, and tofu) is a good rule of thumb. As with fried rice, I like the individual ingredients to still stand out. 

Sunday, June 21, 2020

Beef Chow Fun (乾炒牛河)

Beef chow fun is a famous Cantonese dish combining wide rice noodles with tender sliced beef. Several years ago, I posted a chicken chow fun recipe using the same noodles. While this is not exactly an "upgrade," this recipe improves upon it with a better marinade inspired by Pei-Mei, and a sauce to tie it all together. This is also a companion recipe to my chow mein recipe from a few weeks ago. Grandpa and grandma would often serve us both in one meal! The name qianchao niu he is interesting. The first part - qianchao means "dry fried," similar to dry-cooked string beans. I'm not sure of the history of this dish, but this name may suggest the beef was originally deep fried. The rest of the name refers to beef (niu) and the wide noodles (he fen) in the dish. I was very happy with how this turned out, but in retrospect, this recipe makes a lot of food. I would probably halve everything next time, but there's nothing wrong with having some leftovers. 


I took the recipe for the beef from "Sliced Beef with Broccoli" in Pei-Mei Volume II. She tosses the beef with some blanched gailan (Chinese broccoli) and a sauce. The beef is phenomenal on its own, and I would happily gobble it up with some rice. When I cook flank steak whole, I typically pan fry it to medium rare to avoid drying it out. Here, the thinly sliced beef is cooked through completely, yet remains super tender. The key is the marinade, which includes baking soda as a tenderizer. If you've never tried this technique before, it will amaze you.

This recipe uses mostly pantry staples and easily found ingredients. The noodles can sometimes be hard to find, though. Rice noodles come in many shapes and sizes. I previously used the super-thin kind for minced "pigeon" lettuce cups. Medium-width rice noodles are used for pad thai. The widest rice, called shahe fen (sometimes transliterated ho fun), are essential to this dish. Part of the problem is that this usually doesn't appear on the package and, unless you know the Chinese word (沙河粉), you'll have to eyeball it. Although dark soy sauce is not typically added at the end of stir frying like it is here, it's essential to achieving the signature brown look for the noodles. Classic beef chow fun usually has mung bean sprouts, which are tragically not sold in Vermillion. I included napa and onion instead, which also makes this into more of a complete meal.

Friday, May 1, 2020

Roasted Mushrooms

I usually feature main dishes or, often, one-pan meals on this blog, but easy side dishes that allow you to focus on the main dish are an important part of a cook's repertoire. I've been making some version of these marinated, roasted mushrooms for several years. The dark/light soy combination is one I use quite often and one that complements mushrooms well. The long roasting time gives the mushrooms ample opportunity sweat out liquid, concentrating the flavor, a technique I owe to Kenji. I reserved the liquid and added it to a particularly tasty batch of braised chicken and mushroom pasta a few days later.


I usually use cremini mushrooms for this dish, but you could really use any kind. In researching this post, I discovered the three types of mushroom you typically see at the supermarket (around here, anyway) are actually all the same mushroom. White/button mushrooms are at the most immature stage. As they grow, they turn brown and become cremini mushrooms, sometimes called "baby bellas." The most mature mushrooms are the much larger portobellos. I generally find the creminis have more flavor than the white mushrooms.

Sunday, April 26, 2020

Pollo a la Plancha

Last month, I wrote about trying a Cuban dish called pollo a la plancha during our San Diego trip. It's a simple dish consisting of chicken cutlets grilled on a griddle and topped with onions. I was surprised with how much I enjoyed it. A few weeks ago, I threw together my own version for a quick Passover-friendly lunch. Ariel later told me how much she liked it, which is usually a one-way ticket to a blog post. As I'm not too experienced with Cuban cuisine, I won't claim this is particularly authentic, but I can guarantee it is delicious.


My original version used a boneless, skinless chicken breast butterflied and separated into two cutlets. This time, I had some thighs on hand instead. I think either cut works equally well, so go with whatever you have. This recipe ends up using only half an orange and about 3/4 of a lime, so I encourage you to use the leftovers to make yourself a drink. I served with rice, but a salad works, too.

Friday, July 14, 2017

Grilled Leg of Lamb Kebabs

Bonne fête, folks, we've made it to another Bastille Day. I struggled a little with what to make for this dearest of No Free Lunch traditions, and ended up settling on a recipe that's been overdue on the blog - a Julia Child-inspired leg of lamb. I've been making this with some regularity for the last two years, and it even made a pictorial appearance in the 2016 birthday special. I believe Child's original recipe is for a whole butterflied leg of lamb (for which this marinade would do nicely), but I generally make it into kebabs. Although kebabs might be stretching the theme a touch, let me remind you that less than 12 years after the storming of the Bastille, Egyptian Mamluks were recruited into the French army, and would eventually become part of Napoleon's Imperial Guard cavalry. I'm calling it close enough.


I must make an admission here in the ingredients section. The lemon juice completely slipped my mind when making the marinade today. If you do happen to be lacking lemon juice, I can report the lamb is still excellent. However, I normally include it, and it does add a nice element. This was also a great opportunity to use some fresh rosemary we've been growing on the deck, and while dried will do the job, it doesn't quite compare with the fragrance of fresh. Finally, let's talk about soy sauce. If there's anything food-related I could possibly claim to know more about than Julia Child, it might just be Chinese fermented bean products. For the uninitiated, Chinese soy sauce comes in two varieties: dark and light. Dark soy sauce is, as the name suggests, very dark, a little viscous, and will dye anything it comes in contact with a lovely dark brown, including your shirt. It's great for marinades and stews, but a little goes a long way. Light soy sauce is the "default" Chinese soy sauce and is typically used for saucing stir fried dishes, where a more delicate touch is required. I often mix the two, as I've done here.

Ingredients
  • 2 lb. boneless leg of lamb
  • 4 Tbs. olive oil
  • 3 cloves garlic, grated or minced
  • 3 Tbs. Dijon mustard
  • 1 Tbs. dark soy sauce
  • 1 Tbs. light soy sauce
  • 1 sprig fresh rosemary (about 1 tsp.), chopped
  • 1/2 tsp. dried oregano
  • 3 Tbs lemon juice
  • 1 large onion

Instructions

For kebabs, cut the lamb into small chunks, about 1 to 1 1/2 inch square. Trim fat as needed, as the large chunks of fat can be tough. Transfer the pieces to a gallon bag.


Combine the olive oil, garlic, mustard, soy sauce, rosemary, oregano, and lemon juice. Mix well into a loose paste and pour over the lamb. Mix thoroughly to coat the meat. Transfer to refrigerator and marinate for a few hours.


Cut the onion into small pieces, about an inch square. Toss with a little olive oil. Thread the lamb on skewers, alternating with onion pieces. This will make about 4 skewers.


Grill on high flame until well browned on all sides and cooked to preferred temperature. Turn frequently for even browning. I generally keep the hood open on a gas grill to avoid overcooking.

Saturday, September 24, 2016

Char Siu Reloaded

Char siu (叉燒) is easily one of my "signature" recipes, and was one of my early posts. My original post was based on grandpa's recipe. He was vague, as usual. He took out two jars (bean sauce and fermented tofu) and said to use half and half of each. As an afterthought, he mentioned I could throw in some five spice, but that was optional. In the early days of No Free Lunch, most of my recipes were a recounting of the first time I had made things. Naturally, the recipe has evolved over the last few years, as I've made it countless times.


In the time since the original post, I've seen a lot of char siu recipes, including those in Henry Chan's Classic Deem Sum and the venerable Peimei's Chinese Cook Book. Most of these recipes involve some combination of hoisin sauce, soy sauce, some other flavoring and coloring agents. What they typically don't include are grandpa's main ingredients. While I'm sure these recipes are fine, the combination of fermented tofu and bean sauce gives the meat a deep flavor unlike anything else. It's definitely worth seeking out these unusual ingredients.

This is, ultimately, a simple recipe, and lives and dies by the ingredients. Although you can use almost any cut of pork, I usually shoulder, which has a good mix of muscle and fat. I generally buy a whole shoulder roast and cut up about half for char siu, leaving the rest to become potsticker filling. Some grocery stores also sell "country ribs," which are pre-sliced shoulder or loin pieces that can go straight into the marinade. I don't recommend using pork steaks, as I did in my original recipe, as this tend to be a bit too thin.


Koon Chun bean sauce is a fermented soy bean product from Hong Kong. I've used it in quite a few recipes, so it's an indispensable ingredient in my kitchen. I usually use the chunky version, but the ground one works fine if you have that. Possessing a potent funk, fermented bean curd (a.k.a. fermented tofu) is the real exotic ingredient here. When buying, be aware that there are three kinds: white, red, and spicy. We want the red, non-spicy kind. The most commonly available brand, at least around here, is Wangzhihe. Both of these can be hard to find, and you need to go to a Chinese store. Both are also available on Amazon. 

The last thing to mention is the whiskey. You can substitute, within reason, whatever booze you have. That being said, I always use Jameson's Irish Whiskey. It just happened to be what I had the first time I made char siu, and it just stuck as a tradition. Let's call it my secret ingredient.

The recipe is also now in a more convenient per-pound formulation that can easily be scaled up. 

Ingredients
  • Pork shoulder, cut into strips (can substitute other cuts)
Marinade, per pound of meat
  • 2 Tbs Koon Chun bean sauce or ground bean sauce
  • 2 Tbs red fermented bean curd, mix of liquid and tofu
  • 1 Tbs honey
  • 1 Tbs whiskey
  • 1/4 tsp five spice powder

Instructions

Cut the meat into thick strips. It is important to keep some fat, but you can trim off large chunks on the sides. 


In a large bowl, prepare the marinade. Combine the bean sauce, fermented bean curd, honey, whiskey, and five spice. Mash the tofu and mix everything into a paste. Add the pork, and toss until the meat is well-coated. Cover with plastic wrap and move to the refrigerator. Marinate for at least 5 hours, or overnight.

Bean sauce (left) and fermented bean curd (right)

If using a grill, cook on relatively high flame with the hood open. Turn occasionally, until well browned on all sides. Alternatively, you can broil the pork, turning once. 


Let cool a few minutes before slicing into thin pieces. Char siu keeps well if frozen, and can be defrosted in the microwave. It is excellent on its own, or as part of another dish, like Yangzhou fried rice or a noodle soup.

Thursday, July 9, 2015

Steamed Beef with Spicy Rice Powder (粉蒸牛肉)

Fenzheng niurou, translated as "powder steamed beef" (one of the more intuitive translations we've seen so far), hails from the western province of Sichuan. I am still quite a novice when it comes to the various regional cuisines of China, but I'm pleased to say traveling the provinces with Peimei has certainly broadened my knowledge. After dad spotted boxes of spicy rice powder (discussed below) in the Chinese store, I had to give this one a go. He seemed very familiar with the dish, but I don't recall ever eating it before, so we're off into terra incognita with this one. I was immensely pleased with the results. As one of the pictures later shows, the beef goes in fairly dry and emerges as a deep, rich stew, I think in large part due to fat and connective tissue breaking down. I was amazed by how tender the beef was and how well the flavors developed and blended in just 30 minutes of cooking time. 


The unusual ingredient here is the spicy rice powder. This is really a misnomer, as I really wouldn't describe it as a powder, but more like broken up rice. I used prepackaged rice powder. Preparing the powder involves toasting rice with star anise and Sichuan peppercorns, then crushing the rice up. This then becomes a quasi-breading for the beef. Note that the above photo was made with only 1.75 oz of rice powder (one box), but I would double that, as the recipe suggests.


Hot bean paste and Sichuan peppercorn, the staple Sichuan ingredients make their return here, after their first appearance in mapo doufu. These two combine give western Chinese dishes their distinctive heat and aroma. Unlike most of her recipes, Peimei is completely vague on the cut, asking only for "beef" (I did check the Chinese recipe, and it is equally vague). I went with chuck for its good flavor and utility in stews and braises, and this worked out very well. Interestingly, I bought the meat as "western ribs" or "country ribs" -- mostly boneless shoulder cuts of meat sliced into strips, so it was quick to break these down into the slices I needed. Pork country ribs are, by the way, my favorite cut to make char siu.

Ingredients
  • 1 1/2 lb beef chuck
  • 3.5 oz (100 g) spicy rice powder
  • 2 green onions
  • Sichuan peppercorn powder to taste (optional)
Marinade
  • 1 1/2 Tbs minced ginger
  • 1 tsp five spice powder
  • 2 Tbs hot bean paste (doubanjiang -- see Exotic Ingredients)
  • 4 Tbs soy sauce
  • 2 Tbs Shaoxing wine or dry amontillado
  • 2 tsp sugar
  • 1 tsp salt
  • 1/3 c vegetable oil

Instructions

Cut beef across the grain into thin slices, 1 to 1 1/2 inches across. Combine the beef and all marinade ingredients in an airtight bag and let stand in the refrigerator for 30 minutes.


Spread out the rice powder on a plate and dredge each slice of beef on both sides. 


Steam the beef for 30 minutes. If you have small, shallow bowls that can fit inside a bamboo steamer, then use those. I did not have bowls that fit, so I put the beef in a 10 x 10 inch cake dish and set this inside a wok with boiling water below, then covered with a lid. Whatever your strategy, you need the steam to be trapped over the beef. 


Once the beef is done cooking, add the remaining green onions and dust with peppercorn powder, if desired. Mix together and serve. I served with rice and Chinese vegetables.

Commentary

I made minimal changes to the original recipe. The main thing was that I swapped out star anise for the more readily available five spice powder in the marinade. Other than that, I played with the marinade proportions a little. Peimei also calls for an entire cup of rice powder per 3/4 lb. beef, which seems absurd to me.

As a final note, it's worth mentioning that the way my version turned into a deep and delicious stew does not seem to be universal. The photo in the cookbook looks a lot dryer, as well as others I saw on the internet. 

Saturday, July 4, 2015

Chicken Kebabs

Cooking a great meal can be the source of much pride and satisfaction. Sometimes, that satisfaction comes from doing lots of research, gathering ingredients, and pulling off a long, complex recipe. Something like Shanghai-style dumplings comes to mind. Other times, though, coming up with a simple dish on your own and having it exceed expectation can be just as satisfying. With just some chicken thighs on hand, I started looking at some Turkish kebab recipes and came up with this. The result was incredibly delicious. The chicken gets a good char, but is nice and juicy on the inside. They are just a little spicy, but not overwhelming at all.


I found out after the fact that yogurt-marinated chicken kebabs are called şiş tavuk in Turkish. I believe this is pronounced something like "sheesh tah-vook." It occurs to me that Turkish cuisine is one that hasn't quite caught on the US in the way that a lot of others have. If only we had a döner stand on every corner like the Germans do. On a side note, I still remember the first jet lagged kebab we had after touching down in Munich so many years ago, so it must have been pretty good!

A quick note on equipment: The use of metal skewers, from what I've heard, is preferred for chicken because the skewers conduct heat to the center of the meat, whereas for beef, wooden skewers are preferred. Besides, I love an opportunity to use my fun Turkish-styled skewers that invoke images of the Janissaries marching around the Ottoman Empire. Or maybe that's just me. 

Ingredients

  • 4 lb boneless chicken thighs
  • 2 cups plain Greek yogurt (I used fat free)
  • 1 Tbs cumin powder
  • 1 Tbs paprika
  • 3 Tbs lemon juice
  • 1 tsp crushed red pepper
  • 2 tsp salt
  • 1 tsp black pepper
  • 1/2 onion, minced
  • 4 cloves garlic, minced

Instructions

Trim off any skin or large areas of fat from the chicken. Cut into small pieces, about 1 1/2 inches across. In a large bowl, combine chicken with all other ingredients. Mix well with hands to coat the chicken. Cover with plastic wrap and let marinate in the refrigerator for 1-2 hours.


Preheat grill to about 400° F. Assemble the kebabs on skewers. I used 5 skewers. Place the kebabs on the lower rack, right above the flame. Cook with the cover closed until lightly charred on all sides, turning occasionally. If the chicken starts to get done before the char develops, turn the heat up and cook uncovered.

I served with rice. The chicken was also excellent on sandwiches the next day.

Saturday, May 23, 2015

Rice Cakes Revisited

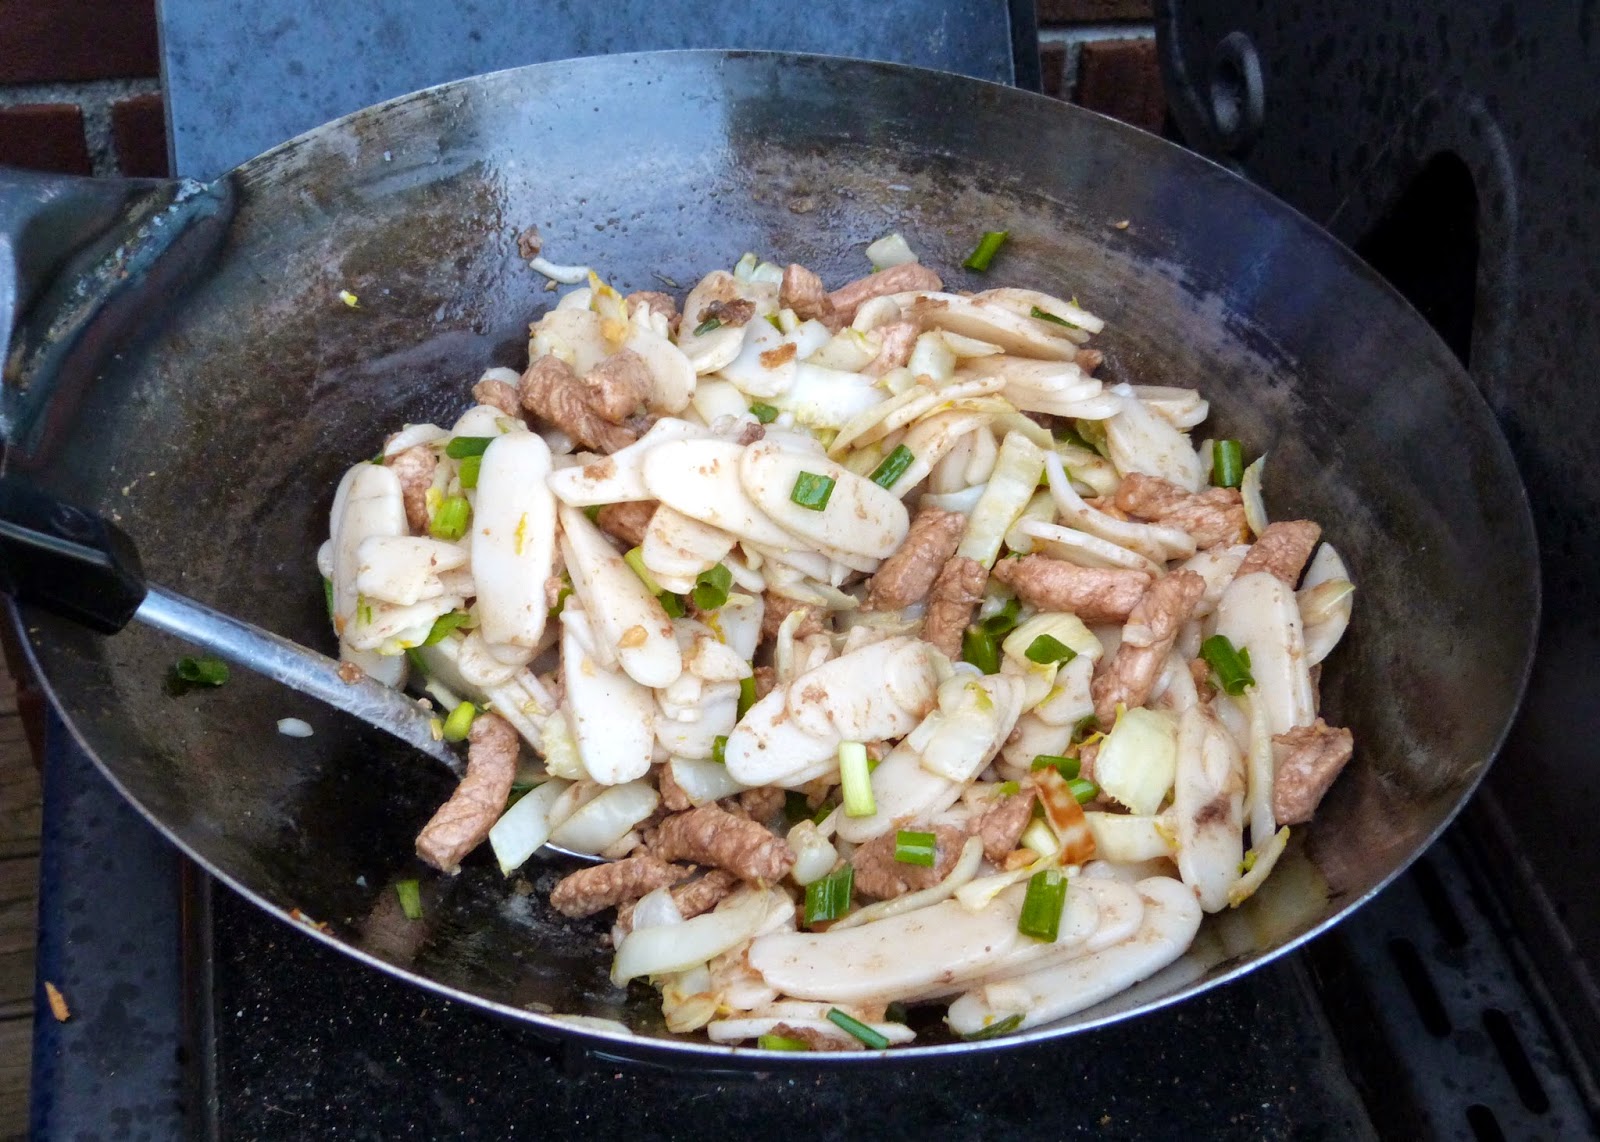
Stir fried rice cakes, known as "tongue depressors" in my family, were an early post on No Free Lunch. Since then, I have continued to make them regularly, and Ariel now regards them to be as much of a comfort food as I do. Since the original post, a lot has changed in how I go about preparing these beauties. Today's recipe is basically a more sophisticated, yet still easy update. The main differences are that I'm using marinated strips of pork rather than ground, salted napa cabbage instead of regular green cabbage, and lightly saucing the dish to pull it all together. I have also figured out that there is no need to parboil the rice cakes. Soaking them for a day softens them enough to go straight to the stir frying stage. This also makes them a little less prone to clumping together, though this does still happen.


Since this is the first time I've done a full-blown recipe using napa cabbage, it is worth a short discussion. Napa, known as da bai cai (big white vegetable) in Chinese, is a gentle and versatile vegetable that I have only recently starting using, and I am hooked in a big way. Each piece has a firm white center that is great for stir frying, and green leaves that are excellent raw. I usually trim off the leaves and save them. This particular head of napa provided greens for fish tacos and hot sandwiches. The leaves are also nice in salads. This recipe also uses my old stir frying standbys, bean sauce and ground bean sauce. These two sauces are more or less interchangeable in terms of use, but I elected to use ground for the marinade and non-ground for the sauce. I like the little bean bits to show up in the sauce, but they aren't necessary in the marinade. If you only have one or the other, it will be perfectly fine.

Ingredients
  • 1 500g package of dried rice cakes (nian gao)
  • 1 lb pork loin (about 4 pieces, if sliced)
  • 1 head Napa cabbage (about 1 lb)
  • Salt
  • Several green onions, chopped
  • 1 Tbs bean sauce
  • 1/2 cup stock (chicken or beef)
  • Vegetable oil
Marinade
  • 2 Tbs ground bean sauce
  • 2 cloves minced garlic
  • Splash of dry sherry
  • Splash of black vinegar
  • Black pepper

Instructions

About 24 hours in advance, start soaking the rice cakes in room temperature water. You can get away with less soaking, but I try to plan ahead. Change the water the next morning.

The cakes after 24 hours

2-3 hours ahead of cooking time, start preparing the pork. Cut the pork into strips, about 1 to 1 1/2 inches long. Working with the standard supermarket pork loin slices, I cut each piece in half, lengthwise, and then cut these into the strips pictured. Combine the pork with marinade ingredients in a bag, then leave this to marinate in the refrigerator.

Sliced pork, ready to marinate

Next, prepare the napa. Pull each leaf and trim the leafy parts off, leaving the firm white centers. This can be done with two cuts. Save the leaves for other uses. Cut the napa into half-inch strips, across the grain. For the big, outer leaves, consider halving the strips.

Untrimmed and trimmed napa

Put the napa in a bowl and salt heavily. Toss to coat and let sit for 20 minutes. Working in batches, wrap the napa in a towel and wring out as much water as possible.

After squeezing dry

Heat up oil in a wok on high heat. Stir fry the napa for a few minutes, until lightly browned. Set aside. Next, empty the bag of pork and garlic into the wok. Add oil as needed. Stir fry until cooked through, then set aside.

Frying on the side burner

Add more oil to the wok, then add the drained rice cakes. Try to get as little water as possible in the wok. Stir fry these briefly. Be careful to keep them moving so that they do not stick too much. The rice cakes will start to get softer and stickier as they cook. Finally, add the green onion, pork, and napa. Stir fry everything together for a minute, then add bean sauce and stock. Stir to coat well and reduce sauce to a thin coating on the food.

Friday, October 31, 2014

Chicken Chao Fen (炒粉)

Chinese humor is largely pun-based, probably due to the language being full of homophones. Give a Chinese person a command of English, and the pun-ssibilities are endless. I remember many lunches at my grandparents' house, where grandpa would come out of the kitchen with two huge platters of noodles and ask if we wanted "mean" or "fun." He thought this was hilarious.


Of course, what he meant was chao mian (stir-fried egg noodles, already covered here) and chao fen, stir-fried rice noodles. The central ingredient is shahe fen (沙河粉). These are relatively wide rice noodles, common in various Asian cuisines, most famously Cantonese. I have had a hard time finding these, even at the local Chinese market, and have stocked up in Chicago. Recently, though, they started carrying them. Note that the word is sometimes transliterated as "ho fun." This dish is a simple application of these noodles, using chicken as the main protein. The marinade is easy, came out great, and shows the versatility of fermented beans!

Ingredients
  • 1 lb dried shahe fen (Chinese rice noodles)
  • 1 onion, sliced
  • 4 cups chopped cabbage
  • Several green onions, chopped
  • Salt
  • Vegetable oil
Chicken and marinade
  • 2 lb chicken breast
  • 2 Tbs bean sauce
  • Five spice powder
  • Black pepper
  • Soy sauce
  • Sherry (I used fino, but go with whatever you have)

Instructions

This dish requires some prep ahead of time. About 2 hours before cooking, start soaking the noodles in warm water. Cut the chicken into small chunks, and combine with marinade in a bag or bowl. The marinade is not an exact science. Give it a good dollop of bean sauce, a few splashes of sherry and soy sauce, and a good dusting with pepper and five spice. Mix well and refrigerate.

After about 90 minutes, chop up the cabbage. Put the cabbage in a bowl and salt liberally. Let this sit for 20-30 minutes, then squeeze out the water (regular readers may have noticed how much I have come to love this technique).


Heat some oil in a wok on high heat. Stir fry the chicken until well-browned and cooked through. Set aside. Add more oil and fry the onion until lightly browned. Add the cabbage and cook for about one more minute, and set all this aside.


Add more oil. This is important to avoid sticking. You don't want the noodles to end up really oily, but stuck noodles means burned noodles and broken noodles. Add the noodles and green onion. Stir fry these on their own for a minute or two, then thrown in the chicken, onion, and cabbage. Briefly cook these together and serve. Although I did not do this, you could also prepare a sauce with some bean sauce, chicken stock, and corn starch.

Wednesday, July 30, 2014

Lemon and Herb Grilled Chicken

At the time I was writing what we might call "classic" No Free Lunch, I did not marinate much. Back then, I did not plan my meals far enough in advance. Additionally, marinating is a lot harder to experiment with, as you can't make adjustments partway through. Because of this, knowledge of flavor combinations is essential to crafting a good marinade. Recently, though, I've been playing around with marinades a lot more, to some pretty tasty results. Looking at other recipes before starting is always a good idea. I like to begin by consulting the mighty Bittman, then heading to Google.


Today's recipe employs a Mediterranean-inspired marinade that is a great way to use fresh summer herbs from the garden. The marinade is by no means an exact science, and you can easily substitute other herbs or ingredients to your liking. The finished chicken is quite versatile, and can go well with pasta, potatoes, or in a sandwich. Today, I ate them with some sautéed spinach and onions.

Ingredients
  • 8 pieces bone-in chicken (recommended: thighs)
  • 1/2 cup olive oil
  • 3 cloves garlic, minced
  • 2 lemons
  • Handful fresh flat-leaf parsley and basil leaves
  • 1/2 tsp dried oregano
  • 1 tsp dried rosemary
  • 1 tsp salt
  • 1/2 tsp black pepper

Instructions

Assemble the marinade in a gallon-size bag. Mince the garlic, roughly chop the fresh herbs, and squeeze out the lemons into the bag. After combining all ingredients, mix it up a bit and add the chicken pieces. You can do this either leaving the skin on or taking it off. Leaving the skin on will give you some crunch on the chicken, so I left it on this time (see grilling tips below for caveats). Marinate in refrigerator for a few hours.

Several minutes ahead of cooking, preheat the grill. Removing from the marinade, place the chicken on the top rack. Grill until cooked through, about 30 minutes, with the cover closed, turning over once.


Tips for Grilling Chicken

Grilling chicken provides a unique challenge, quite different from grilling pork or beef. With red meats, the trick is essentially to char the outside before the inside gets overcooked, but with chicken, it is the opposite. Especially with skin-on chicken, a lot of grease will drip down and cause big fires in the grill that shoot up even to the top rack. This can turn your chicken an unappetizing black in a hurry.

There are a few techniques you can use to prevent this. The first thing to do is simply to check the grill frequently, monitoring both for fires and the interior temperature. I like to keep it around 350 degrees; to cool it off, just leave the top open for a short time. The best way to prevent, or at least mitigate fires is to push all the chicken over to one side and turn the gas off on that side, as shown in the photo. You can leave the grill like this for a while, and then turn the heat on under the chicken later to get some char on the outside as desired. Note also that grilling sausage, such as bratwurst, has largely the same pitfalls as chicken.

Learning to grill is all about being flexible, and requires a lot more attention and adjustment than using the oven, so you always need to be ready to move the meat around or adjust the heat. Learning the quirks of a particular grill is also important. Mine, for example, is hotter in the back-left area. Finally, remember that there's no shame in burning a few; it's all part of the process. I will admit that even today, not all of them turned out as nicely as the two in the photo!

Tuesday, March 20, 2012

Char Siu (叉燒)

Char siu is one of the most famous elements of Cantonese and Hong Kong cuisine. It appears in a variety of dishes, some of which will be forthcoming on No Free Lunch. I consulted with both Dad and Grandpa on this one, who both made this when I was growing up. In fact, Grandpa said he generally always has some stocked up. I've come up with my own recipe using suggestions from both of them. The liquor is Dad's recommendation. I would have used Shaoxing rice wine if I'd had it, but a shot of Jameson will do. Some restaurants and delis add red food coloring, but that's not necessary at home.


You can use any cut of pork you want, really. This time, I used four pieces of pork butt steak, totaling just over three pounds. This cut has some nice marbling on it. Pork loin works just fine, too. The cut you use will affect the flavor and texture, so experimentation is good. The two "exotic" ingredients here are the ground bean sauce and the fermented bean curd. Both are soy bean-based products. I had to get these from a Chinese grocery. The ground bean sauce seems pretty standard, but the fermented bean curd was harder to find. Mine came in a delightful little clay pot with a plastic bag tied up with a string inside. Sometimes, even often, China is great.


Ingredients
  • 3 pounds (approx.) pork butt
  • 1/3 cup ground bean sauce
  • 1/3 cup red fermented bean curd
  • 1 tbs honey (more if desired)
  • 1 tbs whiskey
  • 1/2 tsp five spice powder
  • Water

Instructions

Remove any bones from the pork and cut into strips. Trim off excess fat from the sides, though you want to have some fat throughout. Place the pork into a large bowl or Ziploc bag. Add the ground bean sauce and fermented bean curd, with some of the juice from the bean curd. Crush up the bean curd and add a little water to thin out the marinade. Add honey, whiskey, and five spice powder, and mix thoroughly so all the pork is coated. If using a bowl, cover with plastic wrap. Refrigerate for 5 hours. Don't leave it much longer than that to preserve the texture.


Preheat broiler. Line a large sheet pan with foil and lay out the pork pieces. Brush excess marinade over each piece. Broil until browned, then turn over each piece and broil until the other side is browned. The pork will be cooked through, as the pieces should be fairly thin. I did about 8 minutes on each side. To serve, cut into thin slices.


There are a lot of possibilities for serving char siu. Char siu bao (barbecue pork buns) are a dim sum favorite. It's also great with steamed rice or as part of chao mian (pan fried noodles), as seen above. Char siu is also a key component of the venerable Yangzhou fried rice. You can keep cooked the pork pieces in the freezer until needed.

Sunday, January 29, 2012

Chicken Tikka Masala

Chicken Tikka Masala is one of the most popular Indian dishes worldwide, especially in Britain. The origins of the dish are unclear, but one story says it originated in an Indian restaurant in Scotland. Everyone has their own recipe for Chicken Tikka Masala, and I devised my own after some extensive research. What everyone does agree on is the basic construction of the dish - chicken tikka and a tomato cream sauce. Chicken Tikka  is a an Indian dish of marinated chicken pieces roasted in a Tandoori oven. Of course, I don't have one of those, so I substitute my handy broiler.


The chicken tikka by itself is very tasty, and I encourage you to take a bite before submerging it in the sauce. Overall, you'll notice that the flavors are a lot more nuanced than the quick-and-easy chicken curry I did before. This is a dish that is one must nurture, and it is well worth it. In terms of ingredients, this is by far the most sophisticated recipe to appear on No Free Lunch so far. Don't be intimidated, however, by the long list of spices. This is by no means a definitive recipe; go with what you have if you're missing something here or there. That said, the flavors come together beautifully - the acidic citrus from the lemon, the fragrant cinnamon, the spicy cayenne pepper, and all the rest make for a delicious treat.

Ingredients

Chicken Tikka
  • 2 split chicken breasts
  • 1 cup plain yogurt
  • 2 tsp cumin
  • 1/2 tsp cayenne pepper
  • 1 tsp cinnamon
  • 1 tsp coriander
  • 1/2 tsp cardamom
  • 1 tsp black pepper
  • 2 tsp salt
  • 1/2 lemon

Tomato Cream Sauce
  • 2 cloves garlic, minced
  • 1/2 onion, diced
  • 1 cup crushed tomatoes
  • 1 cup cream
  • 1 tsp coriander
  • 1 tsp cumin
  • 1 tsp turmeric
  • 2 tsp paprika
  • 1 1/2 tablespoons butter

Instructions
  
Cut the bone and skin off the chicken, then cut into small pieces, about an inch a side. Don't be afraid to get your hands dirty here, it's messy work. Combine the yogurt, spices, and chicken in a large bowl or Ziploc bag. Squeeze the lemon juice into the bowl and mix thoroughly. Cover and refrigerate for one hour. Use this time to cook some basmati rice and to get the sauce started. It is worth noting here that due to the shape of the grain, basmati rice only takes about 15 minutes to cook fully.


Once the chicken is done marinating, place the pieces on a sheet pan and shake off excess marinade. Broil until cooked through. Since we cut up the chicken into small pieces, this takes less than 10 minutes. You may want to flip the chicken after a few minutes to cook evenly. The marinade will keep the chicken juicy and tender.


Melt butter in a large pot on medium heat. Add the onion and garlic and sauté until onions are softened. Add the spices and stir. Pour in the crushed tomatoes and simmer for a few minutes. Stir in the cream. The sauce will now take on the brownish-orange color we all know and love. Simmer and reduce for about 10 minutes, then add the chicken pieces. Taste the sauce and add salt and pepper as needed. Simmer for a few more minutes all together. Serve with basmati rice. A great drink accompaniment is an English dry cider.